Category: Process

  • Floating LVP Flooring Installation: Step-by-Step

    Floating LVP Flooring Installation: Step-by-Step

    The difference between a floor that looks professionally done and one that screams “DIY project” is all in the details. It’s the perfectly straight lines, the seamless transitions through doorways, and the solid, quiet feel underfoot. These results don’t happen by accident. They are the product of careful planning and precise execution. From letting the planks acclimate to your home’s environment to leaving the correct expansion gaps along the walls, every step matters. This guide is your roadmap to a successful floating lvp flooring installation, covering the critical techniques that ensure a flawless, durable finish that you’ll be proud of.

    Key Takeaways

    • Proper prep is non-negotiable for a lasting floor: Before you start, make sure your subfloor is completely clean and flat. Also, let your new LVP planks acclimate to your home’s environment for at least 48 hours to prevent future buckling or gaps.
    • Master the details for a stronger installation: Two simple rules make a huge difference in durability. Always leave a 1/4-inch expansion gap around the room’s perimeter and stagger the plank seams between rows for a stable, professional-looking finish.
    • Know when to call an expert for a guaranteed result: While DIY is an option for simple spaces, hiring a professional is the best way to handle tricky layouts or tight timelines. An expert ensures the job is done right the first time, giving you a flawless floor without the stress.

    What Is Floating LVP Flooring?

    When you hear the term “floating floor,” it doesn’t mean your flooring is levitating. It simply means the planks aren’t glued or nailed to the subfloor underneath. Instead, the individual planks connect to each other, creating a single, unified surface that rests securely on top of the subfloor. Its own weight and the tight connections hold everything perfectly in place. This innovative method is one of the main reasons luxury vinyl plank (LVP) flooring has become such a popular choice for homeowners across the Dallas-Fort Worth area. It combines modern engineering with beautiful design for a floor that’s both practical and stylish. The installation is efficient, clean, and delivers a flawless look without the need for messy adhesives or loud nail guns, making it an ideal solution for a quick and high-quality home update.

    How A Floating Floor Clicks Together

    The magic behind a floating LVP floor is its click-lock system. Each plank has a specialized tongue-and-groove design along its edges that allows it to snap securely into the next one. During installation, we angle a new plank against the one already laid, slide the tongue into the groove, and then lower it into place. A gentle tap with a mallet ensures the connection is tight and seamless, creating a strong bond between the planks. This process is repeated across the entire room, forming a durable, interconnected surface that won’t shift or separate over time when installed correctly.

    Why It Beats Glue-Down And Nail-Down Methods

    Compared to traditional installation methods, a floating system offers some clear advantages. Glue-down installations can be messy and involve strong-smelling adhesives, while nailing down hardwood creates noise and dust. The floating click-lock method is much cleaner and significantly faster, which means less disruption to your home and your routine. Because the planks aren’t permanently bonded to the subfloor, this method is also more forgiving over concrete slabs, which are common in North Texas homes. It allows the floor to respond naturally to subtle shifts in temperature without buckling or warping.

    The Perks: Durability And Long-Term Value

    Beyond the installation benefits, floating LVP floors are built to handle real life. The material is incredibly resilient, standing up to scratches from pet claws, spills in the kitchen, and heavy foot traffic in entryways. Its water-resistant properties make it a fantastic choice for any room in the house, including bathrooms, laundry rooms, and basements. This durability means your floor will continue to look great for years with minimal upkeep. For busy families and homeowners who want a beautiful floor without constant worry, the combination of strength and style makes floating LVP a smart, lasting addition to any home.

    Prep Your Room For A Flawless Finish

    The secret to a beautiful, long-lasting floor isn’t just in the final plank you lay. It’s in the careful preparation you do before you even start. This is the step that separates a professional-looking installation from a DIY project that shows its flaws over time. A perfectly prepped room ensures your planks click together smoothly, lay flat without any bounce or creaks, and withstand daily life for years to come. It might feel like extra work upfront, but taking the time to get the foundation right is the most important investment you can make in your new floor.

    Think of it this way: you’re creating a clean, stable canvas for your LVP. This involves three key stages: getting your subfloor in perfect shape, allowing your new planks to adjust to your home’s environment, and setting up a clean, organized workspace. Skipping any of these can lead to frustrating issues down the road, like gaps between planks, buckling, or an uneven finish. At Next Day Flooring, we know that meticulous prep is the foundation of our work. It’s how we guarantee a flawless result that not only looks great on day one but also performs beautifully for the long haul.

    Inspect And Prepare Your Subfloor

    Your new LVP is only as good as the surface it sits on. The subfloor, whether it’s concrete or plywood, must be perfectly clean, flat, and smooth. Start by removing the old flooring, baseboards, and any leftover staples or adhesive. Once the subfloor is bare, sweep and vacuum it thoroughly to get rid of all dust and debris. Next, check for imperfections. Fill any cracks or holes with a patching compound and sand down any high spots or bumps. A level subfloor is non-negotiable for a stable, quiet luxury vinyl plank floor that feels solid underfoot.

    Let Your LVP Planks Acclimate

    This step is simple but crucial: give your flooring time to get used to its new home. LVP expands and contracts slightly with changes in temperature and humidity. To prevent it from buckling or developing gaps after installation, you need to let it acclimate. Just open the boxes and lay the planks flat in the room where they will be installed for at least 48 hours. This allows the material to adjust to your home’s specific climate, ensuring the planks remain stable and securely locked together once they’re on the floor. Don’t skip this waiting period; your patience will pay off.

    Clear And Clean The Installation Area

    A tidy workspace is an efficient workspace. Before you begin, remove all furniture, rugs, and decor from the room. You need a completely empty space to work without obstruction. It’s also a good idea to set up a designated cutting station, preferably in an adjoining room or garage. This keeps sawdust and small vinyl shavings out of the installation area, which is important for ensuring the locking mechanisms on the planks stay clean and click together perfectly. Having a clear, organized room makes the entire process smoother, safer, and faster from start to finish.

    Gather Your Tools And Materials

    Before you lay the first plank, it’s smart to gather everything you’ll need. A well-organized workspace makes the installation process much smoother and helps you avoid interruptions. Having the right tools on hand ensures your cuts are clean, your planks fit snugly, and your new floor looks professional from every angle. This simple prep step is one of the biggest keys to a successful DIY project.

    Your LVP Installation Toolkit

    Most tools for installing LVP are probably in your garage, but a few specialty items make a huge difference. Here’s a checklist of what to have ready:

    • A quality utility knife with extra blades
    • Measuring tape and a pencil
    • A straightedge or carpenter’s square
    • Spacers (usually 1/4-inch) for expansion gaps
    • A tapping block and rubber mallet to lock planks together
    • A pry bar to set the last row in place
    • Knee pads and safety glasses
    • A saw (a miter saw or jigsaw is best for tricky cuts)

    Having these items ready will help you install your new luxury vinyl plank flooring efficiently and with fewer headaches.

    Choose The Right Underlayment

    Underlayment is a thin layer between your subfloor and LVP that adds cushioning, absorbs sound, and smooths minor imperfections. The good news is that many modern LVP products come with an underlayment pad already attached, which simplifies installation. If your planks don’t have one, you’ll need to roll out a separate layer. For concrete subfloors, a vapor barrier is essential to block moisture from damaging your floors. Always check the manufacturer’s instructions to see what they recommend for your specific product. You can find more details about material selection in our flooring FAQs.

    Don’t Forget Your Safety Gear

    Protecting yourself is just as important as protecting your new floors. At a minimum, wear safety glasses to shield your eyes from dust and debris, especially when cutting planks. A good pair of work gloves will protect your hands from sharp edges, and knee pads are a must for staying comfortable. Before you begin, give the subfloor one last thorough cleaning. Vacuum up all dust and debris, because even a small pebble left behind can create a bump under your new flooring. A clean start is the foundation for a beautiful, long-lasting finish.

    Measure And Plan Your Layout

    A good plan is the difference between a floor that looks like a weekend project and one that looks professionally installed. It saves time, reduces waste, and prevents major issues down the road. Before you click a single plank into place, taking the time to measure and map out your room will set you up for a smooth installation. Let’s walk through three key planning steps: getting your measurements right, planning your plank layout, and leaving room for the floor to breathe.

    Calculate Your Square Footage (and Add For Waste)

    First, you need to know how much flooring to buy. Grab a tape measure and find the length and width of your room. Multiply those two numbers together to get your total square footage. For example, a 10-foot by 12-foot room is 120 square feet. But don’t stop there. It’s essential to add a “waste factor” of at least 10% to your total. This extra material covers any cutting mistakes, tricky angles, or damaged planks. It also gives you a small stash for future repairs, ensuring you have perfectly matched LVP flooring if a replacement is ever needed.

    Map Out Your First Row And Stagger The Seams

    Your first row of planks sets the foundation for the entire floor, so it needs to be perfectly straight. Once you’ve established that line, the key to a strong, visually appealing floor is staggering the seams. This means the end joints of the planks in one row should never line up with the joints in the rows next to them. A good rule of thumb is to keep at least six to eight inches between seams. This pattern distributes stress across the floor, preventing weak spots and creating a more natural wood-look finish. As you work, use a tapping block to gently lock the planks together for a tight, secure fit.

    Leave Room For Expansion Gaps

    This step is one of the most important and most often overlooked. All floating floors need room to breathe. As temperatures and humidity levels change in your Dallas-Fort Worth home, the flooring will naturally expand and contract slightly. To allow for this movement, you must leave a 1/4-inch gap between the flooring and every wall or fixed object (like cabinets or door frames). Use spacers to maintain this gap as you install each row. Don’t worry about how it looks; your baseboards and trim will cover the gap completely, leaving you with a flawless and durable floor that won’t buckle or warp over time. This is a critical part of all professional flooring installations.

    How To Install Floating LVP: A Step-by-Step Guide

    Once your room is prepped and your tools are ready, it’s time for the most rewarding part: laying the floor. The click-lock system of floating LVP is designed to be user-friendly, but the secret to a professional-looking result is patience and precision. Taking your time with the first few rows will set you up for success and make the rest of the installation go much more smoothly. Follow these steps carefully to ensure your new floors look fantastic and last for years.

    Lay The First Row Perfectly

    Your first row is the foundation for the entire floor, so getting it straight is critical. Start by laying your first plank in a corner, making sure the tongue side faces the wall. You’ll need to leave a small gap, typically about 1/4-inch, between the planks and the wall. This expansion gap is essential because it allows the flooring to expand and contract with temperature changes without buckling. Use spacers to maintain this gap consistently along the entire wall. Continue laying planks end-to-end until you reach the other side of the room.

    Click Planks Together And Keep Them Straight

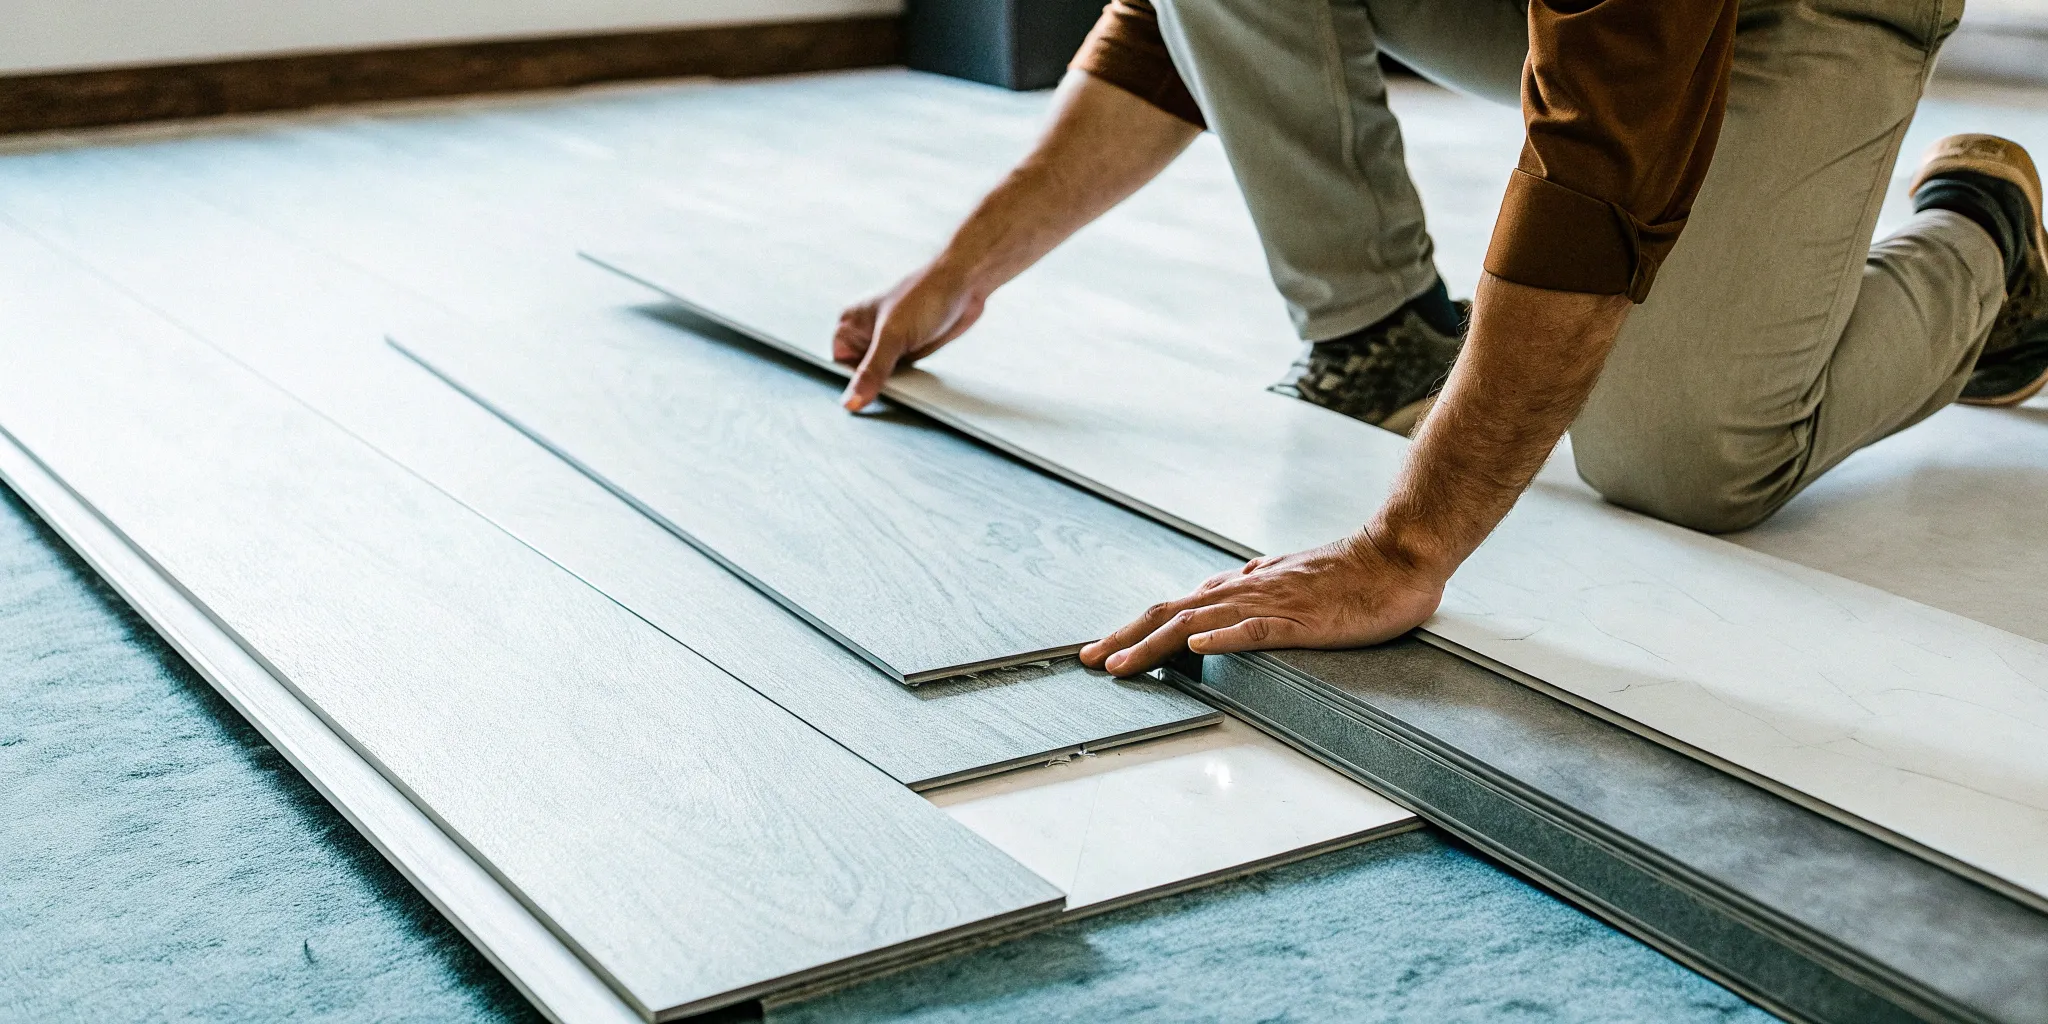
    With your first row in place, you can start the second. Modern LVP uses a click-lock or tongue-and-groove system. To connect the planks, hold the new plank at a slight angle and fit its tongue into the groove of the plank in the first row. Lower it until it clicks into place. To ensure a tight, seamless fit, gently tap the edge of the plank with a tapping block and a rubber mallet. This helps lock the planks together without damaging them. Continue this process, making sure each plank is snug against its neighbor and your rows stay perfectly straight.

    Navigate Doorways And Tricky Corners

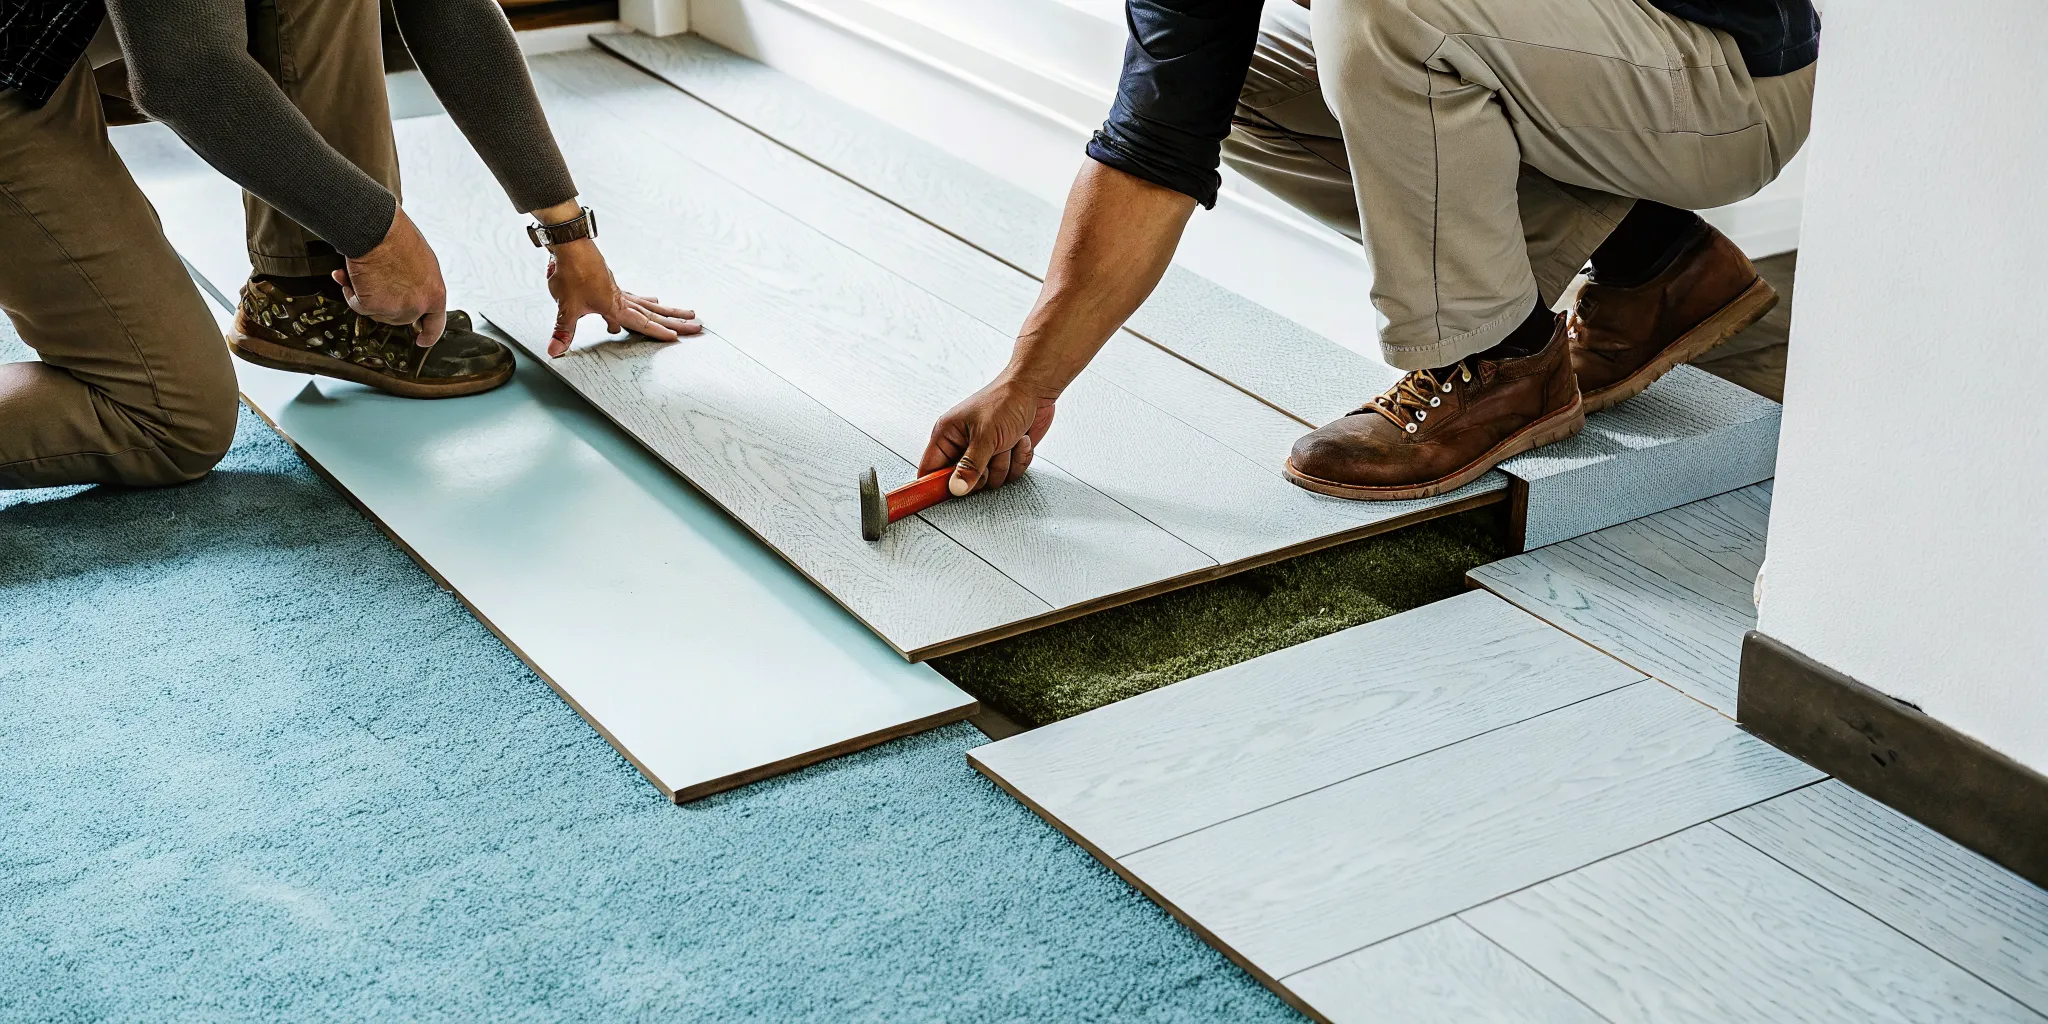
    Floors are rarely perfect rectangles. You’ll inevitably run into doorways, vents, and corners that require custom cuts. For these tricky spots, you’ll need to measure carefully and cut your planks to fit. Creating a paper template can help you get the shape just right before cutting the actual plank. When you reach a doorway, it’s important to install a transition strip. This piece covers the seam where your new LVP flooring meets another type of flooring, like tile or carpet, giving the transition a clean and finished look.

    Make Your Cuts And Add Transition Strips

    When you reach the end of a row, you’ll almost always need to cut the last plank to fit. Measure the remaining space, remembering to account for the 1/4-inch expansion gap. You can use a utility knife to score and snap the plank or a saw for a quicker cut. The leftover piece from this cut can often be used to start your next row, as long as it’s not too short. This creates a natural, staggered pattern. Once the entire floor is laid, you can install your transition strips in doorways and finish the perimeter.

    Add The Finishing Touches For A Pro Look

    You’ve laid the last plank, and your new floor is starting to take shape. This is the exciting part, but the job isn’t quite finished. These final steps are what create a polished, professional result that lasts for years. Taking the time to handle the trim, clean up properly, and inspect your work will make all the difference. It’s these details that transform a good installation into a great one, ensuring your new LVP floors look like they were installed by a seasoned pro.

    Install Baseboards And Trim

    With the flooring in place, it’s time to cover those expansion gaps and give your room a clean, finished edge. First, carefully remove all the spacers you placed along the walls. Now you can reinstall your original baseboards or add new ones for an updated look. Secure the trim to the wall, not the floor, using a brad nailer for a clean finish. This allows the floating floor to expand and contract naturally underneath. For a seamless look, apply a thin bead of caulk along the top edge where the baseboard meets the wall and fill any nail holes before painting.

    Clean Up And Inspect Your New Floor

    A thorough cleanup is essential for protecting your new floor and admiring your hard work. To minimize mess from the start, it’s always a good idea to do your cutting in a separate area, like a garage or patio, to keep sawdust off your new planks. Give the floor a good sweep with a soft-bristle broom to remove any debris, followed by a vacuum (use a hard floor setting without the beater bar). Then, you can do a light damp-mopping. As you clean, do a final inspection. Walk the entire floor, looking for any gaps or planks that don’t feel secure. This final check ensures your luxury vinyl plank flooring is ready for daily life.

    Maintain The Right Room Conditions

    Your LVP flooring needs a stable environment to perform its best over the long term. Remember how you let the planks acclimate before installation? The same principle applies now. Try to keep your home’s temperature consistent throughout the year, avoiding extreme swings in heat and humidity. This is especially important in the Dallas-Fort Worth area, where the weather can change quickly. Maintaining a stable indoor climate helps prevent the planks from expanding, contracting, or buckling over time. This simple step protects your investment and keeps your floors looking beautiful for years. If you have questions about long-term care, our team is always happy to help.

    Common LVP Installation Mistakes To Avoid

    Luxury vinyl plank is a fantastic flooring choice, but its durability and good looks depend entirely on a proper installation. A few common mistakes can keep it from looking its best and performing well over time. Even small oversights can lead to big headaches down the road, like planks that buckle, separate at the seams, or feel uneven underfoot. Getting the details right from the start is the secret to a floor that you’ll love for years to come, one that stands up to daily life without issues.

    Let’s walk through the most frequent trip-ups we see homeowners in the Dallas-Fort Worth area encounter. Understanding these pitfalls is helpful whether you’re planning a DIY project or hiring a professional. Knowing what to look for ensures your new floor is stable, durable, and beautiful from day one. A professional installation handles all these details correctly, giving you peace of mind that the job is done right the first time and your investment is protected. We’ll cover everything from preparing the subfloor to letting the planks acclimate, so you can feel confident in the process and avoid the frustration of a failed installation.

    Skipping Subfloor Prep And Expansion Gaps

    The success of your new LVP floor starts with what’s underneath it. Installing planks over an uneven, dirty, or damaged subfloor is a recipe for disaster. The planks won’t lock together properly, leading to weak spots, squeaking, and an unstable feel underfoot. Before laying the first plank, your subfloor must be perfectly clean, dry, and flat. This means filling any cracks or holes and sanding down any high spots. It’s also essential to leave a small expansion gap, typically about a quarter-inch, between the flooring and the walls. This tiny space allows the vinyl planks to expand and contract with temperature changes without buckling.

    Poor Seam Staggering And Bad Cuts

    Have you ever seen a floor where the seams between planks line up, creating an obvious “H” pattern? That’s a sign of poor staggering. For a strong and natural-looking floor, the end joints of your planks should be staggered by at least six to eight inches from one row to the next. This pattern distributes weight and stress evenly, preventing the seams from separating over time. It also creates a more visually appealing, random look that mimics real wood. Likewise, inaccurate cuts around door frames or corners can leave unsightly gaps that are difficult to hide with trim, giving the whole project an unprofessional finish.

    Forgetting To Acclimate Your Planks

    Vinyl plank flooring needs time to adjust to its new environment before installation. We call this process acclimation. You should let the unopened boxes of LVP sit in the room where they will be installed for at least 48 hours. This allows the material to get used to the home’s specific temperature and humidity levels. If you skip this step, the planks might expand or shrink after they’re already clicked together, causing the floor to buckle or pull apart at the seams. It’s a simple step that prevents major issues down the road and is a standard part of any professional flooring installation.

    How To Care For Your New LVP Floors

    Congratulations on your beautiful new floors! One of the best things about luxury vinyl plank is how simple it is to maintain. You don’t need special equipment or complicated routines to keep it looking brand new. With just a few easy habits, you can protect your investment and ensure your floors stay stunning for years to come. Here’s a straightforward guide to caring for your LVP.

    The Right Way To Clean Your LVP

    While LVP is incredibly durable, it still needs regular cleaning to look its best. The key is to be gentle. Start by sweeping or vacuuming (using a hard floor setting without the beater bar) every couple of days to pick up dirt and grit that can act like sandpaper on the finish. For a deeper clean, a weekly damp mop is all you need. Use a soft mop and a pH-neutral cleaner specifically designed for vinyl. Avoid using harsh chemicals like bleach, ammonia, or abrasive cleaners, as they can dull the protective wear layer and damage your floor’s finish over time.

    Prevent Scratches, Dents, And Damage

    The easiest way to keep your floors looking great is to stop damage before it starts. Place felt pads under the legs of all your furniture, especially heavy pieces like sofas, tables, and entertainment centers. This simple step prevents scratches when furniture gets bumped or shifted. When you need to move something heavy, always lift it instead of dragging it across the floor. It’s also a great idea to place doormats at every entrance to your home. They’ll catch the dirt, sand, and small rocks that can get tracked in on shoes and cause tiny scratches that build up over time.

    Your Simple Long-Term Care Plan

    Keeping your LVP in top shape doesn’t require a lot of effort, just consistency. Here’s a simple routine to follow. On a daily basis, give your floors a quick sweep to clear away any debris. Once a week, use a damp mop with a mild, pH-neutral cleaner to wash away grime. If a spill happens, wipe it up right away to prevent any potential staining or moisture issues. By following these simple steps, your luxury vinyl plank flooring will continue to be a durable and beautiful foundation for your home. It’s all about creating small habits that protect your floors for the long haul.

    DIY Or Hire A Pro In Dallas-Fort Worth?

    Floating LVP flooring is often presented as the perfect weekend warrior project. And for some homeowners with the right tools, a simple square room, and plenty of patience, it can be. But for most of us, the reality of a flooring installation is more complicated. The decision to DIY or hire a professional comes down to balancing your time, skill level, and desire for a flawless, long-lasting result.

    Before you start pulling up your old floors, it’s worth thinking about what a professional installation offers. It’s not just about saving yourself a sore back. An experienced team ensures every step, from subfloor preparation to the final piece of trim, is done correctly. For busy homeowners in the Dallas-Fort Worth area, hiring an expert means the job gets done quickly and correctly, letting you get back to your life without the stress of a project lingering for weeks. A professional can also spot and solve subfloor issues you might not notice, preventing problems like squeaks or uneven planks down the road. It’s an investment in getting the job done right the first time, avoiding costly mistakes that can be difficult and expensive to fix later.

    When To Call For Help With Tricky Layouts Or Tight Deadlines

    If your home has an open-concept floor plan, lots of angles, or tricky obstacles like a kitchen island, a DIY project can quickly become a headache. The first few rows are the most critical for getting a straight, stable floor, and they’re also the hardest to install. One small mistake at the beginning can create bigger, more noticeable gaps later on. If you’re on a tight timeline for moving in or selling your home, a professional crew is your best bet. Our team can complete most LVP installations in just a day or two, a pace that’s tough to match on your own while juggling other responsibilities.

    The Peace Of Mind Of A Professional Installation

    While laying the planks might seem straightforward, a truly durable floor depends on expert preparation and technique. A professional installer ensures your subfloor is perfectly level, makes precise cuts around door jambs and vents, and knows how to create a layout that looks balanced and beautiful. This attention to detail makes a huge difference in how your floor looks and how long it lasts. Ultimately, hiring a pro gives you peace of mind. You can trust that the job is done right, the materials are handled correctly, and the final result will be a floor you love for years. If you’d like an expert opinion, you can always request a free in-home estimate to see what your project involves.

    Related Articles

    Frequently Asked Questions

    Can I install floating LVP directly over my old flooring? In some cases, yes, but it depends entirely on the condition of your existing floor. LVP can often be installed over a single layer of old, well-adhered vinyl or even tile. However, the original floor must be perfectly flat, clean, and structurally sound. Installing over a soft surface like carpet is never an option. The best approach is to have a professional evaluate the subfloor, as any imperfections underneath will eventually show through or cause installation issues.

    How long does a professional LVP installation usually take? One of the biggest advantages of floating LVP is its efficient installation. For a straightforward project in a few standard-sized rooms, our professional team can often complete the entire job in just one to two days. This includes removing the old flooring, preparing the subfloor, and installing the new LVP and trim. The exact timeline depends on the size of the space and the amount of prep work needed, but it’s significantly faster than most other flooring types.

    Is LVP truly waterproof? Luxury vinyl plank itself is made from materials that are 100% waterproof, meaning the planks won’t swell or warp when exposed to moisture. This makes it an excellent choice for kitchens, bathrooms, and laundry rooms. However, it’s important to remember that a floating floor installation is not a completely sealed surface. Water can still seep through the seams and get trapped between the LVP and the subfloor, so it’s always best to clean up large spills promptly.

    Why is leaving an expansion gap around the edges so critical? All floating floors, including LVP, need a little room to move. As your home’s temperature and humidity change throughout the seasons in North Texas, the flooring will naturally expand and contract by a tiny amount. The quarter-inch gap left around the perimeter gives the floor space to do this without buckling or putting pressure on the locking system. Your baseboards and trim will completely hide this gap, so you’ll never see it.

    What happens if I damage a single plank later on? Repairing a floating LVP floor is much simpler than fixing traditional glue-down or nail-down flooring. If a plank gets scratched or dented, it can be replaced without having to tear up the entire floor. A professional can carefully remove the trim, unlock the planks leading to the damaged one, swap it out with a new piece, and then lock everything back into place. This is why we always recommend keeping a few extra planks after your installation is complete.


  • The Homeowner’s Guide To Hardwood Floor Installers

    The Homeowner’s Guide To Hardwood Floor Installers

    There’s a significant difference between a general contractor who can lay down planks and a dedicated flooring craftsman. A true professional understands that a lasting installation is built on a foundation of details that happen long before the first board is nailed down. They obsess over subfloor flatness, conduct precise moisture tests, and insist on letting the wood acclimate to your home’s unique environment. These non-negotiable steps are what separate a beautiful, stable floor from one that fails prematurely. This guide will teach you how to tell the difference, so you can confidently choose from the many hardwood floor installers and find a true expert who values quality as much as you do.

    Key Takeaways

    • The installer’s skill matters more than the wood itself: A quality installation is your best defense against future problems like gapping and warping, ensuring your floors look beautiful for years to come.
    • Preparation is the most critical step: Before any planks are laid, confirm your installer performs moisture tests, thoroughly inspects the subfloor, and allows the wood to acclimate inside your home.
    • Vet your candidates with a simple checklist: Always verify their insurance, ask for a detailed written contract, and check recent customer reviews. A true professional will be transparent and happy to provide this information.

    What Does A Hardwood Floor Installer Do?

    A professional hardwood floor installer is much more than just a contractor who lays down planks. They are skilled craftspeople responsible for the entire process, from initial assessment to the final finishing touches. Their work ensures your floors are not only beautiful but also durable and correctly installed to last for decades. A true expert manages every technical detail, including subfloor preparation, moisture mitigation, and material acclimation, which are critical for a successful outcome. They handle the complexities so you can simply enjoy your new floors. Understanding the full scope of their services helps you appreciate the value they bring to your home improvement project.

    Installing New Hardwood Floors

    The most common job for a hardwood installer is, of course, installing new floors. This process is far more involved than it looks. It starts with carefully removing your old flooring and disposing of it properly. Next, they assess and prepare the subfloor, which is the foundation of your new floor. This step might involve leveling, cleaning, or repairing the surface to ensure it’s perfectly flat and stable. A flawed subfloor can lead to squeaks, gaps, and other problems down the road. Finally, they expertly lay the solid wood flooring, cutting each plank to fit precisely around walls, vents, and doorways for a seamless, professional finish.

    Refinishing Existing Hardwood

    If you have existing hardwood floors that look tired, scratched, or dull, an installer can often bring them back to life through refinishing. This service is a great way to restore the original beauty of your floors without a full replacement. The process involves sanding down the top layer of the wood to remove the old finish and any surface-level imperfections like scratches and minor stains. After sanding, the installer applies a new stain in the color of your choice, followed by several coats of a protective finish. This not only transforms the look of your floors but also adds a durable layer of protection against future wear.

    Handling Repairs And Maintenance

    Over time, even the most durable hardwood floors can suffer damage. An experienced installer can handle a wide range of repairs to keep your floors in top condition. This could involve replacing a single warped or deeply scratched plank, fixing areas with water damage, or addressing squeaks and gaps that have developed. By making targeted repairs, they can solve problems without requiring you to replace the entire floor. This expertise is essential for maintaining the value and longevity of your engineered wood flooring and preserving the investment you’ve made in your home.

    Creating Custom Designs And Inlays

    For homeowners looking for something truly unique, some hardwood installers offer custom design services. This can turn a simple wood floor into a stunning focal point for your home. An installer with this skill set can create intricate patterns like herringbone or chevron, add decorative borders around a room, or even install custom inlays and medallions. These artistic touches require a high level of precision and craftsmanship. While not every project calls for this level of detail, knowing an installer has these capabilities is often a good sign of their overall expertise and dedication to their craft.

    How To Choose The Right Hardwood Floor Installer

    Choosing the right hardwood is only half the battle; the quality of the installation determines how your floors will look and perform for years to come. A great installer protects your investment, while a poor one can lead to frustrating and costly problems down the road. Finding a true professional means looking beyond the quote and evaluating their expertise, credentials, and track record. When you know what to look for, you can confidently hire a team that will get the job done right the first time.

    Look For Certifications And Training

    While Texas doesn’t require a specific license for flooring installers, you can spot a dedicated professional by looking for industry certifications. Organizations like the National Wood Flooring Association (NWFA) offer rigorous training programs that cover everything from subfloor preparation to moisture testing. An installer who invests in these credentials shows a serious commitment to their craft and stays current on the best installation practices. It’s a clear sign that they value quality workmanship and have the technical knowledge to handle your project correctly, ensuring your new floors are beautiful and durable.

    Verify Their Insurance And Licensing

    This step is non-negotiable. A reputable flooring installer must carry general liability insurance and workers’ compensation. General liability protects your home from accidental damage during the installation, while workers’ compensation covers their crew in case of injury. Without this coverage, you could be held financially responsible for any mishaps. Don’t just take their word for it; ask to see a certificate of insurance. A professional company will always be prepared to provide this documentation, giving you the peace of mind that you and your property are protected throughout the project.

    Check Reviews And Past Work

    Before you hire anyone, do a little digging to see what past customers have to say. Check online reviews on sites like Google to get a feel for their reputation in the Dallas-Fort Worth area. Are clients happy with the final result? Do they mention good communication and a professional crew? Beyond reviews, ask to see a portfolio of their recent projects. Seeing their work will give you a clear idea of their skill level and attention to detail, helping you feel confident in their ability to bring your vision to life.

    Gauge Their Expertise On Materials And Moisture

    A true flooring expert understands that wood is a natural material that responds to its environment, especially the humidity here in Texas. Your installer should be knowledgeable about how to manage moisture to prevent future issues like gapping, cupping, or warping. Ask them about their process for moisture testing both the subfloor and the new hardwood. They should also insist on letting the wood acclimate inside your home before installation. This critical step allows the planks to adjust to your home’s temperature and humidity, ensuring a stable and long-lasting fit.

    Understanding Your Hardwood Installation Quote

    An installation quote is more than just a final number; it’s a roadmap for your project. A detailed estimate helps you understand exactly what you’re paying for, from the materials to the labor and any extra prep work involved. When you get a quote from a professional installer, it should clearly outline every step of the process. This transparency is key to avoiding surprises and ensuring you feel confident in your investment. Let’s break down the common components you’ll see in a hardwood flooring estimate so you know what to look for.

    How Your Installation Quote Is Calculated

    Most installers calculate the total project cost on a per-square-foot basis. This figure bundles the expense of the hardwood itself with the labor required for installation. Think of it as a baseline that covers the two biggest components of the job. For example, if your room is 200 square feet, the installer will multiply that by their combined rate for materials and labor to get a starting figure. A clear, all-in-one number per square foot makes it easier to compare different materials and understand the overall scope of your project from the get-go.

    Key Factors That Affect Your Final Quote

    Several variables can influence the final amount on your estimate. The type of wood you choose is a major factor; solid hardwood often has a different material cost than engineered wood. The complexity of the room’s layout also matters. A simple, square room is more straightforward to install than a space with lots of corners, stairs, or custom inlays. Finally, the condition of your subfloor is critical. If it needs repairs or leveling before the new wood can go down, that will be reflected in the quote.

    Breaking Down Material And Labor

    Your quote will generally have two main categories: materials and labor. The material portion covers the actual wood planks. This amount can vary significantly depending on the species (like oak versus walnut), plank width, and finish. The labor portion covers the installer’s time, skill, and the physical work of laying the floor. While it might be tempting to find the lowest labor rate, remember that experienced craftsmanship is what ensures your floors look beautiful and perform well for years. It’s an investment in a job done right the first time.

    What About Additional Services Or Fees?

    A thorough quote will also account for any extra work needed to complete the job properly. This can include tearing out and disposing of old flooring, moving heavy furniture, or making significant repairs to the subfloor. Some projects may also require new baseboards or trim to be installed. A professional installer will identify these needs during your initial consultation. When you request an in-home estimate, be sure to ask what’s included so there are no unexpected additions to your final bill.

    What To Expect During The Installation Process

    Once you’ve chosen your installer, the real work begins. A professional hardwood installation is a multi-step process that prioritizes preparation just as much as the final placement of the planks. Understanding these steps helps you know what’s happening in your home and why each stage is so important for a beautiful, long-lasting floor. While every project in the Dallas–Fort Worth area has its own unique challenges, a quality installation generally follows a predictable and thorough path.

    From the initial assessment to the final board, a true professional focuses on getting the foundation right. This means checking for moisture, ensuring your subfloor is in great shape, and giving the wood time to adjust to your home’s environment. Rushing these early stages can lead to major headaches down the road, so a methodical approach is always the best bet. Here’s a breakdown of what you can expect from a professional installation.

    The Initial Consultation And Moisture Test

    The process kicks off with an in-home consultation. This is when an expert comes to your home to see the space, take precise measurements, and discuss your vision. It’s also the first and most critical checkpoint for moisture. Using a professional moisture meter, the installer will test the subfloor and the general humidity in the room. Because excess moisture is one of the biggest threats to hardwood, this step is non-negotiable. A skilled professional can identify and plan for any potential issues from the very beginning, ensuring a smooth project. This initial meeting is the perfect time to ask questions and get a clear plan before any work starts.

    Preparing And Assessing Your Subfloor

    Your new hardwood floors will only be as good as the foundation they’re installed on. That foundation is the subfloor, the surface beneath your flooring. Before any new wood is laid, your installer will thoroughly inspect the subfloor to make sure it’s clean, flat, and structurally sound. Any squeaks, dips, or damage must be fixed first. If the subfloor is concrete, it needs to be properly sealed and tested for moisture. If it’s wood, it needs to be level and secure. Skipping this step is a recipe for disaster, leading to uneven floors, creaking boards, and other problems. A great installer spends the necessary time here to guarantee a flawless finish.

    Why Your New Wood Needs To Acclimate

    Wood is a natural material that breathes, meaning it expands and contracts with changes in temperature and humidity. Acclimation is the process of letting your new hardwood planks sit inside your home for several days before installation. This allows the wood to adjust to your home’s unique climate. Your installer will have you run your HVAC system as you normally would during this period. This simple step is crucial for preventing gaps, warping, or cupping after the floor is installed. It ensures the wood is stable and won’t dramatically shift once it’s all locked into place, giving you a floor that stays beautiful for years.

    A Step-by-Step Installation Timeline

    While the exact timeline depends on the size and complexity of your project, a typical installation follows a clear sequence. After the subfloor is prepped and the wood is acclimated, the physical installation begins. This involves laying out the planks, making precise cuts to fit around walls and doorways, and securing the boards to the subfloor. Your installer will communicate the expected duration during your initial consultation. While our team at Next Day Flooring is known for efficiency, we never compromise on craftsmanship. Each installation is treated as a custom job, ensuring every detail is handled correctly for a durable and stunning result.

    Key Questions To Ask A Potential Installer

    Choosing an installer is a big decision, and you have every right to be thorough. Think of this as an interview for a very important job: transforming your home. A true professional will welcome your questions and provide clear, confident answers. Asking the right things upfront helps you gauge their expertise, sets clear expectations, and ensures there are no surprises down the road. It’s the best way to find a partner you can trust to handle your flooring project correctly from start to finish.

    Ask About Their Experience And Credentials

    You wouldn’t hire an electrician who isn’t licensed, and the same standard should apply to your flooring installer. Start by asking about their specific experience with hardwood floors. How many years have they been in business? Can they show you a portfolio of completed projects in the Dallas–Fort Worth area?

    Go a step further and inquire about professional qualifications. Certifications from organizations like the National Wood Flooring Association (NWFA) show a commitment to staying current with industry best practices. Also, always confirm they are fully licensed and insured. This protects you and your home in case of accidents. A contractor who invests in their credentials and training is one who takes their craft seriously.

    Clarify The Timeline And Process

    A clear plan is a sign of a well-organized professional. Ask your potential installer to walk you through their entire process, from start to finish. What does subfloor preparation involve? How long will the wood need to acclimate in your home before installation begins? A detailed timeline helps you prepare your household and minimizes disruption.

    You should also ask how they manage the project and who your main point of contact will be. Find out how they handle unexpected issues, like discovering subfloor damage. Understanding their installation workflow ahead of time prevents miscommunication and helps ensure the project runs smoothly. A good installer will be transparent about every step.

    Understand Their Warranty And Guarantees

    Your new hardwood floors are a significant investment, so they should be protected. It’s important to understand the difference between two types of warranties: the manufacturer’s warranty, which covers defects in the flooring material itself, and the installer’s workmanship warranty, which covers the quality of the installation.

    Ask potential installers for detailed information about their workmanship guarantee. What exactly does it cover, and for how long? Is it transferable if you sell your home? Get the terms in writing so you know what to expect. A contractor who stands behind their work with a solid warranty gives you peace of mind that you’re getting a floor built to last. You can often find answers to these questions on a company’s FAQ page.

    Review The Contract And Payment Schedule

    Never move forward without a detailed, written contract. This document should clearly outline the full scope of the project, including the specific materials being used, a breakdown of labor and material costs, and the project timeline. It should also list everything included in the service, from furniture moving to old floor removal and cleanup.

    Pay close attention to the payment schedule. A common red flag is a contractor who asks for a large deposit upfront. A reasonable request is typically 10% to 30% to secure materials. The contract should specify when subsequent payments are due, usually tied to project milestones. Before signing, read everything carefully and make sure you’re comfortable with the terms. When you’re ready, you can request a detailed estimate to review.

    Common Installation Problems To Watch For

    A new hardwood floor is a significant investment, and the last thing you want is to see it fail because of a shoddy installation. While hardwood is incredibly durable, it’s also a natural material that reacts to its environment. Most major flooring issues aren’t caused by the wood itself, but by mistakes made during the installation process. Knowing what to look for can help you spot a red flag before it becomes a permanent problem in your home.

    A professional installer understands that the real work happens before the first board is even laid. They focus on preparation, moisture management, and patience. When these steps are rushed or skipped, the results can be disastrous and costly to fix. From unsightly gaps to warped boards, these common problems are almost always preventable. Here’s what you need to watch out for.

    Gapping, Cupping, And Warping

    Have you ever seen a wood floor with noticeable spaces between the planks? That’s called gapping. Cupping is when the edges of a board are higher than its center, creating a concave shape. Warping is even more severe, causing the wood to twist and lift. These issues occur when wood expands or contracts due to changes in moisture and temperature. While some minor seasonal gapping can be normal, significant and permanent changes often point to an installation error. A skilled installer knows how to account for wood’s natural movement, ensuring the final floor is stable and beautiful for years to come. This is especially important for the solid wood flooring popular in many Dallas-Fort Worth homes.

    Signs Of Moisture Damage

    Moisture is the number one enemy of hardwood floors. If it’s not properly managed, it can lead to all the problems we just discussed, plus discoloration and mold. A true professional will always perform moisture tests on both your subfloor and the new wood planks before starting work. This is a critical step that should never be skipped. An installer who ignores moisture readings is taking a huge risk with your investment. They should also use the correct underlayment as a vapor barrier to protect your floors from any moisture coming up from the subfloor. Understanding how wood reacts to moisture is a key part of a successful installation.

    The Dangers Of A Poorly Prepped Subfloor

    Think of your subfloor as the foundation for your new hardwood. If that foundation isn’t perfectly clean, flat, and structurally sound, it will cause problems for the floor above it. An uneven subfloor can create hollow spots, squeaks, and uneven planks that wear down prematurely. A professional installer will spend a significant amount of time preparing the subfloor, which might involve sanding down high spots, filling in low spots, and ensuring it’s completely free of debris. Rushing this step is a classic shortcut of an inexperienced installer. Our team at Next Day Flooring believes that proper prep is the most important part of any installation, because it guarantees a durable, long-lasting result.

    What Happens When Wood Isn’t Acclimated

    Wood needs time to adjust to its new home before it’s installed. This process is called acclimation. It involves letting the new flooring sit in the room where it will be installed for several days, with your HVAC system running normally. This allows the wood’s moisture content to stabilize with the home’s unique temperature and humidity levels. If an installer tries to lay the flooring the same day it’s delivered, that’s a major red flag. Skipping acclimation almost guarantees that the wood will expand or shrink after installation, leading directly to the gapping and warping you want to avoid. It’s a simple step that demonstrates an installer’s commitment to getting the job done right.

    How To Avoid Common Hiring Mistakes

    Choosing the right installer is just as important as picking the perfect hardwood. A great installation ensures your floors will look beautiful for years, while a poor one can lead to headaches and costly repairs. By being mindful of a few common pitfalls, you can hire a professional for your Dallas–Fort Worth home with confidence.

    Don’t Just Go For The Lowest Quote

    It’s tempting to jump on the lowest offer, but an unusually low quote can be a red flag. Often, it means corners are being cut somewhere, whether in subfloor preparation, material quality, or the skill of the installation team. A professional quote accounts for the time and materials needed to do the job correctly from the start. Think of it as an investment in your home’s long-term value. A quality installation from a team that values craftsmanship prevents issues like gapping and warping down the road, saving you money and stress.

    Always Verify Credentials And Check References

    Before letting anyone work in your home, make sure they are properly insured. This protects you from liability in case of accidents or property damage. Don’t be shy about asking for proof of insurance; a reputable contractor will have it ready. Beyond the paperwork, look for evidence of their work. Check online reviews, browse their project gallery, and ask for references from recent jobs. A contractor with a solid history of satisfied customers is proud to share their track record and demonstrate their expertise.

    Insist On A Detailed, Written Estimate

    A professional estimate is more than just a final number. It should be a clear, itemized document that breaks down every aspect of the project. Look for details on the cost of materials, labor charges, subfloor prep, removal and disposal of your old flooring, and any additional fees. This transparency helps you understand exactly what you’re paying for and prevents surprise costs later. A detailed estimate is a sign of a thorough and honest installer, allowing you to schedule a consultation with a clear understanding of the scope of work.

    Read The Fine Print In Your Contract

    The contract is your final agreement, so review it carefully before signing. It should clearly outline the project timeline, payment schedule, and specific materials being used. Be cautious of requests for large upfront deposits; a standard down payment is typically between 10% and 30% to secure materials. The contract should also include warranty information for both the flooring materials and the installation itself. Understanding these details ensures that you and your installer are on the same page from day one, leading to a smooth and successful project.

    How To Prepare Your Home For New Floors

    Once you’ve chosen your beautiful new hardwood, a little preparation can make the installation process seamless. Taking a few simple steps before the installation crew arrives helps them work efficiently and protects your belongings. A well-prepared space ensures your project stays on schedule and that your new floors get the clean start they deserve. Think of it as rolling out the welcome mat for your new flooring. A clear room and easy access allow our team to focus entirely on what we do best: installing your floors with precision and care.

    Clear The Room And Remove Furniture

    Before installation day, the rooms receiving new flooring need to be completely empty. This includes removing all furniture, rugs, plants, and wall hangings. Don’t forget to clear out closets if they are part of the project. While our installation team can often help with large, heavy items like sofas or beds, it’s always best to confirm this ahead of time. Clearing smaller items and personal belongings yourself helps the installation start right on schedule. If you have any questions about moving specific pieces of furniture, it’s a good idea to get in touch with your installer beforehand to coordinate a plan.

    Ensure Easy Access For The Installers

    Your installation team needs a clear path to bring in tools and materials. Start by clearing a walkway from the driveway or street to the installation area. This means moving any vehicles, outdoor furniture, or toys that might be in the way. Inside, make sure hallways and entryways are free of clutter. A clear path not only makes the work faster but also helps prevent accidental damage to your home or the new flooring. For everyone’s safety, it’s also important to keep children and pets away from the work area throughout the installation process.

    Control Your Home’s Climate For Acclimation

    Wood is a natural material that expands and contracts with changes in temperature and humidity. To prevent future issues like gapping or warping, your new solid wood flooring needs to acclimate to your home’s environment. Your installer will deliver the wood a few days early so it can adjust. During this time, and throughout the installation, maintain a consistent indoor temperature, typically between 60 and 80 degrees Fahrenheit. Running your HVAC system as you normally would is usually all it takes. This simple step is one of the most critical for ensuring the long-term stability and beauty of your hardwood floors.

    Where To Find A Qualified Hardwood Floor Installer

    Finding the right installer is the most important step in getting beautiful, long-lasting hardwood floors. A great installation can make even mid-range materials look stunning, while a poor one can ruin the highest-quality wood. The good news is that finding a true professional in the Dallas–Fort Worth area is straightforward when you know where to look and what to ask. It’s not about finding just anyone to do the job; it’s about finding a partner you can trust to protect your investment and treat your home with respect.

    Check Professional Flooring Associations

    A great starting point is to look for installers who are members of professional organizations. The most respected in our industry is the National Wood Flooring Association (NWFA). Membership isn’t just a sticker on a van; it shows a contractor is serious about their craft. These organizations provide ongoing training and hold their members to strict installation standards. An installer with an NWFA certification has proven their knowledge of everything from subfloor prep to finishing techniques. This commitment to best practices is a strong indicator that they prioritize quality and durability over cutting corners.

    Use Online Reviews And Local Recommendations

    Word-of-mouth is powerful, so start by asking friends, family, or neighbors in your community for recommendations. Beyond personal referrals, online reviews offer a window into a company’s performance. Look at Google, Yelp, and other local directories, but read beyond the star ratings. Look for comments that mention professionalism, communication, and how the team handled challenges. Testimonials that highlight craftsmanship and customer service are far more telling than a simple low quote. A pattern of positive feedback about a company’s process and results is a clear sign you’re on the right track.

    How To Vet Your Top Candidates

    Once you have a short list, it’s time to dig a little deeper. The first step is to confirm that any potential installer is fully insured. This protects you and your home in case of an accident. Don’t be shy about asking for proof of insurance. Next, ask about their specific experience with the type of flooring you want, whether it’s solid wood flooring or engineered hardwood. A qualified professional will be happy to show you a portfolio of their work and may even provide references from recent clients. This vetting process helps ensure you’re hiring a true expert, not just a general contractor.

    Related Articles

    Frequently Asked Questions

    Besides the wood itself, what other factors affect my final quote? Your final quote reflects the entire scope of the project, not just the materials. Key factors include the condition of your subfloor, as any necessary leveling or repairs will be accounted for. The complexity of the room’s layout also plays a role; a space with many corners, stairs, or custom patterns requires more intricate work than a simple square room. Finally, the quote includes the skilled labor needed for tear-out of old flooring, precise installation, and a clean finish.

    How long does a typical hardwood installation take from start to finish? The timeline can vary depending on the size of your project. A crucial part of the process is acclimation, where the wood needs to sit in your home for several days to adjust to the climate before installation can even begin. Once the work starts, a straightforward project might take just a few days. During your in-home consultation, your installer will assess the space and give you a much more specific and reliable timeline for your project.

    Why is hiring a professional installer so important for hardwood floors? Hardwood is a natural material that responds to its environment, and a professional installation accounts for that. An expert handles critical steps that protect your investment, like conducting moisture tests, properly preparing the subfloor, and leaving the correct amount of space for the wood to expand and contract naturally. These technical details prevent common issues like gapping, squeaking, and warping, ensuring your floors look beautiful and perform correctly for decades.

    What is “acclimation” and why does my installer insist on it? Acclimation is the essential process of letting your new hardwood planks adjust to your home’s specific temperature and humidity levels before they are installed. Wood naturally expands and contracts, and this step ensures the material is stable before it’s secured to your subfloor. Skipping it is a major cause of future problems like buckling or gapping. A professional who insists on acclimation is showing a commitment to a durable, high-quality result.

    Do I need to move all my furniture before the installation team arrives? Yes, the rooms receiving new flooring should be completely empty to allow the installers to work safely and efficiently. You should plan to remove all furniture, rugs, and personal items from the space beforehand. Many installation companies can assist with moving larger, heavier pieces, but it’s always best to discuss this during your consultation to coordinate a plan and ensure everything is ready for installation day.

  • Fast Flooring Installation: 5 Speedy Options

    Fast Flooring Installation: 5 Speedy Options

    Let’s be honest: the phrase “quick installation” can sometimes sound like a red flag. It might bring to mind rushed work, cut corners, and floors that start showing problems a year later. But a professional, fast flooring installation is the complete opposite. It’s not about working carelessly; it’s about working efficiently. Speed is the natural result of years of experience, using the right professional-grade tools, and mastering a process that prevents delays before they can even happen. It’s about respecting your time and your home. Here, we’ll break down how we deliver a high-quality, durable floor on a timeline that gets you back to your life with minimal disruption.

    Key Takeaways

    • A fast installation starts with a solid foundation: True speed comes from expert preparation, not rushing the work. Ensuring your subfloor is perfectly level and planning the layout ahead of time are the most important steps for preventing mistakes and future problems.
    • Choose your flooring material based on your timeline: If you need a quick transformation, materials with click-lock systems like luxury vinyl plank (LVP) and laminate are your best bet. Classic solid hardwood is beautiful but requires a longer schedule for acclimation and finishing.
    • Hiring a professional prevents time-wasting errors: An experienced installation team works efficiently because they have the right tools and a proven process. This helps you avoid the common measurement and subfloor mistakes that can turn a weekend DIY project into a month-long headache.

    What Makes A Flooring Installation Fast?

    Everyone wants their new floors installed quickly, but speed isn’t just about how fast a crew can lay down planks. The secret to a truly fast installation is what happens before the first board is even touched. Rushing the job often leads to mistakes, delays, and floors that fail years sooner than they should. A speedy, successful project is built on a foundation of expert preparation, precise planning, and professional execution. It’s about doing things right the first time so there’s no need for a second time.

    At Next Day Flooring, our entire process is designed for efficiency without cutting corners. We know that homeowners in the Dallas–Fort Worth area are busy and want to get back to their lives as soon as possible. That’s why we focus on the details that prevent slowdowns, like ensuring the subfloor is perfectly prepped and the layout is planned for minimal waste and maximum visual appeal. This meticulous approach allows us to work quickly and confidently, delivering a beautiful new floor that’s ready for you to enjoy. If you’re ready for a smooth process, you can schedule a free estimate with our team.

    Why Professional Prep Beats DIY Shortcuts

    It’s tempting to skip some prep work to get to the exciting part, but this is where most DIY projects go wrong. Professional installers know that proper preparation is the most critical step. We start by making sure the subfloor is completely clean, dry, and level, because any imperfections underneath will show up on top. An uneven surface can cause gaps, buckling, or squeaking down the road. Our experienced team has seen it all and knows how to handle any surprises, ensuring your new floor has the solid, stable base it needs to last for years.

    How A Healthy Subfloor Speeds Things Up

    A healthy subfloor is the key to a fast and flawless installation, especially for modern materials like luxury vinyl and laminate. These floors often use click-lock systems that require a perfectly flat surface to function correctly. If there are dips or high spots, the planks won’t connect securely, which can break the locking mechanisms and even void your warranty. We check for any gaps and level the surface meticulously, because a flat subfloor allows us to install your new luxury vinyl plank flooring efficiently and without interruption. This attention to detail is what allows us to deliver on our promise of a fast, high-quality installation.

    Ranking The Fastest Flooring To Install

    When you need new floors fast, the material you choose makes all the difference. Some flooring types are designed for quick, efficient installation, while others require more patience and prep work. Understanding these differences is the first step to getting a beautiful new floor on your timeline. Here’s a look at how the most popular flooring options stack up when it comes to installation speed, from the fastest to the most time-intensive.

    The Speed Champion: Luxury Vinyl Plank (LVP/LVT)

    If speed is your top priority, look no further. Luxury vinyl plank is the undisputed champion of fast flooring installation. Most LVP products use a click-lock system, allowing the planks to snap together securely without messy adhesives. This creates a “floating floor” that sits directly over your subfloor (or even some existing hard floors), dramatically cutting down on prep time. Because it’s a stable, synthetic material, LVP doesn’t need to acclimate to your home’s environment. We can often get straight to work, transforming your space in record time. Its durability and water resistance also make it a fantastic choice for any room, including kitchens, bathrooms, and basements.

    A Close Second: Laminate Flooring

    Hot on the heels of LVP is its close cousin, laminate. Much like vinyl, modern laminate flooring is incredibly installer-friendly. The boards are designed to snap together like puzzle pieces over a thin foam underlayment, making the process clean and efficient. Since it’s also installed as a floating floor, we can avoid the time-consuming steps of nailing or gluing down each piece. While laminate may require a short acclimation period, it’s still one of the fastest ways to get a durable, beautiful new floor that mimics the look of real wood or stone. It’s a fantastic option for living rooms, bedrooms, and hallways where you want a fresh look without a long wait.

    Quick And Classic: Engineered Hardwood

    Want the timeless beauty of wood without the lengthy installation timeline of solid hardwood? Engineered hardwood is your answer. This material is constructed with a top layer of real hardwood fused to a stable, layered core. This design makes it less susceptible to changes in humidity, so it requires less acclimation time than solid wood. Many engineered products can also be installed as a floating floor using a click-lock system. Because it arrives pre-finished from the factory, you get to skip the entire sanding, staining, and sealing process. You get the authentic look and feel of wood, and your room is ready to use almost immediately after installation is complete.

    Fast And Cozy: Carpet

    Don’t overlook the original fast flooring solution. Carpet installation is a surprisingly speedy process in the hands of a professional team. For most standard-sized rooms in the Dallas–Fort Worth area, we can remove old flooring and install new, plush carpet in just a day or two. The process involves laying down a carpet pad, stretching the carpet tightly, and securing it at the edges. There’s no waiting for glue to dry or finishes to cure. You get instant comfort and a completely transformed room almost overnight, making it an ideal choice for bedrooms, family rooms, and anywhere you want to add a touch of warmth and coziness quickly.

    What To Know About Solid Wood Timelines

    While beautiful and classic, traditional solid wood floors require the most patience. The biggest factor is acclimation. Before we can install a single board, the raw wood needs to sit inside your home for at least five to ten days. This allows the material to adjust to your home’s specific temperature and humidity levels. Skipping this crucial step can lead to unsightly gaps or buckling down the road. After installation, the floor may need to be sanded, stained, and sealed on-site, adding several more days to the project. While the result is stunning, it’s important to plan for a longer timeline if you have your heart set on solid hardwood.

    How Long Will Your New Floors Take To Install?

    It’s the number one question we get, and for good reason. When you’re ready for new floors, you want the project done quickly and with minimal disruption to your life. While our name, Next Day Flooring, reflects our commitment to speed, the exact installation timeline for your home depends on a few key factors. The total square footage, the type of flooring you’ve selected, the condition of your subfloor, and the complexity of your room’s layout all play a role.

    A single, square bedroom is a much different project than an entire open-concept first floor with stairs. Our goal is to give you a beautiful, durable floor that lasts for years, and that starts with a realistic timeline. During your free in-home estimate, we’ll walk through the space with you, assess all the variables, and give you a clear schedule you can count on. We believe in getting the job done fast, but more importantly, we believe in getting it done right.

    Can Your Floors Be Installed In One Day?

    Yes, absolutely. Many flooring projects in the Dallas–Fort Worth area can be completed in a single day. This is most common for smaller, straightforward spaces, typically under 1,000 square feet. Think of a few bedrooms, a home office, or a standard living room. Materials like luxury vinyl plank and laminate are especially well-suited for quick turnarounds. A one-day installation is possible when the layout is simple and the subfloor is in good shape, allowing our team to work efficiently without unexpected delays. Our professional installers have the experience and tools to complete these jobs quickly without ever sacrificing quality.

    Setting Realistic Timelines For Bigger Projects

    If your project involves a larger area, multiple rooms, or more complex features, it’s realistic to plan for a two or three-day installation. Things like stairs, intricate patterns, or rooms with lots of angles and corners naturally require more time for precise cuts and fitting. The same goes for projects that need significant subfloor preparation or the removal of old, stubborn flooring. While it might take a little longer, this extra time is a crucial investment in the longevity of your new floors. We’ll never rush the prep work because a solid foundation is key to a flawless finish. Our team will always provide a clear, transparent timeline before we begin, so you know exactly what to expect.

    The Tools And Tech Behind A Speedy Installation

    A fast flooring installation isn’t about rushing the job; it’s about efficiency. At Next Day Flooring, our speed comes from a combination of professional-grade equipment and a deep understanding of modern flooring technology. Having the right tools for the job means we can make precise cuts, secure materials correctly, and work methodically without sacrificing quality. It’s the difference between a frustrating weekend DIY project and a seamless professional installation.

    When you pair the right equipment with innovative materials, you get a beautiful new floor that’s ready for your family to enjoy in record time. We’ve spent years refining our process, investing in tools that deliver flawless results, and mastering the installation techniques for today’s most advanced flooring. This focus on preparation and expertise allows our Dallas–Fort Worth team to complete projects quickly and correctly, so you can get back to your life with minimal disruption.

    Pro-Grade Tools We Can’t Live Without

    You can’t achieve a professional finish with basic hand tools. Our installation toolkit is filled with specialized equipment designed for precision and speed. For example, a flooring nailer allows us to secure hardwood planks perfectly without damaging the wood, a task that’s slow and risky by hand. A high-quality circular saw ensures every cut is clean and exact, which is essential for tight seams and a polished look.

    We also rely on tools like a tapping block and pull bar to fit planks together snugly without gaps. These instruments might seem simple, but they are critical for installing laminate flooring and vinyl correctly. Using the right gear means we work smarter, not harder, delivering a flawless installation on a timeline that respects your schedule.

    Why We Love Click-Lock And Floating Floors

    Modern flooring technology has completely changed the game for installation speed. We’re huge fans of click-lock systems, which are common in luxury vinyl and laminate floors. Instead of using messy glue or nails, these planks are designed with a special tongue-and-groove profile that lets them snap together securely. This creates what’s known as a “floating floor,” where the planks interlock to form a stable surface that rests over the subfloor without being permanently attached.

    This innovation is a major reason why vinyl (LVP/LVT) replacement is one of our fastest services. The process is cleaner, quicker, and eliminates the drying time associated with adhesives. For homeowners, it means a durable, beautiful new floor is often just a day away.

    Our Process For A Flawless, Fast Installation

    A speedy installation doesn’t happen by accident. It’s the result of a disciplined, step-by-step process our team has perfected over years of working in homes across the Dallas–Fort Worth area. While it might seem like the fastest way to get new floors is to just start laying them down, true speed comes from getting it right the first time. Rushing a project often leads to costly mistakes and do-overs, but following a proven method eliminates those risks entirely.

    Think of it like a professional chef preparing a complex meal. They don’t just start cooking; they have every ingredient measured, every tool in place, and every step mapped out. That preparation is what allows them to work efficiently and deliver a perfect result. We take the same approach to your floors. From meticulously preparing the subfloor to planning the final plank, our methodical process removes all the guesswork. It ensures a beautiful, durable result without the stress of unexpected delays. This is how we deliver on our promise of a fast, flawless installation that gives you complete peace of mind.

    Step 1: Perfecting The Subfloor

    Before a single new plank is laid, our first priority is always the subfloor. This is the foundation of your entire floor, and getting it right is non-negotiable for a lasting installation. We start by making sure the surface is completely clean, dry, and, most importantly, level. Even minor imperfections like bumps or dips can cause major problems later, leading to annoying squeaks, gaps between boards, or uneven wear. Taking the time to properly prepare the subfloor prevents these future headaches. It’s a critical step that ensures your new floors not only look great on day one but also perform beautifully for years to come.

    Step 2: Planning The Perfect Layout

    How your flooring is laid out does more than just affect the look of the room; it impacts the entire feel and flow of your space. Our team always plans the layout before we begin, considering things like the room’s main light source and focal points. Generally, running planks parallel to the longest wall or toward a large window can make a room feel more spacious and open. We also map out the rows to avoid leaving a very thin, awkward-looking plank against the far wall. A thoughtful flooring layout creates a balanced, professional finish that elevates the entire room.

    Step 3: Installing With A Smart Sequence

    Once the prep and planning are complete, the installation can move forward quickly and efficiently. Using professional-grade tools, we ensure each plank connects tightly and securely for a seamless surface. One of the most important details is leaving a small, consistent gap around the perimeter of the room. This is called an expansion gap, and it gives the flooring material room to naturally expand and contract with changes in humidity and temperature. Without it, floors can buckle or warp over time. This careful, deliberate sequence is what allows us to work efficiently while ensuring your new floors are installed to last.

    Common Mistakes That Delay A Flooring Project

    Even with the fastest flooring materials, a few common missteps can bring your project to a grinding halt. We’ve seen it all, and our process is designed to avoid these exact pitfalls. Understanding what can go wrong is the first step to making sure everything goes right, keeping your project on schedule and delivering the beautiful, durable floors you expect. Here are the top three mistakes that can turn a quick installation into a lengthy ordeal.

    Ignoring What’s Underneath: The Subfloor

    The most beautiful flooring in the world will fail if the foundation isn’t right. Your subfloor, the surface beneath your new floors, must be clean, dry, and perfectly level before a single plank is laid. Skipping this crucial prep work is a recipe for disaster. An uneven subfloor can cause luxury vinyl to separate at the seams, laminate to buckle, or hardwood to develop annoying squeaks. We always start every project with a thorough subfloor evaluation to address any issues first. This ensures your new floors not only look great on day one but perform beautifully for years to come.

    “Winging It” With Layout And Measurements

    A successful flooring installation is a game of inches, and guessing is not a winning strategy. Taking precise measurements and planning the layout are essential for a seamless look and minimal waste. Without a solid plan, you can end up with awkward plank patterns, visible seams in high-traffic areas, or not enough material to finish the job. A reliable tape measure is just the start; experience tells you how to account for tricky corners, doorways, and transitions between rooms. We map out every installation carefully to ensure a professional, efficient, and visually appealing result every time.

    Rushing The Acclimation Process

    Many flooring materials, especially laminate and wood, need time to adjust to their new environment. This is called acclimation. We let the planks sit in the room where they will be installed for at least 48 hours. This allows the material to adapt to your home’s specific temperature and humidity levels. Skipping this step can cause the flooring to expand or contract after installation, leading to unsightly gaps or warping. While it might seem like a delay, this simple waiting period is one of the most important steps to prevent problems down the road and is a non-negotiable part of our quality process.

    Time-Saving Installation Methods Explained

    The type of flooring you choose is only half the story when it comes to project speed. The installation method plays a huge role in how quickly we can transform your home. At Next Day Flooring, we specialize in techniques that deliver beautiful, durable results without the long wait. These smart, modern approaches minimize disruption while maximizing quality, ensuring your Dallas–Fort Worth home gets the upgrade it deserves, fast.

    The Magic Of A Floating Floor

    A floating floor is exactly what it sounds like: it “floats” over the subfloor instead of being glued or nailed down. This clever design is one of the biggest time-savers in the industry. Because the planks aren’t permanently attached, we can often install them over your existing hard-surface floor, skipping a messy tear-out step. This method also allows the floor to expand and contract naturally with DFW’s temperature shifts, which is great for long-term durability. Materials like luxury vinyl plank and laminate are perfect for this technique, letting us complete your project with incredible speed and precision.

    Click-Lock Vs. Glue-Down: A Speed Comparison

    When it comes to plank flooring, the joining system makes all the difference. Glue-down installation involves applying adhesive to the subfloor, placing each plank, and waiting for it to cure. It’s a strong bond, but it takes time. In contrast, click-lock flooring systems feature planks with interlocking edges that simply snap together. There’s no messy glue, no fumes, and no waiting for anything to dry. This mechanical lock is incredibly secure and allows our team to work much faster without compromising on quality. For busy homeowners, the efficiency of a click-lock system is a clear winner.

    Why Pre-Finished Floors Get You Back On Your Feet Faster

    A traditional hardwood installation can be delayed by the finishing process. After the wood is installed, it has to be sanded, stained, and sealed on-site, a multi-day process that creates dust and fumes. Pre-finished flooring completely eliminates this step. The finish is applied in a controlled factory environment, resulting in a harder, more durable surface. The best part? As soon as the last board is in place, the job is done. There’s no waiting for coats to dry or cure. This means you can walk on your new floors and move furniture back in almost immediately, making it perfect for a fast, hassle-free transformation.

    How To Prep Your DFW Home For A Quick Installation

    A fast, flawless flooring installation is a team effort. While our crew handles the heavy lifting and technical work, a little preparation on your end can make a huge difference. Taking a few simple steps before we arrive ensures our installers can get straight to work, keeping your project on schedule and minimizing disruption to your routine. Think of it as rolling out the red carpet for your new floors.

    When you know what to expect, the entire process feels smoother and more predictable. We’ve found that homeowners in the Dallas–Fort Worth area who tackle these small tasks beforehand are often the most satisfied with the speed and efficiency of their project. It all comes down to creating a clear, ready-to-go workspace. From moving furniture to making sure your new flooring is on-site, here’s exactly how you can help set the stage for a successful and speedy installation day.

    Clear The Room And Move Furniture

    The first step is to create a blank canvas for our installers. Before we arrive, please clear the room of all furniture, décor, and personal items. This includes everything from sofas and tables to lamps and rugs. A completely empty space allows our team to work safely and efficiently without having to navigate around obstacles. It also protects your belongings from dust and accidental damage. Taking the time to prepare the room helps us stick to the timeline and complete our installation services without any delays.

    Check Your Subfloor

    Your new floor is only as good as the foundation it sits on. While our team will handle the professional subfloor preparation, it’s helpful for you to do a quick visual check beforehand. Make sure the subfloor is clean, dry, and free of debris. If you’ve noticed any specific issues, like a soft spot, a persistent squeak, or an obviously uneven area, be sure to point it out during your in-home estimate. Addressing these potential problems early is key to preventing future gaps or buckling in your beautiful new floors. You can find more details on what to expect on our FAQs page.

    Coordinate Your Material Delivery

    To keep your project moving quickly, it’s important that your new flooring materials are at your home before our installation team arrives. Most flooring, especially natural wood and laminate, needs time to acclimate to your home’s temperature and humidity levels. This simple waiting period prevents the planks from expanding or contracting after they’re installed. Ensuring your materials are delivered on time and are ready to go means we can start working the moment we walk through the door. If you have any questions about your delivery schedule, feel free to contact us ahead of time.

    Pro Vs. DIY: Which Route Is Truly Faster?

    The idea of a DIY flooring project can be tempting. You get to learn a new skill, and there’s a certain satisfaction in seeing the finished product. But when your main goal is getting your home back to normal as quickly as possible, the DIY route often adds more time and stress to your plate than you bargained for. The real question isn’t just whether you can do it, but how much time you’re willing to spend on the learning curve, the inevitable mistakes, and the physical labor.

    For busy Dallas–Fort Worth homeowners, time is everything. A professional installation isn’t just about paying for labor; it’s about buying back your weekends and ensuring the job is done right the first time. A seasoned team works with an efficiency that only comes from years of experience, turning a week-long DIY struggle into a project that’s often finished in just a day or two. When you factor in the tools, prep work, and potential for error, hiring a pro is almost always the faster path to beautiful new floors.

    How Experience Saves You Days (or Weeks)

    Think about the difference between a home cook and a line cook. Both can make a meal, but one does it with incredible speed and precision born from repetition. It’s the same with flooring. While a DIYer spends hours watching tutorials and measuring a single room, an experienced installation team can lay flooring in a standard-sized room in a matter of hours. Most professional laminate or LVP projects are completed in one to three days, not one to three weekends. Our crew arrives with every tool needed, a clear plan for the layout, and the expertise to handle any quirks your home might have without missing a beat. That practiced efficiency is what gets your furniture back in place and your life back on track faster than you thought possible.

    Avoiding Costly Mistakes That Cause Delays

    Nothing slows down a project like a mistake you didn’t see coming. For first-time installers, these are almost guaranteed. It could be discovering your subfloor isn’t perfectly level, which can cause planks to buckle or separate over time. Or it might be leaving a gap that’s slightly too wide, which can break the locking mechanism and even void your flooring’s warranty. A simple measurement error can send you back to the store for more materials, adding another day to your timeline. Our team avoids these delays by getting the fundamentals right from the start. We meticulously prep your subfloor and plan the layout to ensure a flawless, durable finish, preventing the kinds of errors that turn a weekend project into a month-long headache.

    Find The Right Floor For Your Timeline And Life

    A fast installation gets your life back to normal quickly, but the right floor makes your life better for years to come. Choosing new flooring isn’t just about how it looks or how fast it goes in; it’s about finding a material that can handle your daily reality. From busy mornings to relaxing evenings, your floors are the foundation of your home. Let’s look at how to pick a floor that fits both your schedule and your lifestyle.

    Balancing Installation Speed With Durability

    It’s tempting to focus only on installation speed, but a floor that can’t stand up to daily life isn’t a great investment. The good news is you don’t have to choose one over the other. Modern materials like luxury vinyl plank (LVP) are popular for a reason: they install quickly and offer incredible resistance to moisture, scratches, and wear. We always guide homeowners in the Dallas–Fort Worth area toward options that provide this perfect balance. Our goal is to install a floor that not only meets your deadline but also looks and performs beautifully for the long haul, so you can feel confident in your choice.

    Matching Your Floor To Your Family’s Lifestyle

    Think about a typical day in your home. Are there kids dropping toys, pets skidding around corners, or frequent spills in the kitchen? Your lifestyle is the most important factor in choosing the right floor. While carpet is a cozy and quick choice for a quiet bedroom, it might not be the best fit for a high-traffic hallway. Materials like laminate flooring and engineered hardwood offer a great combination of style and strength for active areas. During your in-home estimate, we’ll talk through these exact scenarios to help you find a flooring solution that truly works for your family’s needs.

    Related Articles

    Frequently Asked Questions

    What is the fastest type of flooring to have installed? If your main goal is speed, luxury vinyl plank (LVP) and laminate are your best options. Both materials typically use a click-lock system that allows the planks to snap together quickly without any messy adhesives or long drying times. This creates a “floating floor” that can often be installed in just a day, getting your room back to normal in record time.

    Does a “fast” installation mean you cut corners on quality? Not at all. In fact, it’s the opposite. Our speed comes from meticulous preparation and years of experience, not from rushing the job. We focus on getting the subfloor perfectly level and planning the layout precisely so the actual installation is smooth and efficient. This professional approach prevents the common mistakes that cause delays and ensures your new floor is beautiful and built to last.

    Why is subfloor preparation so important for a speedy project? A healthy subfloor is the foundation for a flawless installation. If the surface underneath isn’t perfectly flat and clean, modern flooring like LVP and laminate won’t lock together correctly. This can cause gaps, squeaks, or buckling down the road. By taking the time to perfect the subfloor first, we ensure the installation process goes smoothly without any interruptions, which is the true key to a fast and successful project.

    How can I prepare my home to make the installation go as quickly as possible? A little prep work on your end makes a huge difference. The most helpful thing you can do is completely clear the room of all furniture, rugs, and personal items before our team arrives. This gives our installers a clean, open space to work safely and efficiently, allowing them to get straight to work without any delays.

    If I choose solid hardwood, what should I expect for a timeline? Solid hardwood is a beautiful choice, but it does require the most patience. The wood itself needs to acclimate, or adjust, to your home’s unique temperature and humidity for several days before installation can even begin. After it’s installed, the floor often needs to be sanded, stained, and sealed on-site. Because of these essential steps, you should plan for a longer project timeline compared to other flooring types.

  • Next Day Flooring Installation: What To Expect

    Next Day Flooring Installation: What To Expect

    When you hear “fast installation,” it’s natural to feel a bit skeptical. Does a quicker timeline mean cutting corners or sacrificing quality? It’s a fair question, and the answer is a firm no. Speed doesn’t come from rushing the job; it comes from expertise, preparation, and a highly efficient system. Our professional teams have spent years refining their craft to work skillfully without wasting a moment. We’ve eliminated the typical delays that plague other flooring projects. This guide breaks down how our next day flooring installation process prioritizes quality at every step, proving that you can have a flawless finish without the long wait.

    Key Takeaways

    • Efficiency is by Design: We make same-week installation a reality by bringing flooring samples directly to you, maintaining a stock of popular materials, and using our own expert installation teams.
    • Expertise is Our Accelerator: A fast installation doesn’t mean a rushed job. Our speed comes from the skill of our professional teams who focus on quality craftsmanship, from subfloor prep to the final plank.
    • Set the Stage for a Smooth Installation: Prepare for our team’s arrival by clearing rooms of smaller decor and personal items, and arrange a safe space for children and pets to stay during the project.

    How Does Next-Day Flooring Installation Work?

    You might be wondering how we can install beautiful new floors in your home so quickly without cutting corners. It’s a fair question, especially if you’ve heard stories about renovation projects that drag on for weeks. The answer isn’t a secret—it’s a system we’ve perfected to make the entire process as smooth and efficient as possible for homeowners across the Dallas–Fort Worth area. We’ve removed the typical hurdles that slow things down, like endless trips to showrooms or waiting weeks for materials to arrive.

    Our approach is built around respecting your time and your home. It starts with bringing a curated selection of high-quality flooring samples directly to you. This lets you see how different options look in your space, with your lighting and your furniture, which is a much better way to make a confident choice. We focus on keeping a robust inventory of our most popular and durable flooring styles in stock and ready to go. Our experienced installation teams are scheduled with precision, ensuring that once you’ve made your decision, we can get to work. This streamlined approach means you get the professional flooring installation services you want, without putting your life on hold.

    Our Process: From Consultation To Finished Floor

    We’ve simplified the entire flooring replacement journey into a few straightforward steps. It all begins when you schedule a free in-home estimate. One of our flooring experts will visit your home at a time that works for you, bringing a variety of samples right to your door. During this relaxed, no-pressure consultation, we’ll measure your rooms, assess the condition of your subfloor, and talk through the best options for your lifestyle and home. We’re there to answer all your questions and provide a clear, detailed quote on the spot. Once you’ve selected the perfect floor, we’ll get your installation day on the calendar, often for that very same week.

    Flooring Types Ready For Quick Installation

    Our ability to offer a fast turnaround hinges on keeping a great selection of popular and durable flooring in stock. We specialize in materials that are not only beautiful but also proven to perform well in busy Dallas–Fort Worth households. You can choose from a wide range of options ready for quick installation, including versatile and waterproof luxury vinyl plank (LVP/LVT), modern and scratch-resistant laminate, comfortable carpet for bedrooms, and timeless engineered hardwood. By focusing on these high-demand products, we ensure we have the materials on hand to start your project without waiting weeks for a special order to arrive.

    How We Make Same-Week Installation Possible

    Achieving a same-week installation comes down to preparation and expertise. Unlike companies that rely on third-party contractors with unpredictable schedules, we have our own dedicated installation teams. Our experienced professionals are masters of their craft, trained to work efficiently without ever compromising on the quality of their work. We manage our own schedule carefully, which means when we give you an installation date, we stick to it. By controlling the entire process—from the initial consultation to the final plank laid—we eliminate the communication gaps and bottlenecks that cause long delays with other flooring companies. It’s how we deliver a flawless finish, fast.

    Why Choose A Fast Flooring Installation?

    Let’s be honest—the thought of a flooring project often brings to mind images of dust, disruption, and a home turned upside down for weeks. But it doesn’t have to be that way. Choosing a fast installation means you get the beautiful new floors you want without putting your life on hold. For busy homeowners in the Dallas–Fort Worth area, an efficient process is more than a convenience; it’s a necessity.

    A quick turnaround allows you to move into a new house on schedule, prepare your home for sale without delay, or simply get back to your routine with minimal interruption. It’s about reclaiming your time and your space. When you work with a team that specializes in speed and precision, you get the best of both worlds: a stunning home transformation completed on a timeline that respects your schedule.

    Save Time And Minimize Disruption In Your Home

    A traditional flooring project can stretch out, leaving rooms unusable and your daily life in limbo. With a fast installation, you can enjoy your new floors almost immediately. Instead of navigating a construction zone for days on end, you can have your living room, bedroom, or entire home updated and ready for use in a fraction of the time. This is especially helpful when you’re on a tight deadline, like moving into a new home or getting ready to host guests. Our goal is to make the entire process as smooth as possible, minimizing the mess and disruption so you can get back to normal life on your beautiful new floors.

    Get Professional Quality, Without The Long Wait

    One of the biggest questions we hear is, “Does a fast installation mean cutting corners?” The answer is a firm no. Speed doesn’t come from rushing; it comes from expertise. Our efficient timeline is possible because our professional installation teams have the experience to work skillfully and effectively. We’ve refined our process to eliminate wasted time without ever compromising on the quality of our work. From proper subfloor preparation to the final plank or carpet installation, every step is handled with precision and care. We believe that great craftsmanship can and should be delivered efficiently.

    Common Myths About Quick Installations

    Many people assume that a quick flooring project must sacrifice quality, but that simply isn’t true. A well-organized, experienced team can deliver exceptional results on a tight schedule. The key is a streamlined process and skilled installers who know exactly what they’re doing. Another myth is that a faster timeline involves hidden trade-offs. We believe in being transparent from the start. During your in-home estimate, we’ll walk you through the entire plan and answer any questions you have. You can find more answers to common questions on our FAQs page. Our focus is on providing a high-value service that combines durability, beauty, and convenience.

    How To Prepare For Your Flooring Installation

    A smooth installation day starts with a little preparation. Taking a few simple steps beforehand helps our team work efficiently and ensures your home is ready for its beautiful new floors. Think of it as setting the stage for a quick and seamless transformation. From clearing the room to planning for your family’s comfort, here’s everything you need to know to get ready for the big day.

    Getting Your Rooms Ready For The Big Day

    To help us get straight to work, please clear out any smaller items and personal belongings from the rooms getting new floors. This includes things like lamps, plants, toys, and decor. It’s also a good idea to empty out closets and remove any fragile items, like artwork or heirlooms, from the walls and shelves. Don’t worry about the heavy lifting—our installation team will handle moving standard furniture like sofas, tables, and beds. A clear space allows us to work safely and efficiently, getting your project done on schedule.

    Understanding Material Availability

    The type of flooring you choose plays a big role in the installation timeline. Materials like luxury vinyl plank (LVP) and carpet are often readily available and can be installed very quickly. Other options, like solid hardwood, might require more time for acclimation to your home’s environment before installation can begin. During your free in-home estimate, we’ll discuss which flooring solutions fit your timeline and home’s needs. We provide clear, upfront estimates so you know exactly what to expect from start to finish, with no surprises.

    What To Know About Your Subfloor

    The subfloor is the foundation directly underneath your flooring. A healthy subfloor is flat, level, and solid—the perfect base for a long-lasting installation. Sometimes, when we remove the old flooring, we find the subfloor needs a little attention. Issues like water damage or uneven spots must be addressed before we can lay the new material. If the floor underneath needs fixing or leveling, it can add time to the project. Our team always performs a thorough evaluation of your space to catch potential issues early on.

    A Simple Plan For Kids And Pets

    Flooring installation can be exciting, but it also involves some noise and dust. To keep your little ones and furry friends safe and comfortable, it’s best to have a plan for installation day. You might consider arranging a playdate, a trip to a park, or designating a separate, closed-off area of the house for them to hang out in. This ensures they stay clear of the work area and aren’t stressed by the activity. Keeping everyone comfortable helps our team focus on delivering the high-quality results you expect.

    What To Expect On Installation Day

    The big day is here! After all the planning and preparation, it’s exciting to see your vision come to life. We know that having a crew in your home can feel disruptive, which is why our process is designed to be as smooth and efficient as possible. Our goal is to get you back to your normal routine on beautiful new floors with minimal fuss. Here’s a clear breakdown of what the day will look like from start to finish.

    A Step-by-Step Installation Timeline

    Our professional installation team will arrive on schedule, ready to get to work. We’ll start with a quick walkthrough to confirm the project details and answer any last-minute questions you have. From there, we’ll carefully move your furniture out of the way. Our crew will then handle the removal and disposal of your old flooring, preparing the subfloor for a flawless installation. Once the new floors are in, we conduct a thorough cleanup, move your furniture back, and do a final walkthrough with you to ensure everything looks perfect. Our entire installation process is built around respect for your home and your time.

    Our Commitment To Quality Craftsmanship

    A fast installation should never mean cutting corners. Our reputation is built on the quality of our work, and we take that seriously. Each member of our team is an experienced professional who understands the nuances of different flooring materials, from solid hardwood to luxury vinyl plank. We focus on the details that ensure long-term durability—proper subfloor prep, precise cuts, and secure fittings. We believe great craftsmanship is about more than just how the floor looks the day we leave; it’s about how it performs for years to come. Our company philosophy is centered on delivering results you can trust.

    Caring For Your New Floors Immediately After

    Once your beautiful new floors are installed, a little care in the first 24-48 hours goes a long way. We recommend letting the flooring settle before placing heavy furniture and avoiding any moisture or harsh cleaning agents right away. Depending on the material, there might be specific guidelines for curing or acclimating. Before our team leaves, we’ll give you clear, simple instructions tailored to your specific flooring type. And if you have any questions after we’re gone, we’re always just a phone call away. We want you to feel confident and happy with your investment from day one.

    Related Articles

    Frequently Asked Questions

    Does a fast installation mean I have to compromise on quality? Not at all. Our speed comes from efficiency, not from rushing the job. We’ve built a system that removes common delays, like waiting for materials or coordinating with outside contractors. Our dedicated, in-house teams are seasoned professionals who follow a precise process for every installation, from subfloor preparation to the final details. This allows us to deliver high-quality craftsmanship on a timeline that respects your schedule.

    Do I need to move all my heavy furniture myself before you arrive? You can leave the heavy lifting to us. Our installation crew will handle moving standard furniture like sofas, beds, and tables out of the room and putting it back once the new floors are in. We just ask that you clear away smaller, personal items like decor, lamps, plants, and anything fragile from the area beforehand. This helps our team get straight to work safely and efficiently.

    What happens if you discover an issue with my subfloor? A solid subfloor is the key to a long-lasting floor, so we always check its condition. If we remove your old flooring and find an issue like unevenness or damage, we’ll stop and discuss the situation with you immediately. We’ll explain the problem clearly and walk you through the best options to fix it before we proceed. Transparency is important to us, so you’ll always be informed.

    How can I be sure I’m choosing the right floor during a single in-home visit? Making a decision in your own home is actually one of the best ways to choose with confidence. Seeing samples with your own lighting, wall colors, and furniture is much more effective than guessing in a showroom. Our flooring expert is there to offer guidance and answer questions, not to pressure you. We bring a curated selection of our most durable and popular styles, making the choice feel focused and straightforward.

    What makes your installation teams different from those at a big home improvement store? The main difference is that our installers are our own dedicated employees, not third-party contractors. This means we have full control over scheduling, training, and quality standards. Our teams are accountable to us and, more importantly, to you. This direct relationship eliminates the communication gaps and unpredictable timelines that can happen when work is subcontracted out, ensuring a smoother process and a more reliable result.

  • Solid Hardwood Floor Installation: A Step-by-Step Look

    Solid Hardwood Floor Installation: A Step-by-Step Look

    In North Texas, our homes deal with unique challenges, from dramatic humidity swings to active clay soil that can cause foundations to shift. These environmental factors have a direct impact on natural materials like wood, making a professional solid hardwood floor installation especially critical. An expert approach accounts for our local climate by ensuring proper acclimation, using the right moisture barriers, and leaving adequate room for the wood to expand and contract. This guide explains the specific techniques required for a successful installation in the Dallas-Fort Worth area, ensuring your new floors not only look incredible but are also built to withstand our region’s demands.

    Key Takeaways

    • A Great Floor Starts with a Great Foundation: The most critical steps are acclimating the wood to your home’s unique climate and ensuring the subfloor is perfectly flat to prevent future issues like gaps or squeaks.
    • Professional Technique Prevents Future Headaches: Small details, like using the right L-cleat nails instead of staples and leaving a proper expansion gap, are what keep your floors quiet, stable, and beautiful for years.
    • Match Your Floor to Your Life, Not Just Your Style: Consider your family’s foot traffic, our North Texas climate, and your timeline to decide on the right wood species and whether prefinished or unfinished planks are the best fit.

    What You’ll Need For Hardwood Installation

    Installing solid hardwood floors correctly requires more than just the wood planks themselves. A professional job depends on having a specific set of tools and materials ready to go. If you’re curious about what it takes to get that seamless, long-lasting finish, here’s a look at the equipment our team uses for every solid wood flooring project in the Dallas–Fort Worth area. It’s this combination of specialized gear and expertise that ensures your floors not only look beautiful but also stand the test of time.

    Essential Power Tools

    Power tools are the heavy lifters of any flooring installation. To get clean cuts and secure planks, you’ll need a miter saw for precise angles, especially for pieces that meet walls and door frames. A table saw is also incredibly helpful for making long, straight cuts, known as rip cuts, for the planks that run parallel to the walls. Most importantly, a pneumatic flooring nailer and an air compressor are non-negotiable. This duo drives the fasteners into the wood at the perfect angle and depth without damaging the planks, which is something a standard hammer and nails simply can’t do.

    Must-Have Hand Tools And Accessories

    Beyond the big power tools, a collection of hand tools and accessories is just as important for a quality installation. You’ll need a tape measure, chalk line, and jamb saw for trimming door casings. A professional installer will almost always use a flooring nailer that uses L-cleat nails instead of a stapler. While staples can work for some softer woods, L-cleats provide a much stronger hold, which is critical for the harder wood species we often install in Dallas-area homes. This small detail makes a huge difference in preventing squeaks and movement down the road.

    Key Materials And Supplies

    The star of the show is, of course, the hardwood itself. For a standard 3/4-inch solid hardwood installation, the go-to fasteners are 2-inch, 16-gauge L-cleat nails. Using the right size and type of nail ensures the planks are securely fastened to the subfloor without splitting the tongue. You’ll also need underlayment, like roofing felt or rosin paper, which acts as a moisture vapor barrier and helps reduce friction between the subfloor and the new hardwood. Having all the right flooring materials on hand before starting is key to a smooth and efficient installation process.

    How To Prep Your Room For New Floors

    A beautiful hardwood floor starts long before the first plank is nailed down. Proper preparation is the single most important factor in getting a durable, long-lasting result you’ll love for years. Skipping these steps can lead to frustrating issues like gaps, squeaks, and buckling down the road. By taking the time to get the room ready, you’re setting the stage for a smooth installation and a flawless finish. Here’s a look at the three key prep stages our team focuses on for every project.

    Acclimate Your Hardwood Planks

    Solid hardwood is a natural material, which means it breathes—expanding and contracting with changes in temperature and humidity. That’s why acclimation is a non-negotiable first step. It simply means letting the new wood planks sit inside the room where they’ll be installed for several days before we begin. This gives the wood time to adjust to your home’s unique climate. Rushing this process is a common cause of gapping or buckling later on. Properly acclimated solid wood flooring will be stable and secure, ensuring it performs beautifully for decades in your Dallas-Fort Worth home.

    Inspect And Prepare The Subfloor

    Your new hardwood is only as good as the foundation it rests on. Before any planks are laid, the subfloor must be clean, dry, and perfectly flat. Even minor bumps or dips can create problems, leading to hollow spots, annoying squeaks, and uneven wear over time. Preparing the subfloor can be one of the most challenging parts of the job, often requiring grinding down high spots or using a leveling compound to fill in low areas. Our hands-on industry experience has taught us that a perfectly prepped subfloor is the secret to a quiet, solid, and professional-feeling floor that stands the test of time.

    Plan Your Room’s Layout

    Once the wood is acclimated and the subfloor is ready, it’s time to plan the layout. We don’t just start laying boards from one corner. Instead, we open several boxes at once and arrange the planks on the floor. This process, known as racking, allows us to create a visually appealing and natural pattern. We mix boards of different lengths, colors, and grain variations to avoid awkward clusters or repetitive patterns. This careful planning ensures the final floor looks balanced and intentional. It’s a critical step in our installation services that transforms a simple collection of planks into a cohesive, beautiful surface that complements your entire room.

    Prefinished Vs. Unfinished: Which Hardwood Is Right For You?

    One of the biggest decisions you’ll make when choosing solid hardwood is whether to go with prefinished or unfinished planks. Prefinished hardwood arrives from the factory already sanded, stained, and sealed with multiple protective coats. Unfinished hardwood is raw wood that gets installed first, then sanded and finished on-site. While both result in a beautiful floor, the installation process, timeline, and final look are quite different. Understanding these differences is key to selecting the right option for your home, your timeline, and your long-term satisfaction.

    For most homeowners in the Dallas–Fort Worth area, the choice comes down to balancing convenience with customization. Let’s break down the pros and cons of each so you can feel confident in your decision.

    The Pros And Cons Of Prefinished Hardwood

    Prefinished hardwood is the go-to choice for speed and durability. Because all the finishing work is done in a controlled factory environment, the final product has an incredibly tough, even coating that’s often stronger than what can be applied in a home. This means your floors are ready to walk on almost immediately after installation, minimizing disruption to your life. The process is also much cleaner, with no dust from sanding or fumes from sealants. The main trade-off is that prefinished boards have a beveled edge, creating subtle grooves between planks. While this is a stylistic choice for some, it’s a point to consider. Spot repairs can also be more challenging than with a site-finished floor.

    The Pros And Cons Of Unfinished Hardwood

    If you’re looking for a completely custom look, unfinished hardwood offers unmatched flexibility. You can choose a unique stain to perfectly match your cabinetry or create a one-of-a-kind color. Once installed, the entire floor is sanded smooth, creating a seamless, flat surface from wall to wall. This method is also ideal for matching existing hardwood in other parts of your home. However, the process is significantly more involved. It requires several days for sanding, staining, and applying multiple coats of finish, with drying time needed between each step. The sanding process creates a lot of dust, and the fumes from the finish can be strong, requiring you to stay out of the area.

    How To Decide What’s Best For Your Home

    Your final choice depends on your priorities. If your main goal is to get beautiful, durable floors installed with minimal downtime, prefinished solid wood flooring is almost always the better option. It’s the reason we can deliver high-quality results so quickly. If, however, you need a specific custom color or a perfectly flat, seamless surface, unfinished hardwood might be the right path, as long as you can accommodate the longer project timeline. We can help you weigh these factors during an in-home estimate, where we’ll assess your subfloor, discuss your lifestyle, and recommend a solution that truly fits your home.

    A Step-by-Step Guide To Installing Hardwood Floors

    Installing hardwood floors is a craft that blends precision with patience. While every room has its unique challenges, the fundamental steps for a professional installation remain the same. Understanding what goes into a quality job can help you appreciate the final result, whether you’re watching an expert at work or just curious about the process. From the first board to the final piece of trim, each step builds on the last to create a beautiful, durable surface that will last for decades. Here’s a look at how the pros transform a prepared subfloor into a stunning hardwood masterpiece.

    Lay The Critical First Row

    The first row of hardwood is the foundation for the entire floor. If it isn’t perfectly straight, every subsequent row will be slightly off, creating noticeable gaps and crooked lines. That’s why installers always begin along an exterior wall, which is typically the straightest line in the room. A chalk line is snapped to create a flawless guide. For extra stability, a “glue-assist” method is often used for the first few rows. This involves applying a flexible, polyurethane-based adhesive to the subfloor before nailing the boards, giving these crucial starter rows an exceptionally strong bond that prevents any shifting over time.

    Continue Installing Subsequent Rows

    With the first row securely in place, the rest of the floor can be laid. Installers work from left to right, fitting the tongue of each new board into the groove of the previous one. It’s crucial to install the planks perpendicular to the floor joists (the support beams under the subfloor). Laying the boards across the joists provides the structural support needed to prevent the floor from sagging or developing a “belly effect” down the line. This is one of those non-negotiable rules of a quality hardwood floor installation that ensures your floor remains flat and stable for years to come.

    Master Your Nailing Technique

    Securing the planks correctly is what keeps a hardwood floor tight and quiet. While some might use staplers, professional installers almost always use a flooring nailer with L-cleat nails. Cleats provide a much stronger hold, pulling the board tightly against both the subfloor and the adjoining plank. This is especially important for harder woods like hickory, which can be dense enough to jam a stapler. The right technique ensures each board is fastened securely without damaging the wood, creating a seamless surface that can withstand daily foot traffic and seasonal changes without creaking or separating.

    Add The Finishing Touches And Trim

    The final steps are what give the room a polished, complete look. The last row of boards often needs to be cut to a specific width to fit against the wall. Once it’s in place, baseboards and quarter-round molding are installed to cover the expansion gap left around the room’s perimeter. This gap is essential, as it allows the wood to expand and contract naturally with changes in humidity. Finally, transition strips are fitted in doorways to create a smooth connection to the flooring in the next room. When it’s all done, you’re left with a beautiful floor that truly transforms the space.

    How To Handle Common Installation Challenges

    Even with careful planning, installing solid hardwood floors comes with a few tricky spots. From uneven subfloors to intricate cuts, these hurdles can test your patience. But knowing what to expect and how to approach these common issues is half the battle. Getting these details right is what separates a decent floor from a stunning one that lasts for decades. It’s all about taking your time, using the right techniques, and understanding why each step matters for the final result.

    Working With An Uneven Subfloor

    Many installers will tell you that preparing the subfloor is often the most challenging part of the job. An uneven surface can cause your beautiful new hardwood to squeak, shift, or develop gaps over time. In the Dallas-Fort Worth area, foundation settling can create subtle dips and high spots that need to be addressed before a single plank is laid. The goal is a perfectly flat and level foundation. This usually involves grinding down high areas and filling low spots with a leveling compound. It’s a dusty, meticulous process, but it’s absolutely essential for a professional-quality solid wood floor installation.

    Making Tricky Cuts Around Doorways

    Navigating around door casings, vents, and built-ins requires precision. To keep everything looking clean and aligned, it’s best to start your first row of flooring along a straight exterior wall. You can snap a chalk line to ensure that initial row is perfectly straight, as it will guide the rest of the installation. For doorways, the cleanest look comes from undercutting the door jambs. This involves using a small saw to trim the bottom of the casing, allowing you to slide the flooring plank underneath instead of cutting the plank around it. This technique creates a seamless, built-in appearance that hides the cut edge of the wood.

    Preventing Gaps And Buckling

    Solid hardwood is a natural material that breathes. It expands and contracts with changes in temperature and humidity—a constant factor in North Texas. To account for this movement, you need to leave a small expansion gap around the perimeter of the room. A good rule of thumb is to make the gap as wide as your flooring is thick. This space gives the wood room to swell in humid months without buckling or pushing against the walls. Don’t worry, this gap won’t be visible. It gets completely covered by baseboards and shoe molding, giving you a polished look while allowing your floor to move naturally.

    Solving Moisture-Related Problems

    Moisture is the biggest enemy of a hardwood floor. That’s why it’s so important to let the wood acclimate to your home’s environment before installation. This process allows the moisture content of the planks to adjust to the “normal living conditions” inside your house, preventing shrinking or swelling after they’re nailed down. We also recommend installing a moisture barrier, especially over concrete slab foundations common in DFW homes. This barrier blocks moisture from wicking up from the subfloor and damaging the wood from below. Skipping these steps can lead to frustrating issues like cupping or warping down the road, so proper moisture management is key to a long-lasting floor.

    How To Choose The Perfect Hardwood For Your Home

    Selecting the right hardwood floor goes far beyond picking a color you like. It’s about choosing a material that will stand up to your daily life and look beautiful for years to come. Think of it as a long-term investment in your home’s comfort and character. The perfect hardwood is one that complements your decor, handles your household’s activity level, and suits the unique climate here in the Dallas–Fort Worth area.

    Making the right choice from the start prevents future headaches like premature wear, scratches, or warping. To find the best fit, you need to consider three key factors: the wood species and its durability, how the wood will react to our local climate, and how it aligns with your family’s lifestyle. By thinking through these elements, you can confidently select a solid wood floor that you’ll love from day one. Let’s walk through what you need to know to make a smart decision for your home.

    Match The Wood Species To Your Foot Traffic

    The first step is to be realistic about how you use your space. A floor in a busy entryway or kitchen needs to be much tougher than one in a quiet guest bedroom. Different wood species have different levels of hardness, which directly impacts how well they resist dents and scratches. For the most active areas of your home, you’ll want a durable wood that can handle the constant movement.

    For high-traffic zones, hardwood experts recommend species like oak and maple for their resilience. They are hard enough to withstand daily wear from kids, pets, and frequent guests. Softer woods, like walnut, offer a rich, luxurious look but are better suited for moderate-traffic areas like a home office or formal dining room where they are less likely to get dented.

    Consider Your Home’s Climate

    Wood is a natural material that expands and contracts with changes in humidity and temperature. Here in North Texas, we see our fair share of humid summers and dry winters, and your flooring will react to those shifts. This is why choosing a wood that can handle our climate is so important for preventing issues like gapping or buckling down the road.

    In climates with significant humidity swings, solid hardwood is often recommended because it can adapt to its environment. Proper acclimation—letting the wood planks sit in your home for several days before installation—is a critical step that allows the material to adjust to your home’s specific temperature and moisture levels. This ensures a stable, long-lasting fit.

    Find A Floor That Fits Your Lifestyle

    Ultimately, the best hardwood floor is one that works for you, not the other way around. Your lifestyle should be a major factor in your decision. Do you have large dogs whose claws might scratch a softer finish? Are young children part of the picture, making spills and scuffs a daily reality? Or do you live in a quiet, adults-only household where a more delicate wood would be perfectly fine?

    A floor that truly fits your home considers everything from the local climate to your subfloor type. Also, think about maintenance. Some finishes are easier to touch up than others, while certain wood grains and colors are better at hiding dust and pet hair. Being honest about your daily routines and how much upkeep you’re willing to do will help you choose a floor that remains a source of pride, not stress.

    Caring For Your New Hardwood Floors

    Your beautiful new hardwood floors are installed, and your home feels completely transformed. Now, the goal is to keep them looking just as good as they do today. Proper care doesn’t have to be complicated, but it does require a little know-how. By following a few simple guidelines, you can protect your investment and ensure your floors stay stunning for years to come. Think of it less as a list of chores and more as a routine to preserve the warmth and character you just added to your home.

    The right maintenance plan starts from day one and continues with a consistent cleaning schedule. It’s also about knowing what not to do—like avoiding harsh chemicals or excessive water, which can damage the wood’s finish and integrity. We’ll walk through everything you need to know, from those first crucial hours after installation to the best long-term care strategies. With the right approach, your solid wood flooring will not only last but will also develop a rich patina over time, adding even more value and personality to your space.

    What To Do Immediately After Installation

    The first 24 to 48 hours are critical for your new floors. Although the finish is durable, it needs time to fully cure and harden. Give it that time by waiting at least a full day before walking on it with anything other than socks. Hold off on moving heavy furniture back into the room for as long as the manufacturer recommends—usually a few days. When you do bring furniture in, don’t drag it. Lift and place each piece carefully, and apply felt pads to the bottom of all chair legs, tables, and sofas. This simple step is your best defense against scratches and gouges. Also, keep your pets’ nails trimmed to prevent accidental scratches as they get used to the new surface.

    Your Long-Term Maintenance Plan

    One of the best things about solid hardwood is its longevity. Unlike other flooring types, it can be sanded and refinished multiple times throughout its life, allowing you to erase years of wear and tear or even change the stain color for a fresh look. This makes it a truly sustainable and adaptable choice for your home. To protect this long-term value, it’s important to maintain the manufacturer’s warranty. Many warranties specify that the floors must be installed by a certified professional. A proper professional installation not only ensures your floors perform as they should but also keeps your warranty intact, giving you peace of mind.

    The Best Cleaning Products And Methods

    When it comes to cleaning, less is more. For daily upkeep, a quick sweep with a soft-bristle broom or a dry microfiber dust mop is all you need to pick up dirt and dust that can scratch the finish. For a deeper clean, use a pH-neutral cleaner specifically designed for hardwood floors. The key is to avoid using too much water. Never wet-mop your hardwood floors. Instead, lightly mist a small section of the floor with the cleaner and immediately wipe it with a microfiber mop. According to the National Wood Flooring Association, you should avoid using vinegar, ammonia, or oil-based soaps, as these can dull or damage the finish over time.

    Know When To Call A Professional Installer

    There’s a certain satisfaction that comes from completing a home project yourself. But when it comes to installing solid hardwood floors, it’s important to be realistic about the skill, tools, and time required. This isn’t just a cosmetic update; it’s a major structural addition to your home. An improper installation can lead to costly repairs, wasted materials, and a floor that never quite looks or feels right.

    Deciding to hire a professional isn’t about giving up—it’s about protecting your investment and ensuring the final result is something you’ll be proud of for decades. For many Dallas–Fort Worth homeowners, the peace of mind that comes with an expert installation is well worth it. A pro handles the complexities so you can simply enjoy your beautiful new floors without the stress.

    Signs Your Project Requires An Expert

    So, how do you know when to step back and let an expert take over? Certain signs make the decision clear. First, consider the material itself. Solid hardwood flooring is notoriously tricky to install correctly, as each plank must be perfectly placed and secured to prevent gaps and buckling down the road.

    Next, take a hard look at your space. If your room has irregular angles, multiple doorways, or needs to transition smoothly into another flooring type like tile or carpet, the complexity increases exponentially. Finally, be honest about your experience. If this is your first major flooring project, the learning curve can be steep and unforgiving. Mistakes with hardwood are often difficult and expensive to fix.

    When To Save Time And Ensure Quality

    Beyond the obvious challenges, hiring a professional is often the best way to guarantee a beautiful, long-lasting result. A flawless finish starts with a perfect foundation, and many DIYers find that preparing the subfloor is the most difficult part of the job. A professional installer has the specialized equipment and expertise to ensure your subfloor is perfectly clean, flat, and dry—preventing future squeaks, gaps, and warping.

    A professional installation is a careful process that combines good planning with precise techniques to create a durable, stunning floor. It saves you from the frustration of unexpected problems, the cost of wasted materials, and the stress of a project that takes weeks instead of days. When you want the job done right and right away, calling an expert is the smartest move.

    Related Articles

    Frequently Asked Questions

    Why does my new hardwood need to sit in my house for a few days before you install it? Think of solid wood as a natural material that breathes. It needs time to adjust to your home’s specific temperature and humidity before it gets nailed down. This process, called acclimation, is one of the most important steps for preventing gaps or buckling later on. By letting the wood get comfortable in its new environment first, we ensure it will remain stable and secure for years to come.

    What is the most common cause of problems with a new hardwood floor? Almost every major issue—from squeaks and hollow spots to gaps between boards—can be traced back to the subfloor. Your new hardwood is only as strong as the foundation it sits on. That’s why we spend so much time making sure the subfloor is perfectly clean, dry, and flat before we lay the first plank. Skipping this meticulous prep work is the single biggest mistake you can make.

    Will my new floors have little grooves between the planks? That depends on whether you choose prefinished or unfinished hardwood. Prefinished planks are sanded and sealed at the factory and have a beveled edge, which creates those subtle lines. Unfinished wood is installed raw and then sanded on-site, resulting in a completely flat, seamless surface. For most homeowners who want a durable floor installed quickly, prefinished is the ideal choice.

    How can I keep my new floors from getting scratched? The best defense is a good offense. The easiest way to prevent scratches is to place felt pads on the bottom of all your furniture—chairs, tables, sofas, everything. It’s also a great idea to use doormats at every entrance to catch the dirt and grit that can act like sandpaper under your shoes. Keeping your pets’ nails trimmed will also make a huge difference in protecting the finish.

    Can I install solid hardwood in my kitchen or bathroom? We strongly advise against installing solid hardwood in any area with high moisture, like a full bathroom or a basement. Water is the biggest enemy of a wood floor and can cause it to warp, cup, or swell. While a properly sealed hardwood floor can handle the occasional kitchen spill if it’s wiped up quickly, it’s not designed for rooms that are consistently damp or prone to puddles.

  • Hiring Carpet Installers: A Step-by-Step Guide

    Hiring Carpet Installers: A Step-by-Step Guide

    The most important parts of a great carpet installation are the ones you’ll never see. While you’ll notice the perfect color and soft feel underfoot, the real quality lies in the details beneath the surface. It’s in the properly prepared subfloor, the high-quality padding, and the expertly stretched material that prevents future wrinkles. These are the technical skills that separate a quick fix from a long-term flooring solution. True professional carpet installers are masters of these unseen details, ensuring your floor is not only beautiful on day one but also durable for years to come. This guide will show you what defines a quality installation so you can hire with confidence.

    Key Takeaways

    • Look for Proof, Not Just a Price: The best installers stand on their reputation. Before hiring, verify their license and insurance, read recent customer reviews, and ask about their labor warranty to ensure you’re choosing a qualified professional who stands behind their work.
    • A Pro Installation is a Full-Service Project: A quality installation goes far beyond laying carpet. Professionals handle everything from removing old flooring and prepping the subfloor to the final cleanup, which is crucial for a durable, flawless finish that DIY projects often miss.
    • Compare Itemized Quotes to Make a Confident Choice: Getting at least three detailed estimates is essential. This allows you to compare not just the final cost but the specific services included, helping you spot red flags and choose a transparent partner who offers the best long-term value.

    What Makes A Great Carpet Installer?

    Choosing the right carpet installer is just as important as picking the perfect carpet. A beautiful, high-quality carpet can be ruined by a poor installation, leading to wrinkles, visible seams, and a shorter lifespan. A great installer, on the other hand, ensures your new floor looks flawless and performs well for years to come. They have the right tools, a deep understanding of how different materials behave, and the precision to handle tricky layouts. So, what separates the pros from the rest? It comes down to a few key qualities that you can look for before you hire.

    Experience And Credentials

    An installer’s experience is your best indicator of quality. Look for professionals with a proven track record and several years in the business. Seasoned installers have seen it all—uneven subfloors, complex room shapes, and challenging transitions to other flooring types. This expertise means they can anticipate problems and solve them correctly, ensuring a smooth, durable finish. Don’t be afraid to ask about their background or if they have any certifications. While not always required, credentials from organizations like the Certified Flooring Installers Association (CFI) show a commitment to industry standards and ongoing education. True professionals are proud of their history and happy to share it.

    Licensing And Insurance

    This is non-negotiable. Before you let any contractor work in your home, confirm they are properly licensed and insured. Licensing requirements vary by location, but insurance is a must-have everywhere. A reputable installer will carry both general liability insurance and workers’ compensation. This protects you from any financial responsibility if an accident happens on your property, whether it’s damage to your home or an injury to a crew member. Asking for proof of insurance isn’t rude; it’s a smart and necessary step to protect your investment and give you peace of mind throughout the project.

    Customer Reviews And Past Work

    What past clients say is one of the most reliable ways to gauge an installer’s quality and professionalism. Look for recent reviews on trusted sites and pay attention to the details. Do customers mention the installer’s punctuality, communication, and cleanliness? Did they do a good job of explaining the process? A great installer should also have a portfolio of their work. Ask to see photos of completed projects, especially ones similar to yours. This gives you a clear idea of their craftsmanship and helps you visualize how your own floors will look.

    Warranties And Guarantees

    A confident installer will always stand behind their work. Be sure to ask about any warranties or guarantees they offer on their labor. This is separate from the manufacturer’s warranty, which covers defects in the carpet itself. An installation warranty covers the quality of the workmanship. If seams start to show or the carpet begins to stretch and wrinkle prematurely, a labor guarantee ensures the installer will come back and fix it. This commitment shows they value their reputation and are dedicated to delivering a high-quality result that lasts.

    What Services Do Installers Offer?

    When you hire a professional carpet installer, you’re getting more than just someone to lay down your new flooring. A great installer offers a complete, end-to-end service that takes the entire project off your plate. From the initial tear-out to the final vacuum, they handle the details so you don’t have to. This is especially important because what’s underneath your carpet is just as critical as the carpet itself.

    A full-service installation team manages every step, ensuring a smooth process and a durable, beautiful result. They have the right tools, the right experience, and the efficiency that comes from doing this work every single day. Instead of you coordinating multiple contractors or spending a weekend wrestling with old carpet and a new roll, a professional team handles it all. This comprehensive approach is what separates a quick-fix from a long-term flooring investment. Before you hire, make sure you understand the full scope of services an installer offers to ensure there are no surprises.

    Residential Vs. Commercial Projects

    While both involve putting carpet on a floor, residential and commercial installations are two different worlds. Residential projects, like the one you’re planning for your home, focus on comfort, appearance, and creating a cozy living space. Commercial jobs, on the other hand, are all about durability and withstanding heavy foot traffic in places like offices or retail stores. The materials, adhesives, and installation techniques vary significantly between the two. The Carpet and Rug Institute even has separate installation standards for each. For your home, you want an installer who specializes in residential projects and understands how to deliver a finish that feels and looks great for years to come.

    Old Carpet Removal And Disposal

    Let’s be honest: tearing out old carpet is a dusty, back-breaking job. Most professional installers offer removal and disposal as part of their service, and it’s an option worth taking. A pro team can remove your old carpet, padding, and tack strips quickly and efficiently without damaging your baseboards or walls. They also know how to properly dispose of the old materials, saving you a trip to the dump. Hiring a professional for removal not only saves you time and a major mess but also ensures the subfloor is properly prepped for what comes next.

    Subfloor Prep And Repairs

    What lies beneath your carpet is the foundation for your entire floor. After the old carpet is gone, a good installer will thoroughly inspect your subfloor for any issues. This includes looking for water damage, loose panels, uneven spots, or squeaks that need to be addressed. Ignoring these problems can lead to a lumpy, noisy, or prematurely worn-out carpet. Professional installers can handle most minor subfloor repairs on the spot, ensuring your new carpet has a smooth, solid, and stable base. This crucial step is one of the biggest reasons to hire an expert.

    Specialty Installations

    Not all carpet jobs are a simple square room. Installing carpet on stairs, creating seamless transitions to other flooring types, or working with patterned carpets requires a high level of skill and precision. These specialty installations demand specific techniques and specialized tools to get the job done right. An experienced installer knows how to properly stretch carpet on stairs for safety and longevity, match patterns perfectly across seams, and handle delicate materials like wool. If your project involves anything beyond a basic room, it’s essential to hire an installer with proven experience in that type of work.

    How Much Should Carpet Installation Cost?

    Let’s talk numbers. When you’re budgeting for new carpet, the installation cost is a major piece of the puzzle. While every project is unique, you can generally expect the labor for installation and removal of old carpet to fall somewhere between $1 and $5 per square foot. For an average-sized room, this often translates to a total cost of a few hundred to over a thousand dollars.

    Of course, this is just a ballpark figure. The final price tag depends on the specifics of your home and the scope of the work. A straightforward job in a small, empty square room will cost less than a complex installation in a large, furnished space with tricky angles. The key is to understand what factors contribute to the cost so you can get a clear, accurate estimate that fits your budget without any last-minute surprises. A professional installer will walk you through every line item, ensuring you know exactly where your money is going.

    What Determines The Final Price?

    The quote you receive from an installer isn’t just an arbitrary number. It’s a calculation based on several key factors specific to your project. First, the size and shape of the room play a big role; larger rooms or those with unusual layouts require more material and labor. The type of carpet you choose also matters, as some materials are more challenging to work with. Don’t forget about the prep work—if your old carpet needs to be torn out and hauled away, that will be part of the cost. And if your subfloor has any damage that needs fixing, that has to be addressed before new flooring can go down. Finally, moving heavy furniture is a service most installers offer, but it will add to the final bill.

    How To Get An Accurate Quote

    To feel confident in your decision, you need a clear and detailed quote. The best way to start is by getting estimates from at least three reputable installers. This lets you compare not just the price, but the scope of services and the professionalism of each company. When you receive a quote, make sure it’s itemized. It should clearly break down the costs for materials, labor, carpet removal, furniture moving, and any necessary subfloor repairs. This transparency is a hallmark of a trustworthy professional and helps you avoid hidden fees. An in-home estimate is the only way to get a truly accurate number, as it allows the installer to see the space firsthand.

    Understanding Payment And Financing

    Once you have a quote you’re happy with, the final step is figuring out payment. Most professional flooring companies will require a deposit to secure your materials and schedule the installation, with the final balance due upon completion. If you’d prefer to pay over time, ask about financing options. Many installers partner with lenders to offer convenient monthly payment plans, making it easier to invest in high-quality flooring without paying the full amount upfront. Some companies may also offer a low price guarantee, promising to match a competitor’s price for the same product and service. Be sure to ask about all your payment options when you get your estimate.

    Should You DIY Or Hire A Pro?

    The allure of a DIY project is strong. It feels empowering to tackle a home improvement task yourself, and it seems like a great way to save money. But when it comes to installing carpet, what starts as a weekend project can quickly turn into a frustrating, time-consuming ordeal with less-than-perfect results. Before you start pulling up your old floors, it’s worth taking a serious look at whether going the DIY route is the right call.

    Carpet installation is a skilled trade that requires precision, specialized tools, and a lot of physical effort. While you might save some money on labor costs upfront, a botched installation can lead to wrinkles, visible seams, and a carpet that wears out years before it should. Hiring a professional installer isn’t just paying for labor; it’s an investment in getting the job done right the first time. For most homeowners, especially those with busy schedules, the peace of mind and guaranteed quality that come with a professional installation are well worth the cost.

    The Right Tools For The Job

    Proper carpet installation requires more than just a utility knife and a can-do attitude. Professionals use a whole arsenal of specialized equipment to get that smooth, wall-to-wall finish. Key items include a power stretcher to pull the carpet taut and prevent wrinkles, a knee kicker for positioning in tight spaces, and a seaming iron to create invisible bonds between carpet sections. Without these, you risk a lumpy, loose installation that won’t last. The truth is, having the right physical tools is non-negotiable for a correct installation, and renting or buying them for a single project often doesn’t make financial sense.

    Saving Time And Hassle

    Think about everything that goes into a carpet installation: moving furniture, tearing out the old flooring, prepping the subfloor, measuring and cutting the new carpet, and finally, the installation itself. What a professional crew can accomplish in a day could easily take a DIYer an entire weekend or longer. Many homeowners who attempt it themselves end up overwhelmed by the complexity and physical strain. Hiring a professional not only saves you time but also protects your home from accidental damage to the subfloor or baseboards. You get to skip the stress and just enjoy your beautiful new floors.

    Ensuring Quality And Durability

    The difference between a DIY and a professional carpet installation becomes obvious over time. Common DIY mistakes—like not stretching the carpet tightly enough or placing seams in high-traffic areas—can cause premature wear, ripples, and fraying. In fact, poorly installed carpet can lead to uneven surfaces and even create gaps that expose the subfloor to moisture. A professional installer understands the nuances of the job, from acclimating the carpet to your home’s environment to planning the layout for minimal waste and maximum durability. Their expertise ensures your new carpet looks great not just on day one, but for years to come.

    How To Find And Compare Installers

    Once you’ve found a few potential carpet installers through referrals or local searches, it’s time to dig a little deeper. Choosing the right team is just as important as choosing the right carpet. A great installation ensures your new flooring looks beautiful and lasts for years, while a poor one can lead to frustration and costly repairs down the road. The key is to have a consistent process for evaluating each company so you can make an apples-to-apples comparison.

    Don’t just rely on a single quote or a flashy website. You’re looking for a partner who is experienced, transparent, and reliable. This means checking their credentials, understanding exactly what their quote includes, and knowing what warning signs to look for. Taking the time to do this homework upfront protects your investment and gives you peace of mind that your home is in good hands. Think of it as interviewing candidates for an important job—because it is. Your goal is to find a professional you can trust to bring your vision to life without cutting corners.

    Your Vetting Checklist

    When you start talking to installers, it’s easy to get overwhelmed by details. Using a simple checklist helps you stay focused and compare everyone on the same terms. For every company you consider, make sure you verify their experience, licensing, and insurance. Ask how long they’ve been in business and if they have a portfolio of recent projects you can see. Proper insurance is non-negotiable; it protects you in case of accidents or property damage.

    Next, look for social proof. Check online reviews on sites like Google and Yelp, but also ask for references you can speak with directly. Finally, get a clear understanding of their warranties. A reputable installer will stand behind their work with a guarantee on the installation itself, separate from the manufacturer’s warranty on the carpet. Flooring experts agree that a structured approach is the best way to find a qualified pro.

    Why You Need Multiple Quotes

    Getting estimates from at least three different installers is a crucial step. This isn’t just about finding the cheapest price—it’s about establishing a baseline for what your project should cost and what it should include. A detailed quote should break down the costs for materials, labor, old carpet removal, subfloor preparation, and any other necessary services. When you compare costs and services side-by-side, you can spot inconsistencies and identify which company offers the most value.

    This process also gives you a feel for each company’s professionalism. Did they show up on time for the estimate? Were they thorough in their measurements and assessment of your space? Did they listen to your concerns and answer your questions clearly? A lowball offer might be tempting, but it could mean the installer is cutting corners somewhere you can’t see.

    Red Flags To Watch For

    A great deal isn’t a great deal if it comes with a bad installation. The biggest mistake homeowners make is hiring an inexperienced or unprofessional installer to save a few dollars. A poorly installed carpet can lead to visible seams, buckling, and premature wear, ultimately costing you more in the long run. One of the first red flags is a quote that is significantly lower than all the others.

    Be cautious of anyone who gives you a vague estimate, pressures you to make an immediate decision, or asks for a large cash deposit upfront. A professional installer will provide a clear, itemized quote and a reasonable payment schedule. You should also ask for proof of insurance and licensing. If a company is hesitant to provide these documents, consider it a major warning sign and move on. Avoiding common mistakes starts with trusting your gut and walking away from any installer who doesn’t seem transparent and professional.

    What To Expect On Installation Day

    Once you’ve chosen your carpet and hired an installer, the final step is the installation itself. Knowing what the day will look like helps everything run smoothly and takes the stress out of the process. A professional team will follow a clear, efficient workflow from the moment they arrive until the job is done. Here’s a breakdown of what you can expect when the installation crew shows up at your door.

    The Pre-Installation Walkthrough

    Before any tools come out, your lead installer should walk through the installation areas with you. This isn’t just a formality—it’s a crucial step to confirm every detail is correct. They’ll verify the rooms getting new carpet, double-check measurements, and assess the subfloor. This is also your best opportunity to point out anything specific, like a squeaky floorboard you’d like them to look at or the location of in-floor outlets. A thorough pre-installation check ensures everyone is on the same page and helps the team anticipate any challenges, leading to a smoother, more efficient installation without any last-minute surprises.

    Your Project Timeline

    The time it takes to install your new carpet depends entirely on the size and complexity of your project. A few standard bedrooms can often be completed in a single day, while a whole-house installation or a project with intricate cuts (like stairs) might take longer. Your installer will give you a clear timeline upfront. Once the carpet is laid, you’ll likely be asked to keep foot traffic to a minimum for a few hours. This allows the seams to set properly and the carpet to settle into place. A professional crew works efficiently to minimize disruption, getting you back to your routine and enjoying your new floors as quickly as possible.

    Post-Installation Cleanup And Inspection

    A professional installation isn’t finished until the space is clean. Your installation team will handle the cleanup, which includes removing carpet scraps, old padding, and any other debris created during the job. They should also do a final vacuum of the new carpet. Before they leave, walk through the rooms with the lead installer to inspect the work. Look for tight seams, ensure the carpet is flush against the walls, and check that transitions to other flooring are smooth. This final walkthrough is your chance to confirm everything meets your expectations and to learn about proper carpet care to keep your investment looking great for years to come.

    Key Questions To Ask Before You Hire

    Choosing the right installation team is just as important as picking the perfect carpet. The quality of the installation determines how your new floor will look, feel, and perform for years to come. Before you sign a contract, it’s essential to ask a few key questions to make sure you’re hiring a true professional. A great installer will welcome your questions and provide clear, confident answers. Think of this as a mini-interview to find the right partner for your home project. It’s your chance to confirm their expertise, understand their process, and set clear expectations from the start.

    Installation Methods And Materials

    The technical details of an installation can feel overwhelming, but you don’t need to be an expert to ask the right questions. Start by asking, “What installation method do you recommend for this carpet, and why?” Their answer will tell you if they’re considering your specific product and subfloor. You should also inquire if their team follows established installation standards, which are industry benchmarks for quality work. Finally, don’t forget about the foundation of your new floor. Ask, “What type of carpet padding do you recommend?” A professional will explain their choice based on the carpet’s warranty requirements, foot traffic, and your desired level of comfort, ensuring your investment is protected from the ground up.

    Scheduling And Project Timelines

    A clear and reliable schedule is a hallmark of a professional installation company. To avoid frustrating delays, ask for a complete project timeline, from furniture moving and old carpet removal to the final cleanup. A seasoned installer can give you a realistic estimate and explain the steps involved. It’s also smart to prepare for the unexpected by asking, “How do you handle unforeseen issues, like subfloor damage?” Their answer will reveal their problem-solving skills and commitment to doing the job right. Finally, confirm who your point of contact will be throughout the project. Knowing who to call with questions provides peace of mind and keeps the lines of communication open, helping you avoid common mistakes that can cause stress.

    Communication And Service Standards

    Great craftsmanship and great communication go hand in hand. You want an installer who respects both your home and your time. Ask them to walk you through their entire process, from the pre-installation walkthrough to the final inspection. This gives you a clear picture of what to expect on installation day. It’s also important to ask, “How will you protect my home, including my walls and baseboards, during the installation?” A careful team will have a plan to prevent scuffs and damage. Lastly, ask about their satisfaction guarantee. A simple, “What happens if I have concerns after the installation is complete?” will tell you everything you need to know about their commitment to quality and customer service, preventing the common pitfalls of a flooring project.

    Related Articles

    Frequently Asked Questions

    Do I need to move all my furniture before the installers arrive? Most professional installation companies, including ours, offer furniture moving as part of their service. We can handle the heavy lifting of standard items like sofas, tables, and beds. However, we do ask that you clear away smaller, personal items like books, lamps, and electronics from the rooms. This helps the crew work efficiently and keeps your belongings safe. Be sure to confirm the details when you get your quote, as some exceptionally heavy or delicate items might require special arrangements.

    What happens if you find problems with my subfloor after tearing out the old carpet? This is a great question and exactly why hiring an experienced professional is so important. It’s not uncommon to uncover issues like water damage, squeaky boards, or uneven spots once the old flooring is gone. A professional installer will stop, assess the situation, and explain the problem and your options clearly. Most minor repairs can be handled on the spot, ensuring your new carpet has the solid, stable foundation it needs to last.

    How long does a typical carpet installation take? The timeline really depends on the scope of your project. A few standard-sized bedrooms can often be completed in a single day. A larger project, like an entire house or a space with complex areas like stairs, might take two days or more. When we provide your in-home estimate, we’ll also give you a clear and realistic timeline so you know exactly what to expect and can plan your schedule accordingly.

    Why is a professional installation so important if I bought high-quality carpet? Think of it this way: the carpet is the ingredient, but the installation is the recipe. Even the best materials can be ruined by a poor installation, leading to wrinkles, visible seams, and a floor that wears out years too soon. A professional installer has the specialized tools and expertise to stretch the carpet correctly, place seams strategically, and ensure the final result is durable and flawless. Your investment in good carpet deserves an installation that protects it.

    Is your installation work guaranteed? Absolutely. A reputable installer will always stand behind their craftsmanship. This is separate from the manufacturer’s warranty, which covers defects in the carpet itself. An installation warranty covers the quality of the labor. If you notice issues like seams coming apart or the carpet buckling prematurely, our guarantee means we will come back and make it right. It’s our commitment to ensuring you get a beautiful, long-lasting floor.

  • Luxury Vinyl Plank Installation: A Step-by-Step Guide

    Luxury Vinyl Plank Installation: A Step-by-Step Guide

    Of all the home upgrades you can make, new flooring offers one of the most dramatic transformations. It sets the tone for the entire room, tying together your furniture, paint, and decor. Luxury vinyl plank gives you the stunning look of hardwood without the worry, but turning that stack of boxes into a seamless, beautiful surface requires a careful process. This is where the real magic happens. We’ve created this comprehensive guide to demystify the luxury vinyl plank installation from start to finish. We’ll show you how proper preparation and technique result in a flawless floor that completely revitalizes your space.

    Key Takeaways

    • Your Foundation is Everything: A perfectly clean and level subfloor is the secret to a flawless finish. Don’t forget to let your new planks acclimate in the room for at least 48 hours to prevent gapping or buckling later on.
    • Focus on Gaps and Staggering: For a strong, beautiful floor, maintain a consistent ¼-inch expansion gap around the entire room and stagger the seams between rows. These two techniques are essential for a professional look that lasts.
    • Balance DIY with Professional Expertise: A simple, square room can be a great DIY project, but for large areas, tricky layouts, or imperfect subfloors, hiring a professional is a smart investment that guarantees a fast, correct installation.

    Why Choose Luxury Vinyl Plank (LVP) Flooring?

    If you’re looking for a flooring that combines stunning looks with serious durability, luxury vinyl plank is probably already on your radar. It has quickly become a favorite for Dallas-Fort Worth homeowners, and for good reason. LVP offers the timeless beauty of natural materials like hardwood and stone but without the demanding upkeep or high price tag. It’s a practical, modern solution designed for real life—from busy family kitchens to quiet, relaxing bedrooms.

    The magic of LVP lies in its construction. Made from multiple layers, it’s engineered to withstand scratches, spills, and the daily chaos of a busy home. Whether you’re dealing with kids, pets, or just a lot of foot traffic, LVP holds up beautifully while looking fantastic. It’s the rare flooring choice that doesn’t force you to choose between style and function. You get both, which is why we so often recommend it as a versatile foundation for almost any room in the house.

    The Key Benefits Of LVP

    So, what makes LVP a standout choice? First and foremost, it’s incredibly resilient. The top wear layer is designed to resist scuffs and stains, making cleanup simple and stress-free. Spilled juice or muddy paw prints are no match for it. Second, most LVP products are 100% waterproof. This means you can confidently install it in moisture-prone areas like bathrooms, kitchens, and laundry rooms without worrying about water damage. Finally, the design possibilities are nearly endless. From rustic, wide-plank wood looks to sleek, modern stone tiles, you can achieve a high-end aesthetic that perfectly matches your home’s style.

    LVP Vs. Other Flooring: A Quick Comparison

    When you’re weighing your options, it helps to see how LVP stacks up against other popular flooring types. Compared to traditional hardwood, LVP is generally more affordable and requires far less maintenance over its lifespan. While hardwood is beautiful, it’s susceptible to water damage and scratches. LVP gives you a similar look with waterproof peace of mind.

    Against laminate, the biggest difference is water. While some laminates are water-resistant, LVP is typically fully waterproof, making it a safer choice for any room. And when compared to ceramic or porcelain tile, LVP is warmer and softer underfoot, which can make a big difference in comfort. It’s also less likely to crack if something heavy is dropped on it.

    Gather Your Tools And Materials

    Getting organized before you lay the first plank is one of the best things you can do for a smooth installation. Nothing slows down a project faster than having to stop and run to the store for a tool you forgot. Taking a few minutes to gather everything you need will set you up for success and make the entire process feel much more manageable. Think of it as your pre-project checklist—once everything is in the room and ready to go, you can focus completely on the installation itself.

    Your LVP Installation Toolkit

    You don’t need a workshop full of power tools for this project, but a few key items are non-negotiable. Your basic LVP toolkit should include a measuring tape, a utility knife for straight cuts, a tapping block, and a rubber mallet to gently lock the planks together. You’ll also want a pull bar to tighten the last plank in a row and 1/4-inch spacers to maintain your expansion gap along the walls. Having these essential tools on hand will help you get those clean, professional-looking results you’re after and prevent damage to the flooring planks during installation.

    Essential Materials And Supplies

    Beyond the planks themselves, your most important material is what’s underneath them. Your subfloor must be clean, dry, and perfectly level to support your new LVP. If you have uneven spots, you may need a self-leveling compound to smooth them out. It’s also critical to let your new flooring acclimate. This just means you need to move the unopened boxes of planks into the room where they’ll be installed for at least 48 hours. This gives the material time to adjust to your home’s temperature and humidity, which is a crucial step to prevent buckling or gapping after installation.

    A Quick Safety Gear Checklist

    Finally, let’s talk about safety and comfort. This project involves a lot of time on your hands and knees, so a good pair of knee pads is a must. This might seem like a small thing, but they make a huge difference in how you’ll feel at the end of the day. Many DIYers who’ve been through the process agree that this is one accessory you shouldn’t skip. You’ll also want a pair of safety glasses to protect your eyes when cutting planks and some work gloves to keep your hands safe. Taking these simple precautions ensures your project is not only successful but also safe.

    How To Prep Your Room For LVP Installation

    A beautiful, long-lasting LVP floor starts long before the first plank is laid. Proper preparation is the single most important factor in achieving a flawless finish that stands up to daily life. While our team at Next Day Flooring handles the technical work, understanding these key steps helps you know what to expect and why each one is so critical for the final result. Getting the foundation right ensures your new floors will look great and perform well for years to come. Think of it as setting the stage for a successful installation—it’s where quality begins.

    Assess And Prepare Your Subfloor

    The subfloor is the existing surface that your new LVP will be installed over, and it needs to be in great shape. Before we lay any planks, the subfloor must be perfectly clean, dry, and level. Any lingering dust or debris can prevent the planks from locking together correctly, while moisture can cause serious issues down the line. Most importantly, the subfloor has to be flat. Even small dips or bumps can create bouncy spots, gaps between planks, or uneven wear over time. A professional installer will check the subfloor for levelness and apply a leveling compound if needed to create a smooth, stable foundation for your new flooring.

    Acclimate Your Planks (and Why It Matters)

    It might seem like an unnecessary delay, but letting your new LVP planks acclimate is a step you can’t afford to skip. Acclimation is simply the process of letting the flooring material adjust to your home’s specific temperature and humidity levels. We recommend bringing the unopened boxes into the room where they’ll be installed and letting them sit for at least 48 hours. This prevents the planks from expanding or contracting after they’ve been installed, which can cause the floor to buckle or pull apart at the seams. It’s a simple but crucial step that ensures a tight, secure fit and a durable, long-lasting result.

    Clear The Room And Plan Your Layout

    To get started, the room needs to be a completely blank slate. This means moving all furniture, décor, and other belongings out of the space. Our team will then handle the removal of the old flooring, whether it’s carpet, tile, or old vinyl. Once the room is clear, we can plan the layout. We unpack the planks and intentionally mix them to ensure a natural, varied appearance. This prevents planks with identical patterns from ending up next to each other, which is a dead giveaway of a poorly planned installation. This thoughtful flooring layout planning is what creates a high-end, seamless look across the entire room.

    Understanding LVP Installation Methods

    When it comes to installing luxury vinyl plank flooring, there isn’t a one-size-fits-all approach. The two primary techniques are the floating (or click-lock) method and the glue-down method. Each has its own set of benefits and is suited for different situations, so understanding the basics will help you feel confident in the process, whether you’re tackling a small room yourself or working with a professional.

    The right choice depends on factors like your subfloor condition, the amount of foot traffic the room gets, and your long-term goals for the space. Let’s break down how each method works so you can see what makes the most sense for your home.

    Floating Floors: The Click-Lock Method

    The floating floor is by far the most common installation method for residential LVP. The name says it all: the planks aren’t actually attached to the subfloor with any adhesive. Instead, they feature a clever tongue-and-groove system that allows them to click and lock together, creating a secure, seamless surface that “floats” over the subfloor. This approach is popular because it’s fast, clean, and doesn’t require messy glues. It also makes it easier to replace a single plank down the road if one gets damaged. Because the floor isn’t glued down, it can expand and contract naturally with temperature changes.

    The Glue-Down Method

    For a more permanent and heavy-duty installation, there’s the glue-down method. With this technique, a special adhesive is spread across the subfloor with a trowel, and each plank is carefully set into place. A heavy roller is then used to press the planks firmly into the glue, ensuring a solid bond that won’t shift or lift over time. This method is the gold standard for commercial spaces or high-traffic areas in a home—think busy entryways, kitchens, or hallways. While it’s a more intensive process, a glue-down installation provides incredible stability and durability, making it a fantastic long-term solution.

    Which Method Is Right For Your Home?

    So, how do you choose? A floating floor is often perfect for standard rooms like bedrooms and living areas. However, if your subfloor has some minor imperfections or you’re installing LVP in a large, open-concept space or a room with heavy furniture, the glue-down method might provide better stability. While some homeowners feel comfortable with a DIY click-lock installation, a professional can ensure the job is done right, especially for bigger or more complex projects. An expert vinyl flooring installation will always start with an assessment of your subfloor and room layout to recommend the method that will give you the best performance and longest-lasting results.

    How To Install Floating LVP: A Step-by-Step Guide

    Alright, this is where the real fun begins. With your room prepped and your tools ready, it’s time to lay your new floor. The click-lock method is incredibly satisfying, and once you get a rhythm going, you’ll see your room transform plank by plank. We’ll walk through the process together, focusing on the key techniques that ensure a professional, long-lasting result. Remember to take your time on the first few rows—a strong start makes everything else fall into place.

    Laying The First Row Perfectly

    Your first row sets the standard for the entire installation, so it’s worth getting it just right. Start in a corner, placing the first plank with its tongue side facing the wall. It’s critical to leave a ¼-inch gap between the plank and the wall. Use spacers to maintain this distance consistently. This isn’t just a suggestion; it’s an essential expansion gap that allows the flooring to expand and contract with temperature changes without buckling. Continue laying planks end-to-end until you complete the row, making sure each connection is tight and secure.

    Installing The Next Rows And Staggering Seams

    To create a floor that’s both beautiful and strong, you need to stagger the seams. This means the end joints of your planks shouldn’t line up from one row to the next. A good rule of thumb is to ensure the seams are offset by at least 8 to 10 inches. You can use the piece you cut from the end of the first row to start your second row (as long as it’s long enough). This technique creates a more natural, random look that mimics real wood and adds structural integrity to the entire floor, preventing weak points from forming.

    How To Cut Planks And Fit Around Obstacles

    You’ll inevitably need to cut planks to fit at the end of rows or around obstacles like doorways and vents. For straight cuts, simply score the plank with a sharp utility knife and snap it along the line. It’s a quick and surprisingly clean method. When you get to a door frame, don’t try to cut the plank to fit around it. Instead, use an oscillating multi-tool to cut the bottom of the door frame. This allows you to slide the plank right underneath, creating a seamless, professional finish that makes a huge difference in the final look.

    Managing Expansion Gaps For A Lasting Floor

    We mentioned the expansion gap when starting the first row, and it’s important to maintain it around the entire perimeter of the room. This includes walls, cabinets, pipes, and any other fixed objects. This small, hidden space is your floor’s best friend. It gives the planks room to breathe, expanding and contracting naturally with Dallas’s changing humidity and temperatures. Skipping this step is one of the most common DIY mistakes and can lead to your beautiful new floor buckling or separating over time. Always use spacers to keep that ¼-inch gap consistent as you work.

    Add The Finishing Touches

    With all the planks clicked into place, you’re on the home stretch. But the job isn’t quite done yet. These finishing touches are what separate a good DIY job from a truly professional-looking installation. Taking the time to properly install trim and clean up correctly not only makes your new floor look incredible but also protects it for the long haul. Think of these final steps as the frame for your masterpiece—they tie everything together and ensure your hard work really shines. These details are non-negotiable for a floor that looks and performs its best for years.

    Install Transition Strips And Moldings

    Transition strips are the clean, simple solution for doorways and areas where your LVP meets another type of flooring, like carpet or tile. They cover the gap between the two surfaces, creating a smooth and safe threshold that prevents tripping. When you’re installing LVP across multiple rooms, a great pro tip is to align the long joints of your planks with the doorways for a continuous, seamless flow. This small detail makes a huge difference in the final look. Choosing the right molding and trim will protect the edges of your planks from chipping and wear, keeping your floor polished and secure.

    Finish With Baseboards Or Quarter Round

    Remember that small expansion gap you carefully left around the perimeter of the room? Now it’s time to cover it up. Installing baseboards or a smaller trim called quarter round is the final step to framing your new floor. This trim neatly hides the gap, gives the room a clean edge, and protects the base of your walls from scuffs and bumps from furniture or vacuums. If you removed your old baseboards before starting, you can reinstall them now. If you left them in place, adding a quarter-round molding along the bottom is an easy way to get that polished, professional finish without much extra work.

    Your Final Walk-Through And Cleanup

    Before you move the furniture back in, take a moment for one last quality check. Walk across the entire floor, feeling for any planks that might be loose, uneven, or make a noise. Now is the easiest time to fix any minor issues. Once you’re satisfied, give the floor a thorough sweep to remove any dust and debris from the installation. Follow up with a light cleaning using a product recommended by your flooring’s manufacturer. Following the specific manufacturer’s guidelines from day one is the best way to keep your LVP looking brand new and protect your investment.

    Common Installation Mistakes To Avoid

    Even the most beautiful LVP can look amateurish if the installation isn’t done right. While luxury vinyl is known for being DIY-friendly, a few common missteps can lead to floors that buckle, gap, or just don’t feel solid underfoot. Getting these details right is what separates a good-enough job from a great one that lasts for years.

    Understanding these potential pitfalls is the first step, whether you decide to tackle the project yourself or bring in a professional. Let’s walk through the most frequent mistakes we see and how to avoid them for a flawless finish that you’ll love for years to come.

    Skipping Subfloor Prep

    Think of your subfloor as the foundation for your new LVP. If it’s not clean, flat, and smooth, any imperfections will eventually show through. Small bumps, dips, or even leftover debris can create hollow spots, lead to creaking, and cause the locking mechanisms between planks to fail over time. As flooring experts explain, a successful vinyl flooring installation depends on a well-prepared subfloor. Taking the time to level, patch, and thoroughly clean the surface is non-negotiable for a floor that feels solid and looks perfect.

    Forgetting The Expansion Gap

    LVP flooring, like many materials in your home, expands and contracts with changes in temperature and humidity. It needs a little breathing room to do this without causing problems. That’s why leaving a small expansion gap—typically about a quarter-inch—around the perimeter of the room is so important. Without this space, the planks can press against the walls and each other, leading to buckling or peaking at the seams. This small detail is essential for maintaining the integrity of your flooring and is a clear sign of a professional installation. The gap will be covered by baseboards, so you’ll never even see it.

    Making Incorrect Cuts And Layouts

    A great LVP installation looks natural and balanced, which comes down to smart planning. One common mistake is failing to stagger the seams properly, creating a repetitive “H-pattern” that looks unnatural. It’s also important to mix planks from different boxes to blend any variations in color and pattern. Another layout error is not measuring the room correctly, which can leave you with a very narrow, awkward-looking plank on the final row. A little layout planning beforehand prevents these aesthetic issues and ensures your floor looks cohesive and professionally installed from every angle.

    How To Care For Your New LVP Floors

    Now that your beautiful new floors are installed, you’ll want to keep them looking their best. The good news is that LVP is incredibly durable and low-maintenance. With a simple and consistent care routine, you can protect your investment and ensure your floors look fantastic for years to come. It’s all about establishing a few good habits that prevent dirt and damage before they start.

    Your Daily And Weekly Cleaning Routine

    The key to keeping LVP pristine is consistency. Start by sweeping or vacuuming daily to remove dirt, dust, and grit that can act like sandpaper and cause tiny scratches over time. Be sure to use a vacuum without a beater bar, or one where you can turn it off.

    When spills happen, wipe them up right away with a soft cloth. Even though LVP is waterproof, letting liquids sit can lead to staining or create a slippery spot. For a deeper weekly clean, mop with a microfiber mop and a pH-neutral cleaner made for vinyl floors. It’s important to avoid harsh chemicals, vinegar, or ammonia-based products, as they can dull the finish and damage the protective wear layer.

    Long-Term Care And Damage Prevention

    A little prevention goes a long way in protecting your LVP floors. Place doormats at all exterior doors to catch dirt, rocks, and moisture before they get tracked inside. For heavy furniture and appliances, use floor protectors to prevent dents and scuffs. It’s also a great idea to stick felt pads on the bottom of chair and table legs to allow them to slide smoothly without scratching the surface.

    While LVP is tough, it’s not indestructible. Avoid dragging heavy objects across the floor. Always lift and carry furniture when moving it. Following these simple do’s and don’ts will help you avoid common issues and keep your floors in top condition.

    DIY Vs. Hiring A Pro: Making The Right Call

    Deciding whether to install your new LVP flooring yourself or hire a professional is a big part of the planning process. Luxury vinyl is often marketed as a DIY-friendly product, and for good reason. The click-lock systems are designed to be intuitive, and you don’t need a workshop full of specialized tools to get the job done.

    However, a smooth installation involves more than just clicking planks together. Your decision should balance your budget, timeline, and confidence in your own handiwork. A successful DIY project can be incredibly rewarding, but a professional installation guarantees a flawless finish without you having to sacrifice a weekend. Let’s break down when each path makes the most sense for your home.

    When A DIY Installation Makes Sense

    If you’re comfortable with home improvement projects and have a straightforward space to work with, a DIY installation is definitely achievable. Of all the flooring options, luxury vinyl plank is one of the simplest to install yourself. The material is easy to cut, and the floating floor method means you’re just snapping the planks together over your subfloor.

    A DIY approach is often a great fit if:

    • The room is small and square. A guest bedroom, home office, or laundry room without complex angles is a perfect starting point.
    • Your subfloor is already level and clean. If you don’t have to do major prep work, the job becomes much simpler.
    • You have the time. A proper installation takes patience. Make sure you have a full weekend to dedicate to the project without feeling rushed.

    Signs It’s Time To Call A Professional

    While LVP can be a great DIY project, there are many situations where calling a professional is the smarter, safer, and even more cost-effective choice in the long run. Even though luxury vinyl is considered DIY-friendly, professional installation is a good choice if you’re not confident or if the area is large or complicated. An experienced installer can handle challenges that might frustrate a first-timer.

    Consider hiring a pro if:

    • You’re flooring a large or irregularly shaped area. Professionals have the tools and techniques to handle long hallways, open-concept spaces, and tricky cuts around cabinets or stairs.
    • Your subfloor needs work. An installer can properly identify and fix issues with your subfloor to ensure your new LVP lasts for years.
    • You want it done fast and right. If you’re on a tight timeline—like moving into a new home or preparing to sell—a professional team can complete the job efficiently and correctly, often in just a day. A reputable installer will also provide a labor warranty, giving you peace of mind.

    Related Articles

    Frequently Asked Questions

    Can I install LVP directly over my old flooring? This is a great question, and the answer is sometimes, but not always. You can often install LVP over existing sheet vinyl or even some types of tile, as long as the original floor is perfectly flat, smooth, and securely attached to the subfloor. However, you should never install it over carpet or another floating floor like laminate. The most important thing is having a solid, level foundation. Putting a beautiful new floor over a flawed surface will only lead to problems like gapping or bouncing down the road.

    How long does a professional LVP installation usually take? One of the best parts of choosing LVP is how quickly it transforms a space. For a professional team, a typical project covering a few rooms can often be completed in just one to two days. This timeline usually includes removing the old flooring, making sure the subfloor is perfectly prepped, and installing the new planks and trim. It’s a fast and efficient process that minimizes disruption to your home life.

    Is LVP a good choice for homes with pets and kids? Absolutely. In fact, it’s one of the best flooring options for a busy, active household. The durable top wear layer is designed to stand up to scratches from pet claws and the general chaos of family life. Plus, since most LVP is 100% waterproof, you don’t have to panic about spilled juice or pet accidents. Cleanup is simple, which makes it a practical and stress-free choice for parents.

    What’s the real difference between “waterproof” and “water-resistant” flooring? This is a critical distinction to understand. A “water-resistant” floor, like many laminates, can handle topical spills if you clean them up right away. If liquid sits too long, it can seep between the seams and damage the core of the plank or your subfloor. “Waterproof” LVP, on the other hand, is made from materials that won’t swell or break down when exposed to water. This means the planks themselves are protected, making LVP a much safer bet for bathrooms, kitchens, and laundry rooms.

    My subfloor isn’t perfectly level. Is that a big deal? Yes, it is the single most important factor in a successful installation. An uneven subfloor will prevent the LVP planks from locking together securely, which can cause gaps to appear between boards. You might also notice soft, bouncy spots or hear clicking sounds when you walk across the floor. Over time, this constant movement can damage the locking system and ruin your new floor. Taking the time to properly level the subfloor is a non-negotiable step for a beautiful, long-lasting result.

  • Your Guide To Waterproof Vinyl Flooring Installation

    Your Guide To Waterproof Vinyl Flooring Installation

    The best home upgrades are the ones that make your daily life simpler. That’s the real promise of waterproof vinyl flooring—it gives you a beautiful, modern look without the constant worry. You can finally relax, knowing your floors are built to withstand spills, pets, and busy family life. But achieving that true peace of mind requires more than just great materials; it demands an installation that’s just as reliable. A meticulous waterproof vinyl flooring installation is what guarantees a seamless, durable surface that performs as well as it looks. In this guide, we’ll break down the process so you can see how it all comes together.

    Key Takeaways

    • Proper Subfloor Prep is Non-Negotiable: Before laying a single plank, ensure your subfloor is completely flat, clean, and dry. This is the single most important step to prevent future issues like gaps, creaks, and separating planks.
    • Stagger Seams and Mind the Gap: For a natural, professional look, always stagger the seams between planks instead of lining them up. Be sure to leave a 1/4-inch expansion gap around the room’s perimeter to allow the floor to move with temperature changes and prevent buckling.
    • Easy Maintenance Protects Your Investment: Keep your floors looking new with simple habits. Use felt pads on furniture, place doormats at every entrance, and clean regularly with a pH-neutral cleaner to avoid damage and dulling.

    What Is Waterproof Vinyl Flooring (And Is It Right For You)?

    So, you’re thinking about new floors and keep hearing about waterproof vinyl. What exactly is it? Simply put, waterproof vinyl flooring is a type of luxury vinyl plank (LVP) engineered to be 100% impervious to water. It gives you the stunning, realistic look of materials like hardwood or stone, but without the worry and high maintenance that often come with them. This makes it an incredibly practical choice for busy Dallas-Fort Worth homeowners who want beautiful floors that can handle the realities of daily life—from spilled drinks in the kitchen to muddy paw prints by the back door.

    The secret is in its construction. Unlike older types of vinyl or water-resistant laminate, waterproof LVP features a solid, rigid core that doesn’t swell, buckle, or warp when exposed to moisture. While some guides might frame it as a simple DIY project, a flawless, truly waterproof result depends on expert installation. Proper subfloor preparation and ensuring every plank is perfectly locked are non-negotiable steps for long-term performance. So, is it the right choice for your home? Let’s look at the benefits and clear up some common confusion.

    The Real Benefits Of Going Waterproof

    The biggest advantage of waterproof vinyl is right in the name: it’s designed to withstand moisture. This makes it the perfect flooring for kitchens, bathrooms, laundry rooms, and basements—anywhere spills and humidity are common. You don’t have to stress about a tipped glass of water or your kids splashing during bath time. Beyond its water-handling skills, this flooring is built to last. With the right care, you can expect your waterproof vinyl floors to look great for 15 to 20 years. It’s a durable, long-term solution that gives you peace of mind.

    Waterproof Vs. Water-Resistant: Know The Difference

    It’s easy to get these terms mixed up, but the difference is critical for your home. “Water-resistant” flooring can handle small spills if you wipe them up quickly, but it can’t stop liquid from eventually seeping through to the subfloor. Think of it like a light jacket in a drizzle—it helps, but it won’t keep you dry in a downpour. “Waterproof” flooring, on the other hand, is designed to be completely non-porous. The material itself stops liquid from passing through, protecting both the plank and the subfloor underneath. This is why true waterproof vinyl is such a game-changer for homes with pets, kids, or high-traffic wet areas.

    Gather Your Tools And Materials For Installation

    A smooth installation starts long before you lay the first plank. Taking the time to gather everything you need upfront is the secret to avoiding frustrating mid-project hardware store runs. Think of it as setting up your workspace for success. With the right tools and materials on hand, you can focus on the task at hand and achieve a clean, professional finish that looks like it was done by a pro.

    Your Must-Have Installation Tool Kit

    You don’t need a workshop full of expensive equipment, but a few key tools will make your life much easier. A basic flooring installation kit usually includes a tapping block and a pull bar, which help you lock the planks together tightly without damaging them. You’ll also want a pry bar for removing baseboards and a sharp utility knife for scoring and snapping planks. For more precise work, an oscillating multi-tool is fantastic for undercutting door jambs, and a guillotine-style cutter offers clean, dust-free cuts right in the room. And trust me on this one: invest in a good pair of knee pads. Your future self will thank you.

    Create Your Materials And Supplies Checklist

    Before you order your flooring, you need to measure your room accurately. Calculate the total square footage by multiplying the room’s length by its width. Once you have that number, add at least 10% to it. This extra material is your “waste factor,” and it covers any mis-cuts, mistakes, or oddly shaped planks you might need for corners and doorways. Running out of flooring halfway through a project is a momentum-killer. Ordering a little extra from the same batch ensures you have enough to finish the job and that all your planks have a consistent color and finish. It’s always a good idea to keep a few extra planks for any future repairs, too.

    Choose The Right Underlayment

    Underlayment is the thin layer of material that goes between your subfloor and your new vinyl planks. Its job is to provide cushioning, reduce noise, and act as a moisture barrier. Many modern waterproof vinyl flooring products come with a pre-attached underlayment or “pad,” which simplifies installation and saves you a step. If your chosen flooring doesn’t have an attached pad, or if you’re installing over a concrete subfloor, you’ll need a separate vapor barrier. A simple 6 mil plastic sheeting will do the trick. This is a non-negotiable step for basements or any concrete slab, as it prevents moisture from seeping up and getting trapped under your beautiful new floors.

    How To Prep Your Subfloor For A Flawless Finish

    Think of your subfloor as the foundation for your new vinyl planks. If it isn’t clean, flat, and dry, you’re setting yourself up for problems down the road—think annoying squeaks, separating planks, and a finish that just looks off. Taking the time to prep your subfloor correctly is the single most important thing you can do to ensure your new floors look amazing and last for years. It’s the difference between a frustrating DIY project and a professional-quality result you can be proud of. Don’t be tempted to rush this part; a little extra effort here pays off big time, protecting your investment and giving you the durable, beautiful floors you want.

    Step 1: Remove The Old Flooring

    Before you can lay down anything new, the old flooring has to go. Whether it’s carpet, old tile, or sheet vinyl, you need to remove it completely to get down to the bare subfloor. This isn’t just about clearing the way; it’s your first chance to inspect what’s happening underneath. Once the old floor is up, take a moment to look for any obvious signs of trouble like water stains, mold, or rot. You’ll also want to pull up any remaining staples, tack strips, and adhesive residue to create a perfectly clean slate for the next steps.

    Step 2: Check For And Address Moisture

    Moisture is the number one enemy of any flooring installation. For a wood subfloor, you can use a moisture meter to check the levels. For a concrete slab, which is common in many DFW homes, the process is a bit more involved. Trapped moisture in concrete can lead to major issues, so it’s a critical step you can’t afford to guess on. If you see any discoloration or suspect moisture might be an issue, it’s wise to address the source of the leak before proceeding. Getting this right prevents your beautiful new floors from warping or failing later.

    Step 3: Make Sure Your Subfloor Is Perfectly Level

    Luxury vinyl planks are flexible, but they aren’t magic. They need a flat, smooth surface to lock together properly and stay that way. Any significant dips or high spots in your subfloor can cause the planks to bend, creak, and eventually break at the seams. Grab a long, straight level and check the entire floor. Most manufacturers specify that the floor should be flat within 3/16 of an inch over a 10-foot span. You can grind down high spots and use a self-leveling compound to fill in any low areas for a perfectly smooth surface.

    Step 4: Let Your New Vinyl Planks Acclimate

    Here’s some good news: unlike solid hardwood that needs days to adjust to a home’s environment, waterproof vinyl flooring is much more stable. It doesn’t require a long acclimation period. However, it’s still a good practice to bring the boxes into the room where they’ll be installed for at least 24 to 48 hours before you start. This allows the planks to adjust to your home’s temperature, which ensures they will lay flat and lock together easily during installation. Just make sure you don’t stack them in a corner; lay the boxes flat and give them some space.

    Your Step-by-Step Guide To Installing Vinyl Planks

    With your subfloor prepped and your materials ready, it’s time for the most rewarding part: laying the planks. This is where your new room really starts to take shape. Don’t rush this process—a little patience here goes a long way toward a beautiful, professional-looking result. We’ll walk through it one step at a time, from planning your layout to making those tricky final cuts.

    Plan Your Layout And Measure Accurately

    Before you click a single plank into place, you need a game plan. A good layout prevents awkward, narrow strips of flooring against one wall or tiny plank pieces at the end of a row. Start by measuring the width of your room. Divide that number by the width of one plank to see how many full rows you’ll have and how wide your last row will be. If the final row will be less than one-third of a plank’s width, it’s best to trim your first row lengthwise. This simple adjustment will make the first and last rows a similar width, creating a more balanced and professional look. A clear plan helps you visualize the final result and avoid common mistakes.

    Lay The First Row Perfectly

    Your first row is the foundation for the entire floor, so it needs to be perfectly straight. Most installations start along the longest, most visible wall. Place 1/4-inch spacers between the wall and your planks to create an expansion gap—this allows the flooring to expand and contract with temperature changes without buckling. Click the short ends of the first few planks together, making sure the seams are tight and there are no gaps. Use a level or a laser line to ensure this row is absolutely straight before moving on. An uneven first row will only cause bigger problems and wider gaps as you work your way across the room.

    Continue Laying Planks And Staggering Seams

    To achieve a natural wood look, you need to avoid lining up the seams between planks. A random, staggered pattern is key. As you open boxes, mix planks from several different ones to ensure a good blend of colors and patterns. A common method is to use the piece you cut off from the end of one row to start the next, as long as it’s at least six inches long. This creates a natural offset and reduces waste. Avoid creating a noticeable “step” or “H” pattern where seams are too close together. The goal is to make the layout look organic, so staggering the plank seams is one of the most important steps for a high-quality finish.

    Cut Planks To Fit Around Doorways And Obstacles

    Doorways, vents, and other obstacles require careful cuts. For door jambs, the cleanest look comes from undercutting the trim with a handsaw or multi-tool and sliding the plank underneath. For other complex shapes, create a template using cardboard or paper first. Trace the shape onto your plank and use a jigsaw for a precise cut. Remember the golden rule of cutting: measure twice, cut once. It’s always better to cut a piece a little too big and trim it down than to cut it too short and waste a plank. Taking your time on these detail-oriented cuts around obstacles is what separates a DIY job from a professional installation.

    Avoid These Common DIY Installation Mistakes

    Taking on a flooring project yourself can feel empowering, but a few common missteps can quickly turn a dream floor into a costly headache. Even the highest-quality waterproof vinyl can fail if the installation isn’t done right. The difference between a floor that looks great for years and one that starts to buckle, gap, or peel often comes down to avoiding a few critical errors that professionals are trained to spot.

    Whether you’re committed to the DIY route or just want to know what to look for in a quality installation, understanding these mistakes is key. From what lies beneath the planks to the tiny gaps along the wall, every detail matters. Getting the fundamentals right ensures your new floor is not only beautiful but also durable enough to handle daily life. Overlooking them can lead to frustrating repairs that cost more time and money than simply doing it correctly from the start. We see it all the time—small installation mistakes that create big problems down the road.

    Don’t Skip Proper Subfloor Prep

    Think of your subfloor as the foundation for your new vinyl planks. If it isn’t perfectly flat, clean, and dry, any imperfections will eventually show through on the surface, causing planks to flex, creak, or even separate. Before a single plank is laid, the old flooring should be removed and the subfloor thoroughly inspected. This is your chance to find and fix hidden issues like moisture damage or uneven spots. A professional installer spends a significant amount of time on subfloor preparation because they know a flawless finish starts with a solid, level base. Skipping this step is one of the biggest gambles you can take with your flooring investment.

    Watch Out For Damaged Planks And Uneven Seams

    Modern vinyl planks are designed with a precise tongue-and-groove system that allows them to click together securely. However, if a plank’s locking mechanism is damaged or a tiny piece of debris gets stuck in the groove, it won’t create a tight seal. It’s crucial to inspect each board before you install it. Forcing a plank into place can break the locking system and create a weak spot in your floor. Even a tiny gap between seams—as small as 1/8 of an inch—can allow dirt and moisture in, eventually causing the planks to shift or tear under pressure. A tight, seamless connection is essential for a truly waterproof and durable surface.

    Get Your Expansion Gaps And Transitions Right

    Vinyl flooring, like many materials in your home, expands and contracts with temperature changes. To allow for this natural movement, you must leave a small space—typically 1/4 inch—between the flooring and the walls or any other fixed objects like kitchen islands or cabinets. This is called an expansion gap. Without it, the planks have nowhere to go when they expand, which can cause the entire floor to buckle or warp. Similarly, you need to use the correct transition strips where your vinyl meets another type of flooring, like carpet or tile. These strips cover the gap, protect the edges of the planks, and create a smooth, finished look.

    How To Add The Finishing Touches

    Once the last plank is in place, the job isn’t quite done. The final steps are what transform a freshly laid floor into a seamless, integrated part of your home. These finishing touches—installing trim, managing gaps, and performing a final inspection—are critical for both the look and the long-term durability of your new waterproof vinyl flooring.

    This is where true craftsmanship shines. Paying close attention to these details protects the integrity of the installation, preventing issues like buckling and premature wear. Getting these steps right guarantees your floor will not only look beautiful on day one but will also perform flawlessly for years to come.

    Install Transition Strips And Baseboards

    Transition strips and baseboards are the framing for your new floor, covering gaps and creating clean lines for a polished look. You’ll need transition strips wherever the vinyl meets a different flooring type, like carpet or tile, to protect the plank edges from chipping. For a truly waterproof seal in bathrooms or kitchens, a small bead of silicone sealant along the edge before installing trim adds an extra layer of protection. Reinstalling or adding new baseboards and shoe molding is the final touch, hiding the expansion gap along the walls and tying the room together.

    Correctly Manage Expansion Gaps

    Vinyl plank flooring needs a little breathing room. It naturally expands and contracts with changes in temperature, so a small space—typically a quarter-inch—must be left around the room’s perimeter. This is called an expansion gap. It’s essential to maintain this gap between the flooring and any fixed object, including walls, cabinets, and pipes. Without this space, the planks could press against each other and buckle or warp over time. While the gap is a functional necessity, it’s ultimately hidden by baseboards, so you get all the benefits without seeing the space.

    Complete Your Final Cleanup And Inspection

    Before moving furniture back in, a thorough cleanup is essential. First, remove any spacers used during installation. Next, give the floor a detailed sweep and vacuum to pick up any dust or debris left over from the project. Even small particles of grit can act like sandpaper, causing fine scratches on your new floor’s surface. A final wipe-down with a damp mop and a pH-neutral cleaner will remove any smudges. This is also the perfect time for a final inspection to ensure every plank is secure and every seam is tight.

    How To Maintain Your Waterproof Vinyl Floors

    Your beautiful new waterproof vinyl floors are installed, and your home feels completely refreshed. The great news is that LVP is designed for real life, which means it’s incredibly durable and easy to care for. Unlike more demanding materials that require special treatments, waxing, or polishing, vinyl is refreshingly low-maintenance. Its protective wear layer is built to handle daily foot traffic, spills, and everything else that comes with a busy household, from kids and pets to dinner parties. With just a little routine attention, you can keep your floors looking as good as the day we installed them.

    Proper maintenance is the key to protecting your investment and ensuring your floors last for years. By following a few simple steps, you prevent the small scratches and scuffs that can accumulate over time and keep the surface looking smooth and clean. This isn’t about spending your weekends scrubbing; it’s about creating simple habits that make a big difference. Think of it less as a chore and more as a simple routine to preserve that brand-new look and feel you love. We’ve put together this guide to make it as straightforward as possible, so you can spend less time cleaning and more time enjoying your beautiful home.

    Your Guide To Daily Cleaning And Spill Care

    The key to keeping vinyl floors pristine is consistent, gentle cleaning. Start by sweeping with a soft-bristle broom or vacuuming (just be sure to turn off the beater bar or use a hard floor setting) a couple of times a week to pick up dirt and grit. Those tiny particles can act like sandpaper over time, dulling your floor’s finish. When it comes to spills, act fast. While your floors are waterproof, it’s always best to wipe up liquids immediately to prevent any potential for staining. For weekly mopping, a damp mop is your best friend. Avoid soaking the floor with excess water. Use warm water and a pH-neutral cleaner made for vinyl flooring. Steer clear of harsh detergents or products that promise to add shine, as they can leave behind a sticky, dulling film.

    Protect Your Floors From Scratches And Damage

    Prevention is the easiest way to protect your floors from daily wear and tear. One of the simplest and most effective things you can do is place felt pads on the bottom of all your furniture legs—chairs, tables, sofas, you name it. This allows them to slide smoothly without scratching the surface. When moving heavy appliances or furniture, never drag them across the floor. Place doormats at every entrance to your home. They do a fantastic job of trapping the dirt, sand, and moisture that would otherwise be tracked inside. This small step significantly reduces the amount of abrasive debris that gets on your floors. Remember to avoid using rubber-backed or latex-backed mats, as they can sometimes discolor the vinyl over time.

    Learn How To Deep Clean And Make Minor Repairs

    Every few months, your floors might benefit from a slightly deeper clean, especially in high-traffic areas. This doesn’t mean you need to break out harsh scrub brushes or steamers, which can damage the wear layer. A deep clean simply involves a thorough mopping with your pH-neutral cleaner, paying close attention to corners and baseboards. For common scuffs left by shoes, you can often buff them out with a clean tennis ball or a microfiber cloth. If you encounter a minor scratch, don’t panic. There are vinyl floor repair kits available that can help conceal small imperfections and blend them seamlessly with the rest of your flooring. Taking care of these small issues as they appear will keep your floors looking flawless for the long haul.

    Related Articles

    Frequently Asked Questions

    Is waterproof vinyl flooring truly 100% waterproof? Yes, the planks themselves are completely impervious to water. The core is made of a solid vinyl composite that won’t swell or warp, no matter how long liquid sits on it. However, a truly waterproof floor system depends on a flawless installation. If the planks aren’t locked together perfectly, water can find its way through the seams to your subfloor. That’s why professional installation is so important for ensuring the entire surface is sealed and protected.

    Can I install waterproof vinyl flooring myself? While many brands market their products as DIY-friendly, a successful, long-lasting result depends heavily on proper subfloor preparation. Getting the subfloor perfectly clean, flat, and level is the most critical step, and it’s where most DIY projects go wrong. Any imperfections underneath can cause the planks to separate or creak over time. A professional installation ensures this foundation is perfect, protecting your investment and guaranteeing a beautiful finish.

    Is this a good choice for a home with kids and pets? Absolutely. In fact, it’s one of the best flooring options for busy households. Beyond being waterproof and handling spills or pet accidents without issue, it’s also incredibly durable. The top wear layer is designed to resist scratches from dog nails, scuffs from dragged toys, and the general wear and tear of daily foot traffic. It gives you the high-end look of hardwood with far less worry and maintenance.

    How is this different from water-resistant laminate? The key difference is the core material. Water-resistant laminate has a core made of high-density fiberboard, which is essentially wood composite. While it has a protective top layer, if water sits too long and seeps into the seams, that wood-based core can still swell and get damaged permanently. True waterproof vinyl has a solid polymer core that simply cannot absorb water, making it a much safer choice for kitchens, bathrooms, and basements.

    Do I really need to leave a gap around the edges of the room? Yes, that expansion gap is non-negotiable. All floating floors, including vinyl plank, need a little bit of room to expand and contract with your home’s temperature changes throughout the year. Without that small gap around the perimeter, the planks could press against the walls and buckle in the middle of the room. Don’t worry, this functional space is completely covered by baseboards and trim, so you’ll never even see it.

  • The Complete Engineered Hardwood Installation Guide

    The Complete Engineered Hardwood Installation Guide

    The difference between a floor that looks great for a year and one that lasts for decades often comes down to avoiding a few common mistakes. It’s easy to get excited and rush into laying planks, but skipping crucial prep work or forgetting a key step can lead to frustrating and costly problems later. This guide is designed to be your trusted resource, showing you not just what to do, but also what not to do. We’ll highlight the common pitfalls that can derail an engineered hardwood installation and give you the practical knowledge to sidestep them, ensuring your floor is stable, quiet, and beautiful from day one.

    Key Takeaways

    • Success starts before the first plank is laid: The most crucial steps happen before installation. Always acclimate your flooring in the room for at least 48 hours and get your subfloor completely clean, level, and dry to prevent future issues like squeaks or gaps.
    • Get the details right for a professional finish: A great installation comes down to a few key details. Maintain a ¼-inch expansion gap around the entire room to prevent buckling, and stagger the ends of your planks by at least six inches for a strong, seamless look.
    • Finish strong and maintain your work: Once the floor is laid, wait at least 24 hours before adding furniture. To keep it looking beautiful for years, focus on maintaining stable humidity in your home and sticking to a simple cleaning routine with a hardwood-safe cleaner.

    What Is Engineered Hardwood?

    If you love the timeless look of hardwood but need something more practical for your busy Dallas-Fort Worth home, engineered hardwood is an excellent choice. It offers the same beauty as solid wood because the top layer is real wood, but its unique construction provides stability and versatility that solid wood just can’t match. This makes it a smart, durable solution for almost any room in your house. Let’s break down what makes it such a popular and reliable flooring option.

    Understanding Its Layered Construction

    Think of an engineered hardwood plank as a high-tech sandwich. The top layer is a thin slice of genuine hardwood—like oak, hickory, or maple—which gives you that authentic look and feel. Below that visible surface are multiple layers of high-quality plywood or high-density fiberboard (HDF) stacked in alternating directions. This cross-grained core is the secret to its strength. By bonding these layers together under intense heat and pressure, manufacturers create a plank that is incredibly stable and structurally sound. This design is what sets it apart from a single, solid piece of wood.

    Why It Resists Moisture Better Than Solid Wood

    That layered core we just talked about is also why engineered hardwood stands up so well to Texas humidity. Solid wood is like a sponge—it expands and contracts significantly with changes in moisture, which can lead to warping or gapping. The cross-layered core of engineered wood, however, counteracts this natural movement. Each layer’s grain runs in a different direction, which restricts the plank’s ability to swell or shrink. This structural stability means you can confidently install engineered hardwood in places where solid wood is a risk, like over concrete slab foundations or in finished basements.

    The Benefits For Your Budget And Timeline

    Beyond its durability, engineered hardwood delivers fantastic value. It’s generally more affordable than solid hardwood, allowing you to get that premium wood look without stretching your budget. And this isn’t a short-term fix; a quality engineered floor can last for decades, often between 20 and 80 years, depending on the thickness of the top wood layer. Because it can be installed using different methods—including floating, which is often faster than nailing down solid wood—it can also help shorten your project timeline. This means less disruption to your daily life and beautiful new floors you can enjoy sooner.

    How To Prepare For Your Installation

    A beautiful, long-lasting engineered hardwood floor starts long before you lay the first plank. Proper preparation is the single most important factor in getting a professional result that stands the test of time. Rushing this stage can lead to squeaks, gaps, and buckling down the road. Taking the time to get your room ready ensures your new floors will look and perform their best for years to come. Think of it as setting the foundation for a successful project—it’s the work you do now that prevents headaches later.

    Acclimate Your Planks (Don’t Skip This!)

    This step is incredibly simple but absolutely essential. Wood is a natural material that expands and contracts with changes in temperature and humidity. To prevent your new floors from warping or buckling after installation, you need to let the planks acclimate to your home’s environment. Simply bring the unopened boxes of flooring into the room where they will be installed and let them sit for at least 24 to 48 hours. This gives the wood time to adjust to the room’s specific climate, ensuring a stable and secure fit once the planks are connected.

    Prep And Level Your Subfloor

    Your new engineered hardwood is only as good as the surface it’s installed on. Before you begin, you need a clean, flat, and solid subfloor. Start by removing the old baseboards and any existing flooring. Next, thoroughly sweep and vacuum the area to get rid of all dust and debris. Carefully inspect the subfloor for any protruding nails or staples and remove them. Check for any high or low spots. A level subfloor is critical for preventing hollow sounds and uneven wear. You may need to sand down high spots or use a leveling compound to fill in dips, but this extra effort pays off with a flawless finish.

    Test For Moisture And Choose Your Underlayment

    Moisture is the biggest threat to any wood floor. Before installation, it’s crucial to test the moisture content of your subfloor to ensure it’s dry enough for installation. For wood subfloors, the moisture level should be below 12%. You should also maintain a consistent temperature (60-80°F) and humidity (30-50%) in the room. Once you’ve confirmed the subfloor is dry, you’ll need to select an underlayment. This thin layer of material goes between the subfloor and your engineered hardwood. It acts as a moisture barrier, reduces noise, provides a bit of cushioning, and helps smooth over minor imperfections in the subfloor. Don’t treat it as optional—an underlayment is a key component for protecting your investment.

    Gather Your Tools And Materials

    A smooth installation starts with having everything you need within arm’s reach. Nothing slows down a project faster than having to stop and run to the hardware store for a tool you forgot. Before you lay the first plank, take a few minutes to gather your equipment. This simple step ensures your project goes efficiently and helps you achieve that professional finish you’re looking for. Think of it as setting up your command center—a little organization now saves a lot of frustration later.

    We’ll break this down into three categories: the tools you’ll use, the supplies your floor needs, and the safety gear you shouldn’t work without.

    Your Essential Tool Checklist

    These are the core tools that will get you through nearly every step of the installation. You might already have many of these in your garage. Your checklist should include a tape measure, pencil, a utility knife, and a combination square for accurate marking and cutting. You’ll also need a rubber mallet and a tapping block to gently nudge planks into place without damaging the locking systems. To maintain the crucial expansion gap along the walls, you’ll need 1/4-inch spacers. Finally, you’ll need a power saw—a miter saw is ideal for clean, straight cuts, but a circular or hand saw will also work.

    Necessary Supplies For The Job

    Unlike tools, these are the materials you’ll use up during the installation. First, you’ll need a reliable moisture meter to test your subfloor—a critical step we covered in the prep phase. Depending on your installation method, you’ll also need a high-quality wood flooring adhesive and the specific trowel size recommended by the adhesive manufacturer. A pull bar is essential for tightening the seams on the last row of planks in a tight space. It’s also smart to have a specialized adhesive remover and a few clean rags on hand, because even the neatest installers can have a little squeeze-out.

    Don’t Forget Safety Gear

    Please don’t treat this part as optional. Your safety is the most important part of any home project. Always wear safety glasses to protect your eyes from dust and debris, especially when cutting planks. A good pair of knee pads will save your joints from hours of discomfort on a hard subfloor. If you’re tearing out old carpet, we strongly recommend wearing thick work gloves to protect your hands from hidden staples and tack strips. An old carpet can also hide years of dust and dander, so using a dust mask or respirator is a great idea to keep from breathing that in.

    Choose Your Installation Method

    One of the best things about engineered hardwood is its versatility, and that extends to how it’s installed. Unlike solid hardwood, which is almost always nailed down, engineered planks can be floated, glued, or nailed. The right choice for your home depends on your subfloor type, the room’s traffic level, and your comfort with the process.

    Making the right call here is crucial for the long-term performance and durability of your floors. A floating floor is often the go-to for DIY projects and standard living areas, while a glue-down installation offers incredible stability over concrete. For homes with a plywood subfloor, nailing or stapling provides a classic, solid feel underfoot. Let’s walk through each option so you can confidently decide which path is best for your project.

    The Floating Method

    The floating method is the most popular choice for a reason—it’s straightforward and doesn’t require messy adhesives or special nail guns. The planks are designed to click and lock together at the edges, forming a single, solid surface that “floats” over the subfloor. It isn’t attached directly to the subfloor, which allows the wood to expand and contract naturally with changes in humidity.

    Before you start, you’ll need to roll out an underlayment. This thin layer of foam or cork is essential for moisture protection, sound dampening, and smoothing over minor imperfections in the subfloor. You’ll also need to leave a small expansion gap (usually about ¼ inch) around the perimeter of the room to give the floor space to move.

    The Glue-Down Method

    If you’re installing engineered hardwood over a concrete slab or in a high-traffic area like a kitchen or entryway, the glue-down method is an excellent choice. This technique involves spreading a specialized wood flooring adhesive directly onto the subfloor with a trowel and setting the planks into it. The result is an incredibly solid and stable floor that feels completely bonded to the foundation of your home.

    The key to a successful glue-down installation is to work in small, manageable sections. You only want to spread enough adhesive for a few rows at a time to prevent it from drying out before you can lay the planks. This method requires a bit more patience and attention to detail to avoid a mess, but the permanent, durable result is often worth the effort.

    The Nail-Down Or Staple-Down Method

    For homeowners with a plywood or OSB subfloor, the nail-down or staple-down method offers a traditional and extremely secure installation. This technique involves using a pneumatic flooring nailer or stapler to drive fasteners through the tongue of each plank and into the wooden subfloor below. Because the fasteners are hidden, you get a clean, seamless look.

    This method is often preferred by professionals because it creates a floor with zero give or movement. The first row is typically secured by hand-nailing through the face of the planks near the wall (where the baseboard will hide the nails), and from there, the power nailer does the rest. It’s a fast and effective method, but it absolutely requires the right kind of subfloor to work.

    Which Method Is Right For Your Home?

    So, how do you choose? It really comes down to your subfloor and your needs. If you have a concrete subfloor, your options are floating or glue-down. If you have a wooden subfloor, you can choose any of the three methods.

    For most residential spaces like bedrooms and living rooms, a floating installation is perfectly suitable and the most DIY-friendly. For kitchens, basements, or any area where you want maximum stability, a glue-down application is the superior choice. If you have a wooden subfloor and want that classic, rock-solid feel underfoot, you can’t go wrong with a nail-down installation. Understanding your subfloor preparation is the first step to making the right decision.

    Your Step-by-Step Installation Guide

    With your room prepped and your tools ready, it’s time for the most rewarding part: laying the floor. This is where your vision starts to become a reality, plank by plank. The key to a professional-looking result is patience and precision, especially in the first few rows. A strong start ensures everything else will fall into place correctly.

    This guide walks you through the core mechanics of a floating floor installation, which is the most common DIY method for engineered hardwood. While the exact steps can vary slightly depending on whether you’re gluing or nailing, the principles of starting straight, leaving an expansion gap, and staggering your seams are universal. Taking your time here will pay off for years to come, giving you a beautiful and durable floor that you can be proud of. Remember to always consult the specific instructions from your flooring manufacturer, as they will provide the definitive guide for their product.

    Laying The First Row Perfectly

    Your first row sets the standard for the entire floor, so getting it right is essential. Start in a corner, laying the first plank with its tongue side facing into the room. This orientation allows you to easily tap the groove of the next row onto the tongue of the first. Place 1/4-inch spacers between the short and long sides of the plank and the walls. As you work your way across the room, lock the short ends of the planks together. To ensure a tight connection without damaging the wood, gently tap the planks into place using a tapping block and a rubber mallet. A snug fit is crucial for a seamless look.

    Leave Room For Expansion Gaps

    It might feel counterintuitive to leave a gap around the perimeter of your new floor, but this step is non-negotiable. Engineered hardwood is still made with real wood, which naturally expands and contracts with changes in humidity and temperature. Placing 1/4-inch spacers along every wall creates a critical expansion gap. This small space gives your floor room to breathe and shift throughout the seasons. Without it, the planks could press against the walls and each other, leading to buckling or warping over time. Don’t worry about the appearance—this gap will be completely hidden once you reinstall your baseboards.

    Connect Planks And Stagger The Seams

    Once your first row is down, the rest of the installation will start to move more quickly. To create a strong and visually appealing floor, you need to stagger the plank ends by at least six inches between adjacent rows. This avoids creating noticeable lines where the short ends of the planks meet. An easy way to achieve a natural stagger is to use the leftover piece from the last plank of one row to start the next, as long as it’s at least six inches long. As you connect the tongue-and-groove joints, use your tapping block and mallet to ensure every connection is secure. This method protects the plank edges from damage while creating a solid, interlocked floor.

    Laying The Rest Of Your Floor

    Continue laying planks row by row, maintaining the staggered pattern and the expansion gap along the walls. Work your way across the room, gently tapping each plank for a tight fit. As you progress, periodically step back and check your work to ensure the rows are straight and the seams are snug. Once the final plank is in place, the hard part is over. However, it’s important to let the floor settle. For best results, you should avoid heavy foot traffic and wait at least 24 hours before moving furniture back into the room. This gives the flooring time to acclimate and settle into its new home without any added pressure.

    Handle Cuts And Transitions Like A Pro

    This is where the magic really happens. Laying full planks across an open room is straightforward, but handling the details—the cuts, corners, and transitions—is what separates a standard DIY job from a truly professional installation. Getting these final touches right is the key to a floor that looks seamless, integrated, and polished. Don’t let this part intimidate you. It’s less about owning a workshop full of fancy tools and more about adopting a mindset of patience and precision. A well-executed cut or a perfectly placed transition strip is a signature of quality craftsmanship.

    We’ll walk through the three most important steps for finishing like a pro. First, we’ll cover how to measure and cut your planks for a perfect fit every time, ensuring minimal waste and clean edges. Next, we’ll tackle those tricky spots like doorways and cabinets, using a simple technique that creates a flawless, built-in look. Finally, we’ll show you how to install transition strips to create a smooth flow between your new hardwood and other flooring surfaces, like the tile in your kitchen or the carpet in a bedroom. Taking your time on these steps will pay off in a big way, giving you a beautiful floor you can be proud of for years to come.

    Measure And Cut Planks With Precision

    The old saying “measure twice, cut once” is your best friend here. For the cleanest results, always mark your cutting line on the finished side of the plank. When you’re ready to cut, make sure the finished side is facing up. This helps prevent the saw blade from splintering the top wood veneer, keeping your edges crisp. A table saw or even a simple hand saw will work, but safety is key—always wear a mask to avoid inhaling dust. Before you start, take a moment to check the specific cutting instructions for your flooring, as some products have unique recommendations that can make all the difference in the final look.

    Work Around Doorways And Obstacles

    Nothing screams “DIY” like a poorly cut plank notched around a door frame. The professional approach is much cleaner and surprisingly simple: cut the door frame itself. Using an oscillating multi-tool or a flush-trim saw, carefully cut off the bottom of the door casing at the height of your new flooring. This creates a small gap that allows you to slide the plank directly underneath the frame. The result is a seamless, custom-fit look with no visible gaps. This technique works for door jambs, cabinet toe-kicks, and other permanent obstacles, giving your installation a polished, built-in appearance that looks like it was always meant to be there.

    Install Transition Strips And Thresholds

    Transition strips are the finishing touch that ties your new floor to the rest of your home. They cover the expansion gap and create a smooth bridge between your engineered hardwood and other flooring types. For areas where the hardwood meets another hard surface of a similar height, a T-molding is the perfect solution. There are also special transition pieces for connecting to carpet or lower floors. To install most types, apply a bead of strong construction adhesive to the subfloor in the gap between the two floors and press the strip firmly into place. This small detail protects the edges of your planks and gives the entire project a clean, intentional look.

    Common Installation Mistakes To Avoid

    You’ve picked out the perfect engineered hardwood, cleared the room, and you’re ready to get started. This is where the details really matter. A successful installation isn’t just about laying planks; it’s about avoiding the common slip-ups that can turn a dream floor into a future headache. Even small oversights can lead to creaks, gaps, or uneven surfaces down the road. Think of it like painting a room—the final result is only as good as your prep work and attention to detail.

    The good news is that these mistakes are entirely preventable once you know what to look for. Whether you’re tackling this project yourself or just want to understand the process better, knowing these key points will help ensure your new floors look professional and last for years. We’ll walk through the four most common installation errors we see and give you clear, actionable steps to sidestep them. From preparing your subfloor correctly to getting the finishing touches just right, a little extra care makes all the difference.

    Mistake #1: Skipping Prep Work

    It’s tempting to jump right into laying the beautiful new planks, but the work you do before the first board goes down is the most critical part of the entire project. Your subfloor must be perfectly clean, flat, and dry. As one installation guide notes, “Even a tiny bit of sand or dirt left underneath can cause problems later.” Debris can create high spots that cause planks to rock or squeak, while an uneven subfloor prevents the locking mechanisms from engaging properly. Take the time to thoroughly sweep and vacuum the area, check for levelness, and sand down any high spots. This foundational step ensures your finished floor is stable, quiet, and smooth underfoot.

    Mistake #2: Forgetting Expansion Gaps

    Engineered hardwood, like any wood product, responds to changes in temperature and humidity by expanding and contracting. This movement is completely natural, but it needs space to happen. That’s why leaving a small expansion gap around the perimeter of the room is non-negotiable. Most manufacturers recommend using 1/4-inch spacers along the walls to create a consistent gap, which will later be covered by your baseboards. Forgetting this step can cause your floor to buckle, warp, or cup as the seasons change, creating an unsightly and potentially costly problem. This simple step gives your floor the breathing room it needs to stay flat and beautiful for its entire lifespan.

    Mistake #3: Making A Mess With Glue

    If you’re using the glue-down method, your motto should be “work clean.” Flooring adhesive is incredibly strong and starts to set quickly, making spills a real pain to deal with if you wait too long. It’s essential to clean up any adhesive that gets on the surface of the planks immediately. Keep a dry or slightly damp cloth handy specifically for this purpose. A small drip might not seem like a big deal in the moment, but once it cures, it can be nearly impossible to remove without damaging the floor’s protective finish. By cleaning as you go, you’ll save yourself a lot of frustration and ensure a spotless, professional-looking result.

    Mistake #4: Using Short Planks Incorrectly

    The layout of your planks affects both the strength and the visual appeal of your floor. A common mistake is using planks that are too short at the beginning or end of a row. As a general rule, you should “avoid using pieces shorter than 12 inches next to a wall.” Short pieces can create weak points in the floor’s structure, leading to instability over time. Aesthetically, using too many short boards creates a choppy, busy pattern that looks unprofessional. Proper staggering with longer planks creates a more natural, seamless appearance and ensures the joints are distributed evenly for a stronger, more durable floor.

    Add The Finishing Touches

    With the main part of the installation behind you, it’s time for the final steps that truly complete the project. These finishing touches are what separate a good-looking floor from a professionally finished one. Taking the time to handle the trim, cleanup, and initial care correctly ensures your new engineered hardwood floors will look their best and last for years. It’s all about protecting your investment and creating a space that feels polished and ready for daily life. These details might seem small, but they make a huge difference in the final result.

    Install Baseboards And Molding

    Now you can address the expansion gaps you left along the walls. This is where baseboards and molding come in. After removing any temporary spacers, you’ll want to install trim to cover those gaps neatly. This step is essential for a professional look, as it creates a seamless transition from the floor to the wall. It also protects the edges of your planks from damage. Whether you’re reinstalling your old baseboards or putting in new ones, make sure they sit snugly against the floor without pinching it, allowing the wood to expand and contract naturally underneath.

    Complete A Final Cleanup And Inspection

    A clean workspace is a safe workspace, and it’s also the key to a flawless finish. If you used the glue-down method, it’s especially important to wipe up any excess adhesive right away with a clean rag and the recommended remover before it has a chance to harden. Once the trim is installed, give the entire floor a thorough sweep and vacuum to remove all dust and debris. Then, do a final walk-through. Look at the floor from different angles to check for any imperfections, uneven planks, or gaps that need attention. This final inspection ensures everything is perfect before you move furniture back in.

    Know Your Post-Installation Care

    Your new floors need a little time to settle in. It’s best to wait at least 24 to 48 hours before walking heavily on them or returning furniture to the room. This allows the flooring to acclimate and any adhesives to cure completely. When you do move furniture, use felt pads on the legs to prevent scratches. It’s also critical to avoid covering your new floors with non-breathable materials like plastic sheeting. This can trap moisture and heat, potentially damaging the finish. Following these simple post-installation care steps will set your floor up for a long, beautiful life.

    Keep Your New Floors Looking Great

    You’ve put in the work, and your new engineered hardwood floors look incredible. Now, let’s make sure they stay that way. A little care goes a long way in protecting your investment and keeping your floors looking brand new for years. The right maintenance routine isn’t complicated—it’s just about building a few simple habits that protect the wood’s finish and structure. From the first few days to your weekly cleaning schedule, here’s everything you need to know to maintain that beautiful, fresh-install look.

    Immediate Post-Installation Care

    Patience is key right after your installation is complete. Give your new floors at least 24 to 48 hours to settle before moving furniture back into the room or allowing heavy foot traffic. This waiting period is crucial because it lets the planks fully acclimate to your home’s environment and ensures any adhesives have time to cure properly. Rushing this step can cause planks to shift or scratch. Think of it as letting your floors get comfortable before you ask them to do any heavy lifting. Once this initial period is over, you can start enjoying your beautiful new space.
    Your Long-Term Cleaning Routine

    The best way to keep your engineered hardwood looking pristine is with a simple, consistent cleaning routine. A daily sweep with a soft-bristle broom or a quick pass with a dust mop will prevent dirt and grit from scratching the surface. When spills happen, clean them up immediately with a dry or slightly damp cloth to prevent moisture from seeping into the wood. For a deeper clean, use a pH-neutral cleaner specifically designed for hardwood floors. You can also protect high-traffic areas with area rugs and place felt pads under all furniture legs to prevent scuffs and scratches. These small habits make a huge difference in the long-term care of your floors.

    Manage Humidity And Temperature

    Engineered hardwood is more stable than solid wood, but it’s still a natural product that reacts to its environment. Maintaining consistent humidity and temperature levels in your home is one of the most important things you can do to prevent warping, gapping, or cupping. Aim to keep your home’s humidity between 30% and 50% and the temperature between 60°F and 80°F year-round. Using a humidifier in the dry winter months and a dehumidifier during the humid Dallas summers can help. This simple step not only protects your floors but also ensures you stay within the terms of your product warranty.

    When To Call A Professional Installer

    Tackling a DIY project can be rewarding, but flooring requires precision. While this guide equips you to install engineered hardwood, it’s just as important to know your limits. Calling a professional isn’t admitting defeat—it’s a smart decision to protect your investment and avoid future headaches. An experienced installer assesses your home’s unique conditions and solves problems before they start. If you have a tight deadline, a tricky layout, or simply want the peace of mind that comes with a job done right, bringing in an expert is the best path forward.

    If Your Project Is Complex

    Not all rooms are simple squares. If your subfloor isn’t perfectly flat or you’re connecting rooms with height differences, the project’s difficulty rises quickly. Uneven subfloors can cause planks to flex, leading to hollow spots or annoying clicking sounds. A professional knows how to level the subfloor to create a solid, quiet foundation. Transitions between rooms are another common challenge. An expert can identify these potential issues during an in-home estimate and build the right fix into the installation plan from the start, ensuring a safe and seamless look.

    When You’re Short On Time Or Tools

    Let’s be honest: installing a floor is a major time commitment. If you’re a busy professional, dedicating a full weekend to a flooring project might not be realistic. A professional crew can complete an installation far more quickly, minimizing disruption to your life. They also have all the specialized equipment for a perfect installation process, from miter saws for precise cuts to moisture meters for subfloor testing. Plus, you’ll need to avoid heavy foot traffic for 24 hours after the job is done, which is much easier to manage with a professional timeline.

    To Protect Your Warranty

    Engineered hardwood is a significant investment, and the manufacturer’s warranty is there to protect it. However, warranties often have strict installation requirements, specifying that the job site’s humidity must be kept between 30–50% and the temperature between 60–80°F. Failing to meet these conditions could void your coverage. A professional installer is familiar with these rules and has the tools to ensure your home is compliant. By hiring an expert, you’re ensuring your new floors perform beautifully for years and that your investment is covered. Following proper maintenance tips afterward will keep them looking great.

    Related Articles

    Frequently Asked Questions

    Can I really install engineered hardwood in a kitchen or bathroom? Engineered hardwood is a fantastic choice for kitchens. Its layered construction makes it much more stable than solid wood, so it handles the temperature and humidity shifts common in a kitchen without warping. However, I would advise against installing it in a full bathroom with a shower or tub. While it resists moisture well, it isn’t waterproof, and standing water from a bath or shower can cause serious damage over time.

    Is engineered hardwood a good choice if I have kids or pets? Absolutely. The key is to look at the protective finish on the planks. Most modern engineered hardwoods come with a factory-applied, multi-layer urethane finish that is incredibly tough and resistant to scratches and scuffs from pet claws or kids’ toys. For extra peace of mind, choose a product with a thicker top wood layer and a finish that includes aluminum oxide, which adds another level of durability for a busy household.

    Can engineered hardwood be refinished like solid hardwood? Yes, it can, but how many times depends entirely on the thickness of the top wood layer. A high-quality engineered plank with a thick veneer can typically be sanded and refinished once or twice in its lifetime. This is a great way to erase years of wear and make your floors look new again. Thinner, more budget-friendly options may not have enough wood on top to allow for sanding, so it’s an important factor to consider when you buy.

    How long does a typical installation take from start to finish? The timeline has a few parts. First, the wood needs to acclimate in your home for at least 24 to 48 hours. The subfloor preparation can take anywhere from a few hours to a full day, depending on its condition. Once that’s done, a professional crew can often install the flooring in an average-sized home in just one or two days. This efficiency is one of the biggest advantages of hiring an expert.

    Do I always need an underlayment for a floating floor? Yes, you should never skip the underlayment. It performs several critical jobs that protect your floor and make it more comfortable. It acts as a barrier against any moisture coming up from the subfloor, it helps dampen sound when you walk, and it provides a bit of cushioning that makes the floor feel more solid underfoot. It’s a small step that makes a huge difference in the long-term performance of your floor.