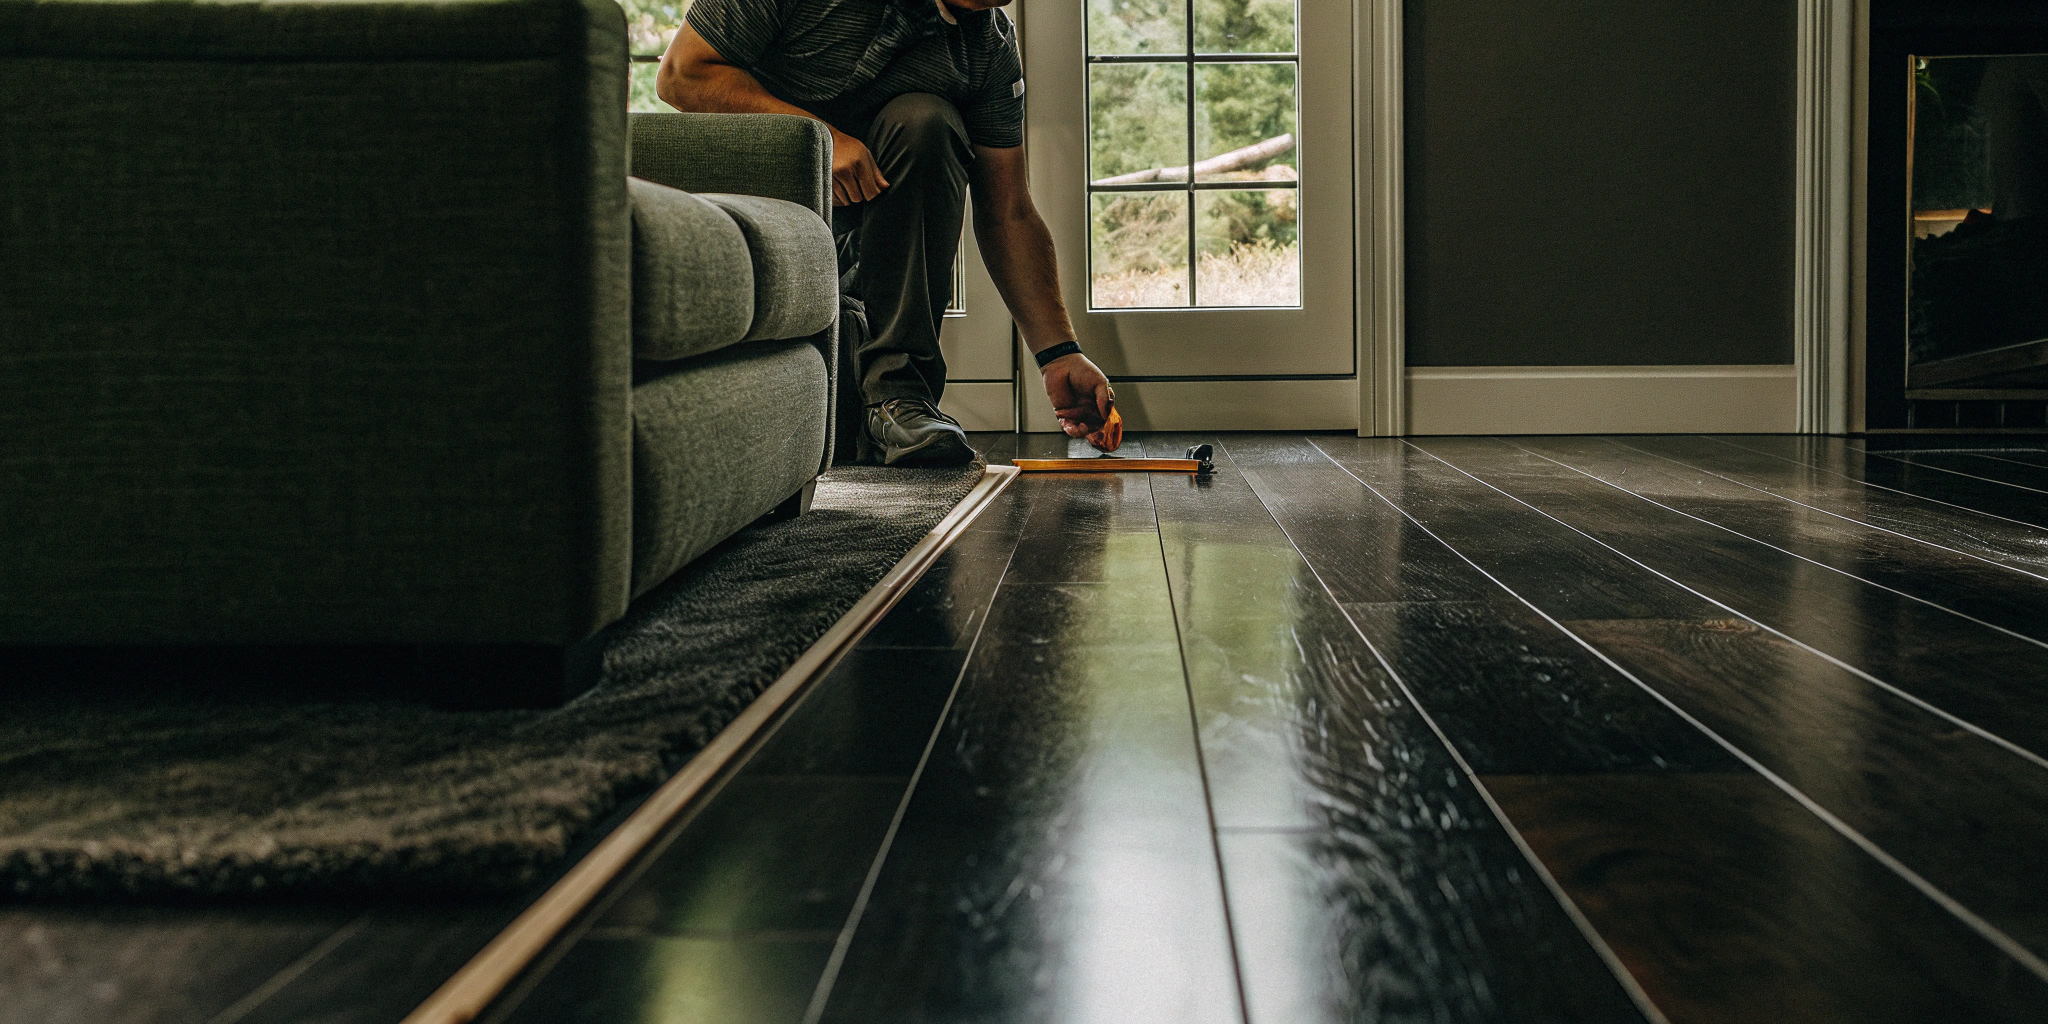
Category: Buying Guide

  • What’s The Real Labor Cost To Install Laminate Flooring?

    What’s The Real Labor Cost To Install Laminate Flooring?

    Nothing derails a home renovation project faster than unexpected costs. A clear, transparent quote is the key to a stress-free flooring installation, and a major component of that quote is the labor. Understanding what is the average labor cost to install laminate flooring is the first step toward building a budget with no surprises. This guide will demystify the numbers on your estimate. We’ll explain every factor that contributes to the final price, from removing old floors and preparing the subfloor to the finishing touches, so you know exactly where your money is going before the work even begins.

    Key Takeaways

    • Budget for More Than Just the Flooring: Your total project cost is a mix of materials and professional labor. In the Dallas-Fort Worth area, installation labor typically runs from $2 to $6 per square foot, so be sure to factor this into your budget for a realistic financial picture.
    • Your Home’s Unique Details Shape the Price: The final quote goes beyond simple square footage. The condition of your subfloor, the need to remove old flooring, and complex layouts like stairs or kitchen islands all influence the total cost because they require more time and skill.
    • Insist on an In-Home Estimate for Accuracy: A phone quote is just a guess. A professional needs to see your space to provide a reliable price, so always get a written, itemized estimate that clarifies costs for underlayment, trim, and disposal to avoid surprise fees.

    How Much Does Laminate Flooring Installation Actually Cost?

    Figuring out a realistic budget for new flooring can feel like a moving target. You have the cost of the laminate itself, but the installation labor is a huge piece of the puzzle. Let’s break down what you can expect to pay for professional installation, starting with the big picture and then zeroing in on what it looks like here in the Dallas-Fort Worth area.

    A Look At National Averages

    Across the country, the labor cost for laminate flooring installation is fairly consistent. Most homeowners can expect to pay between $2 and $5 per square foot for the installation work alone. According to data from HomeGuide, this means that for a 1,000-square-foot space, you’d be looking at roughly $2,000 to $5,000 just for labor. When you factor in the cost of the materials, the total project price often lands somewhere between $3 and $13 per square foot. This wide range accounts for everything from budget-friendly laminate to premium, high-end planks and the complexity of the job.

    What To Expect In The Dallas-Fort Worth Area

    Here in the Dallas-Fort Worth metroplex, installation costs generally fall right in line with the national averages. Local homeowners can anticipate labor rates ranging from $2 to $6 per square foot. This cost typically covers the standard installation process, and as noted by Pro Tool Reviews, it may also include the prep work and disposal of old materials. Of course, this is just a benchmark. The final price depends on the specifics of your home, like the condition of your subfloor and the layout of your rooms. This is why getting a detailed, in-home estimate is the only way to know your true project cost.

    What Factors Influence Your Final Installation Quote?

    When you start budgeting for new laminate floors, it’s easy to focus on the price per square foot of the material itself. But the final number on your installation quote is shaped by much more than just the flooring you choose. Several key factors determine the total cost, from the condition of your home to the specific demands of the project. Understanding these variables helps you see exactly what you’re paying for—a smooth, durable, and professional installation.

    Think of it like this: a flooring installer isn’t just laying planks. They’re preparing a canvas, solving unique challenges presented by your space, and ensuring the final product stands the test of time. A simple, empty square room will always cost less than a multi-room project with complex layouts and a subfloor that needs some TLC. By breaking down the quote, you can appreciate where your money is going and why certain steps, like proper subfloor prep, are a non-negotiable part of a quality job. Let’s walk through the main components that will influence your final price.

    The Size And Shape Of Your Room

    This is the most straightforward factor. The larger the area you’re covering, the more material and labor you’ll need. Most quotes are based on a price per square foot, which includes both the flooring and the installation work. According to NerdWallet, the total cost to install laminate flooring can range from $3 to $13 per square foot when you combine materials and labor.

    But it’s not just about total square footage—the shape of the room matters, too. A simple rectangular living room is far easier to install than a kitchen with an island, a hallway with multiple doorways, and several closets. Each corner, angle, and obstacle requires precise cuts and careful fitting, which adds to the installation time and, consequently, the labor cost.

    Your Subfloor’s Condition And Prep Work

    What’s underneath your new floors is just as important as the floors themselves. The subfloor—the structural layer beneath your flooring—must be clean, flat, and dry for a successful laminate installation. If it’s not, you risk bouncy spots, gaps between planks, and a floor that fails prematurely. That’s why a professional installer will always inspect the subfloor first.

    Any necessary prep work will be added to your quote. This could include leveling uneven concrete, securing loose plywood, or cleaning up old adhesive. As one industry guide notes, installation costs can fluctuate based on the condition of the subfloor and the prep work required. Skipping this step to save a few dollars is a recipe for disaster, so be sure your quote includes proper preparation.

    Removing Old Floors And Moving Furniture

    Before the new laminate can go in, the old flooring has to come out. Whether you have old carpet, tile, or vinyl, the removal and disposal process takes time and effort. Most installation companies will include this as a separate line item on your quote. According to HomeGuide, you can expect to pay between $0.70 and $1.60 per square foot for flooring removal.

    Similarly, your rooms need to be empty before work can begin. While you can certainly move your own furniture to save money, many homeowners find it more convenient to have the installation crew handle it. This service typically costs between $25 and $75 per room and ensures your heavy items are moved safely and efficiently.

    Local Labor Rates

    Just like with any service, labor costs for flooring installation vary depending on where you live. The rates in a major metropolitan area like Dallas-Fort Worth will naturally differ from those in a small rural town. This is driven by the local cost of living, demand for skilled labor, and regional business expenses.

    While national averages can provide a ballpark figure—often between $2 and $3 per square foot for labor alone—your most accurate estimate will come from a local professional. It can be tempting to shop around for the absolute lowest labor rate, but remember that you’re paying for expertise. An experienced, insured installer brings the skill needed to handle unexpected issues and deliver a flawless finish that protects your investment for years to come.

    Does Your Choice Of Laminate Affect The Price?

    Yes, absolutely. The specific laminate flooring you choose does more than just set the style for your room—it directly influences your total installation cost. While it’s easy to focus on the price per square foot of the material itself, the characteristics of that material often dictate how much labor is required to install it properly. Think of it this way: some types of laminate are straightforward and quick to install, while others demand more time, precision, and skill from your installation team.

    Three key factors related to your laminate choice will impact the labor portion of your quote: the installation system (click-lock vs. glue-down), the thickness and quality of the planks, and the complexity of the pattern you want. Understanding how each of these affects the process will help you balance your design vision with your budget and ensure there are no surprises when you get your final quote. It’s all about knowing where your money is going and why certain choices require a bigger investment in professional labor.

    Click-Lock Vs. Glue-Down Systems

    Most laminate flooring today uses a click-lock system, where the planks interlock with each other to create a “floating” floor that sits on top of an underlayment. This method is efficient and is the standard for most residential projects. However, some situations call for a glue-down installation, where each plank is adhered directly to the subfloor. While less common for laminate, this method is sometimes used in commercial settings or for specific product types.

    If your project requires a glue-down system, you can expect higher labor costs. The process is more meticulous, requiring careful subfloor preparation and the time-consuming application of adhesive. Because of the extra steps and expertise involved, a glue-down flooring installation is more labor-intensive and will be reflected in a higher installation price.

    How Plank Thickness And Quality Play A Role

    When you’re shopping for laminate, you’ll notice planks come in different thicknesses, typically ranging from 6mm to 12mm. While a thicker plank costs more upfront, it often provides better durability and a more solid feel underfoot. A high-quality, thicker laminate flooring is ideal for high-traffic areas like hallways and living rooms and can sometimes be more forgiving over minor subfloor imperfections.

    Beyond thickness, features like water-resistance or fully waterproof construction also add to the material cost. Investing in a waterproof laminate for a kitchen, entryway, or bathroom is a smart move that protects your investment long-term. While these premium features primarily affect the material price, they underscore the importance of choosing the right product for the right room to avoid costly repairs later.

    Intricate Patterns And Complex Layouts

    A standard, straight-plank layout is the most efficient and cost-effective way to install laminate flooring. If you’re dreaming of a more decorative look, like a herringbone or diagonal pattern, be prepared for the labor cost to increase. These designs require significantly more cutting, precision, and planning from the installer, which adds hours to the job. The more complex the layout, the more waste material is generated, which can also add to your total cost.

    Similarly, rooms with unusual shapes, multiple angles, closets, or architectural features like kitchen islands will require more detailed work. Each cut and corner takes time to get just right. An installer has to account for this extra effort, so detailed patterns and complex rooms will naturally result in a higher labor quote than a simple, square room.

    What Else Should You Budget For Beyond Labor?

    When you’re planning your new laminate floors, it’s easy to focus on the two biggest numbers: the cost of the flooring itself and the labor to install it. But a truly professional installation involves more than just laying down planks. To avoid last-minute surprises and ensure your final bill matches your expectations, it’s important to account for a few other essential materials and services.

    These additional costs are what separate a rushed, incomplete job from a durable, beautifully finished floor that lasts for years. From the protective layer underneath to the finishing touches that tie the room together, each component plays a critical role. Factoring these items into your initial budget from the start means you’ll have a much clearer picture of the total investment. A trustworthy installer will always walk you through these line items in your quote, so you know exactly what you’re paying for.

    Underlayment And Moisture Barriers

    Think of underlayment as the secret hero of your laminate flooring. This thin layer of foam or felt is rolled out over the subfloor before the planks are installed, providing cushion, reducing noise, and acting as a moisture barrier to protect your floors from damage. Some laminate products come with an underlayment already attached, which can be a great time-saver. If yours doesn’t, you’ll need to budget for underlayment separately. The cost typically runs from $0.50 to $3.50 per square foot, but it’s a non-negotiable step for ensuring your floor feels great underfoot and stands the test of time.

    Trim, Moldings, And Transition Pieces

    Trim and moldings are the finishing touches that give your new floor a polished, professional look. These pieces cover the expansion gaps left along the walls (a must for floating floors like laminate) and create a seamless look. You’ll need baseboards or quarter-round molding along the perimeter of the room. You should also plan for transition pieces, which are used in doorways to smoothly connect your laminate to other flooring types, like tile or carpet. Forgetting to factor in these materials is a common oversight, but they are essential for a clean, finished appearance.

    Disposal Of Your Old Flooring

    Before the new floors can go in, the old ones have to come out. Whether you’re pulling up old carpet, tile, or vinyl, there’s a cost associated with both the labor for removal and the proper disposal of the materials. Many professional installation quotes will include this service, but it’s always a good idea to confirm. If it’s not included, you’ll need to add it to your budget. The cost for removing and disposing of old flooring can range from around $0.70 to $1.60 per square foot, depending on the material being removed.

    Permits And Inspections

    For most standard flooring replacement projects, you won’t need to worry about pulling permits. However, if your installation is part of a larger remodel that involves altering or removing walls, you may need approval from your local municipality. It’s always wise to check local regulations to be sure. Additionally, in older homes, there’s a small chance that old flooring or adhesives could contain hazardous materials like asbestos. Testing and abatement for these materials would be a separate and necessary expense not typically covered in a standard installation estimate.

    What Unexpected Issues Can Drive Up Costs?

    Even with a perfect plan, home renovation projects can sometimes hit a snag. When it comes to flooring installation, most surprises are hiding right under your feet. The good news is that an experienced professional can spot most potential issues during an in-home estimate, preventing them from becoming budget-breaking problems later on.

    The most common variables that can affect your final cost are the condition of your subfloor, the complexity of the layout (like stairs), and the urgency of your timeline. While these factors can add to the price, addressing them correctly is the difference between a floor that looks good for a year and one that lasts for decades. A thorough quote should account for these possibilities, giving you a clear and realistic picture of the total investment from the start. This transparency is key to a stress-free project, ensuring you know exactly what to expect before the work begins.

    Fixing Subfloor Damage Or Moisture

    Your new laminate flooring needs a solid foundation to perform its best. That foundation is the subfloor—the structural layer beneath your flooring. Before any new planks can be installed, it’s crucial that the subfloor is clean, dry, and level. If we pull up your old carpet or tile and find cracks, soft spots from old leaks, or significant unevenness, those issues have to be addressed first. Fixing damage adds labor and material costs for things like leveling compounds or replacing sections of plywood, but skipping this step can lead to bouncy floors, separating planks, and long-term problems.

    Installing Laminate On Stairs

    Taking laminate flooring up a staircase creates a beautiful, continuous look, but it’s a much more detailed and time-consuming task than installing it in a square room. Each step and riser must be measured and cut precisely, and special trim pieces called “stair nosing” are required to create a safe, finished edge. This intricate work requires more skill and time from the installation team, which naturally increases the labor cost. While it’s an added expense, having a professional handle your stairs ensures the final result is not only durable and seamless but also safe for your family to use every day.

    Tight Timelines And Rush Projects

    We understand that sometimes you need new floors now—whether you’re moving into a new home or preparing to sell. While our name is Next Day Flooring, and we pride ourselves on efficient turnarounds, true emergency projects can sometimes come with a premium. If a project requires our crew to work overtime or reschedule other committed jobs to meet an exceptionally tight deadline, a rush fee may apply. This covers the additional coordination and labor costs needed to prioritize your installation without compromising quality. We always aim to be upfront about scheduling, so discussing your timeline during the initial estimate will ensure there are no surprises.

    How To Get An Accurate Quote From A Pro

    Getting a clear, comprehensive quote is the most important step in planning your flooring project. A vague estimate can lead to surprise costs and unnecessary stress, while a detailed quote sets clear expectations for everyone involved. The goal isn’t just to find the cheapest price, but to find the best value and ensure a smooth, professional installation from start to finish. A trustworthy installer will be transparent about every line item, from materials to labor. They should be able to explain what factors are influencing the cost and what’s included in their service.

    To make sure you’re comparing apples to apples and hiring a true professional, you’ll need to do a little homework. This process protects your investment and helps you find a partner you can rely on. By focusing on a few key areas—insisting on an in-home estimate, checking the installer’s credentials, and asking the right questions—you can move forward with confidence and avoid the common pitfalls that trip up other homeowners. It’s about setting your project up for success from the very beginning and feeling certain that the team you hire will deliver beautiful, long-lasting results without any hidden surprises.

    Why You Need A Detailed, In-Home Estimate

    An accurate flooring quote is impossible to give over the phone. A true professional needs to see your space in person to provide a reliable price. During an in-home estimate, an installer can take precise measurements, assess the condition of your subfloor, and identify any potential challenges, like tricky layouts or uneven surfaces. This visit is your chance to discuss your vision and get expert recommendations tailored to your home.

    Always insist on a detailed, written quote that breaks down all the costs. This document should clearly list the price for labor, materials, underlayment, trim, and any additional services like furniture moving or old floor removal. Getting several written quotes allows you to compare offers effectively and spot any red flags.

    Check Credentials And Read Reviews

    Before you hire anyone, take a few minutes to verify their credentials. A reputable flooring installer should be licensed and insured. A license shows they meet state or local requirements, while insurance protects you and your home from liability in case of accidents or property damage. One of the biggest mistakes homeowners make is skipping this step, so don’t be afraid to ask for proof.

    You can also learn a lot from past customers. Look for online reviews on sites like Google or Yelp to get a sense of the company’s reputation for quality, communication, and reliability. While a perfect record is rare, you should see a consistent pattern of positive feedback. You can also check a contractor’s credentials with official state resources to confirm they are in good standing.

    Key Questions To Ask Your Flooring Installer

    Once you have a written estimate in hand, it’s time to clarify the details. Asking the right questions ensures there are no misunderstandings down the road. This conversation helps you understand exactly what you’re paying for and gauges the installer’s experience and professionalism.

    Here are a few essential questions to ask:

    • Does your quote include moving furniture and removing/disposing of the old flooring?
    • Is the cost of underlayment, trim, and transition pieces included?
    • How long have you been installing this specific type of flooring?
    • What is your process for handling unexpected subfloor damage?
    • Who will be performing the installation, and are they employees or subcontractors?
    • What does your warranty cover and for how long?

    Create Your Laminate Flooring Budget

    Setting a clear budget is the first step toward a stress-free flooring project. Knowing what to expect helps you make confident decisions about materials and installation, ensuring you get the beautiful, durable floors you want without any last-minute financial surprises. Let’s walk through how to build a realistic budget for your laminate flooring installation.

    Putting It All Together For A Realistic Total

    So, what’s the bottom line? Nationally, the total cost to install laminate flooring often lands between $3 and $13 per square foot, including both materials and labor. For a standard-sized project, this can translate to a total of around $3,000. The materials themselves typically run from $1 to $5 per square foot, with the rest covering professional installation. Your final number will depend on the quality of the laminate you choose, the complexity of your room’s layout, and the condition of your subfloor. A clear, itemized quote from your installer is the best way to see exactly where your money is going.

    Smart Ways To Save Without Sacrificing Quality

    You don’t have to choose the cheapest materials to stay on budget. One of the most effective ways to save is by handling some of the prep work yourself. If you’re comfortable with it, moving furniture out of the room and tearing out old carpeting or flooring can reduce labor costs. When it comes to the laminate itself, you can often find a great balance of price and durability in mid-range options. Keep an eye out for sales or consider simpler finishes, which can offer a timeless look for less. These small steps can make a big difference without compromising the quality of the final installation.

    Why Professional Installation Is A Smart Investment

    While it might be tempting to save on labor costs, professional installation is an investment in your home’s value and your own peace of mind. Installers typically charge between $2 and $3 per square foot, but that price covers far more than just laying down planks. You’re paying for expertise in subfloor preparation, precise cuts, and seamless transitions between rooms. A pro can spot and fix underlying issues that could cause problems later, ensuring your floor not only looks great but also lasts for years. This expertise helps you avoid common DIY mistakes that can lead to costly repairs down the road.

    Related Articles

    Frequently Asked Questions

    What’s a realistic all-in price for a typical laminate flooring project? For a straightforward project here in the Dallas-Fort Worth area, you can generally expect the total cost—including mid-range materials and professional labor—to fall between $5 and $10 per square foot. So, for a 500-square-foot living room, you might budget around $2,500 to $5,000. This range covers the essentials, but the final number depends on the specific laminate you choose and the unique conditions of your home.

    Why do I need an in-home estimate? Can’t I just get a price over the phone? A phone quote is really just a guess. An accurate price depends on factors that can only be seen in person, like the condition of your subfloor, the exact layout of your rooms, and any tricky corners or transitions. An in-home estimate allows a professional to take precise measurements and spot potential issues ahead of time, which means the quote you receive will be reliable and free of last-minute surprises.

    What is the most common “surprise” cost I should be prepared for? The biggest unknown in any flooring project is the condition of the subfloor. Once the old flooring is removed, we might find issues like uneven concrete, moisture damage, or soft spots in the plywood. These problems must be fixed before the new laminate can be installed to ensure it lasts. While addressing subfloor damage adds to the cost, it’s a crucial step for a durable, long-lasting result.

    Are there any simple ways to lower the cost without sacrificing quality? Yes, the easiest way to reduce your labor costs is to handle some of the prep work yourself. If you’re able, moving all the furniture out of the rooms and tearing out old carpeting can save the installation crew time, which in turn saves you money. This allows you to allocate more of your budget toward high-quality laminate and professional installation, which are the two things that impact the final look and longevity the most.

    Is paying for professional installation really worth it compared to doing it myself? Absolutely. When you hire a professional, you’re paying for more than just someone laying planks. You’re investing in expertise. A pro knows how to properly prepare the subfloor, make precise cuts around doorways and cabinets, and ensure the finished floor has the necessary expansion gaps. This prevents common DIY mistakes like buckling or gapping, protecting your investment and giving you a beautiful floor that performs correctly for years.
  • Flooring Calculator Square Feet: Measure Like A Pro

    Flooring Calculator Square Feet: Measure Like A Pro

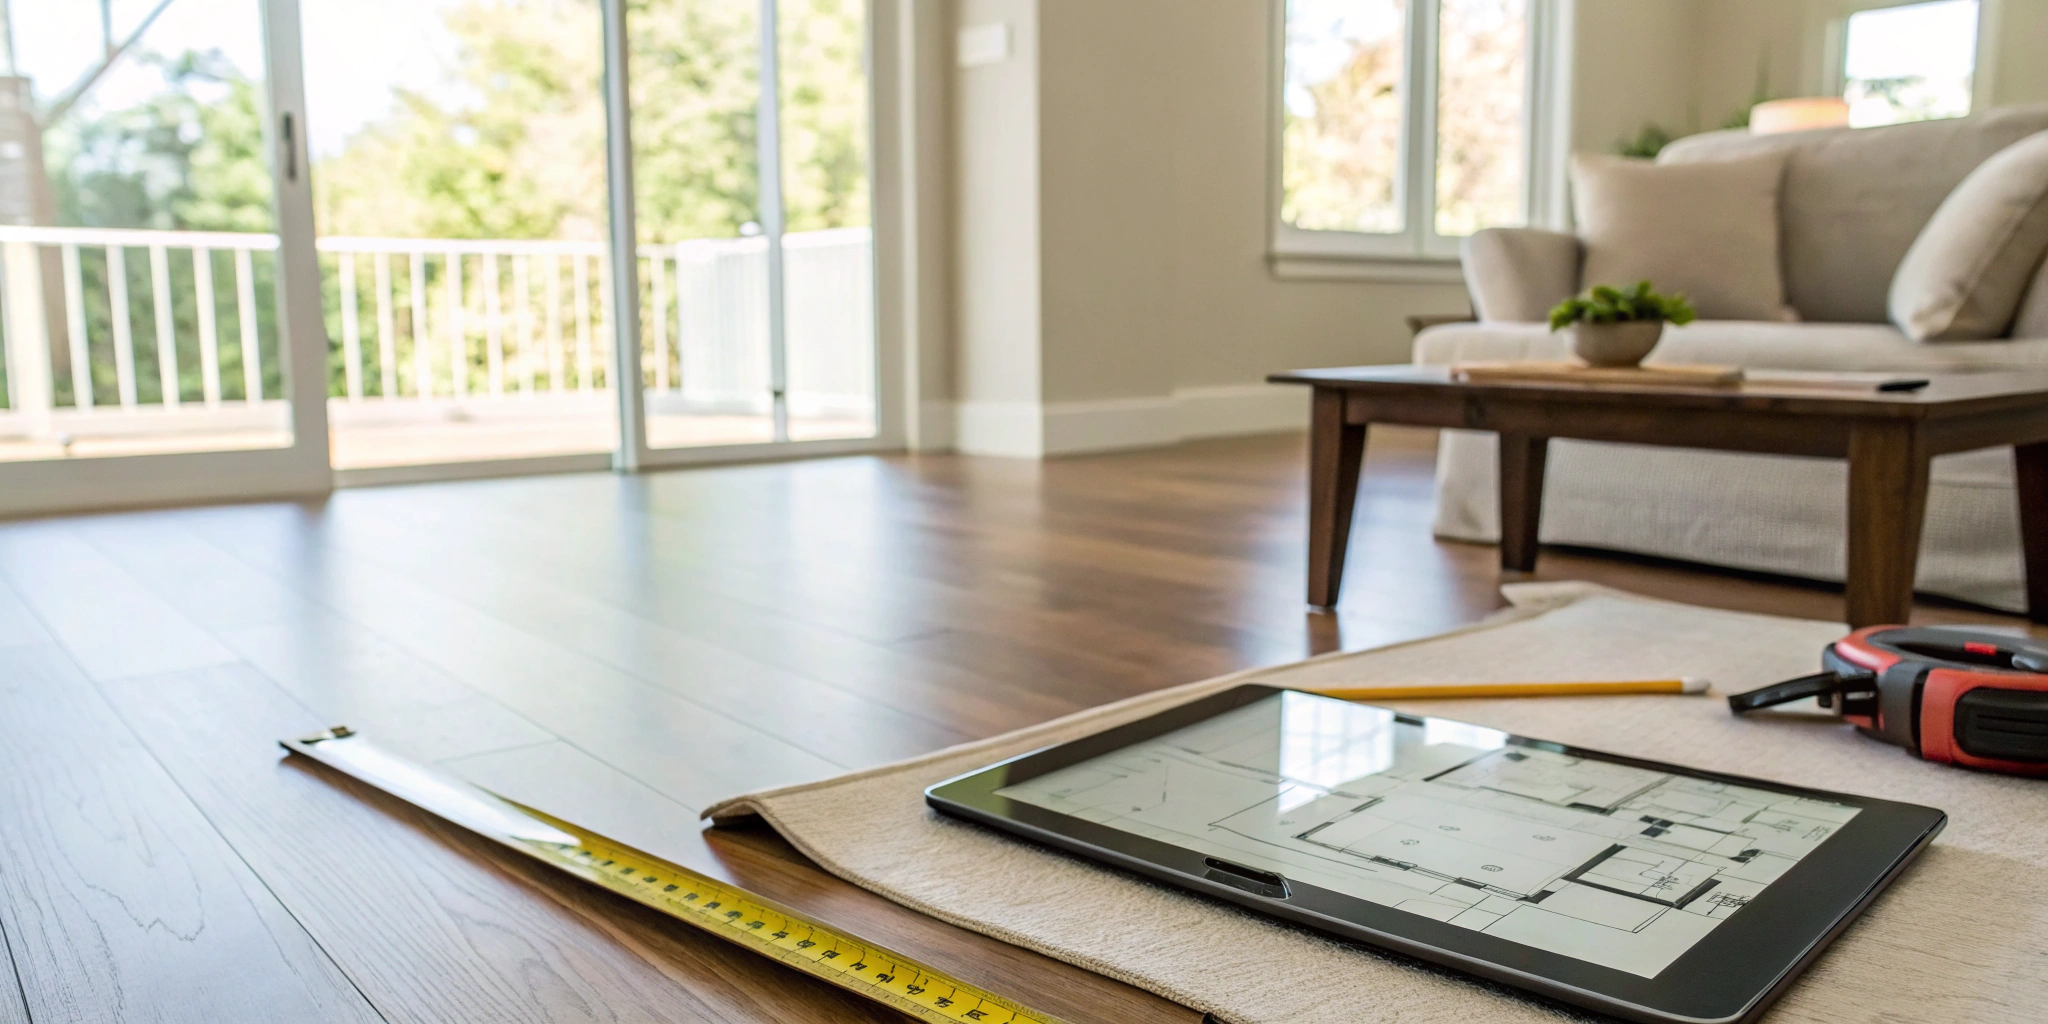
    Measuring a simple, square bedroom is one thing, but what about your open-concept living area that flows into the kitchen, or the hallway with that awkward nook? Modern floor plans can make getting an accurate measurement feel like a complicated geometry problem. This is precisely why a good flooring calculator square feet tool is so helpful. It allows you to break down complex spaces into simple, manageable rectangles, calculating the area for each one before adding them all together for a grand total. This divide-and-conquer approach removes the intimidation factor and ensures every corner is accounted for, giving you a precise number to work with as you begin planning your project.

    Key Takeaways

    • Measure by Section for Total Accuracy: Calculate a room’s square footage by multiplying its length and width. For complex layouts, divide the space into smaller rectangles, measure each one, and add the totals together—making sure to include closets and alcoves.
    • Always Plan for Material Waste: Order 10-15% more flooring than your total measurement requires. This essential buffer accounts for cuts, installation patterns, and minor mistakes, preventing a material shortage from delaying your project.
    • Purchase by the Carton, Not the Foot: Flooring is sold in full boxes. Once you have your final square footage (including the waste factor), divide that number by the square feet listed on the carton and round up to determine how many boxes you need to buy.

    What Is A Flooring Calculator?

    Think of a flooring calculator as your first step toward a new floor. It’s a simple online tool that helps you estimate how much flooring material you’ll need for a room or your entire home. Before you even start looking at samples, a calculator gives you a solid idea of the total square footage required, which is the foundation for building an accurate budget.

    More than just a measurement tool, a good flooring calculator helps you plan for the realities of an installation. It accounts for things like material waste from cuts and tricky angles, ensuring you don’t run out of flooring mid-project. Using one is a smart, proactive way to start your project with confidence and have a more informed conversation when you’re ready to get a professional estimate. It takes the guesswork out of the equation and sets you up for a smooth, predictable process from the very beginning.

    How It Works And Why You Need One

    The basic idea behind a flooring calculator is simple. To find the square footage of a room, you just measure the length and width in feet and multiply those two numbers together. An online calculator does this math for you, but its real value comes from adding what’s known as a “waste factor.”

    A waste factor is extra material—usually 10% to 15%—added to your total square footage. This isn’t about being wasteful; it’s about being prepared. During installation, planks and tiles have to be cut to fit around walls, doorways, and corners. The waste factor ensures your installer has enough material to account for these cuts and any potential mistakes. Without it, you risk running out of flooring before the job is done, which can cause major delays and added costs.

    Different Types Of Calculators

    While most online tools are straightforward square footage calculators, you’ll find a few different types out there. Some are designed for specific materials, like carpet or tile, and will recommend a waste factor based on the product you choose. Others are more comprehensive, allowing you to input the price per square foot to get a rough estimate of the total material cost.

    You can also find advanced tools that help with more complex situations. For instance, some calculators are designed to estimate the square footage of properties with various common lot shapes, which is helpful for rooms that aren’t perfect squares or rectangles. These specialized calculators can break down an L-shaped room or a space with angled walls into simple, manageable sections, giving you a more accurate picture of your material needs.

    How To Measure Your Room For Flooring

    Getting an accurate measurement is the first step toward a flawless flooring installation. While it might seem intimidating, especially if you have an oddly shaped room, it’s a straightforward process once you know the basics. Taking the time to measure correctly helps you create a realistic budget and ensures you order the right amount of material, preventing last-minute shortages or overspending. Think of it as creating a simple map of your space. With a few tools and a clear plan, you can confidently calculate the square footage of any room in your home. This initial prep work is key to a smooth project from start to finish.

    The Tools You’ll Need

    You don’t need a professional toolkit to get an accurate measurement. Just gather a few household items before you begin. First and foremost, you’ll need a reliable tape measure—a 25-foot locking one is usually perfect for the job. You’ll also want a notepad and a pen or pencil to jot down your numbers. It’s helpful to sketch a quick, simple diagram of your room’s layout, labeling each wall with its measurement as you go. Finally, have your phone’s calculator or a small handheld one ready to do the math. That’s it! With these simple tools, you’re prepared to measure your space like a pro.

    Measuring A Standard Room: A Step-by-Step Guide

    For square or rectangular rooms, the process is simple. Start by extending your tape measure along one wall to find the room’s length. Write that number down. Next, measure the adjacent wall to find the width. To get the basic square footage, you just need to multiply its width by its length. For example, if your room is 12 feet long and 10 feet wide, your calculation is 12 ft x 10 ft = 120 square feet. Always measure from wall to wall, not from the baseboards, to get the most accurate dimension. It’s also a good idea to measure each dimension twice to catch any errors.

    Tackling Tricky Spaces And Odd-Shaped Rooms

    What if your room isn’t a perfect square? Don’t worry. The easiest way to handle an L-shaped room or a space with nooks and angles is to break it down into smaller, simpler shapes. Imagine your room as a collection of squares and rectangles. Measure the length and width of each individual section and calculate its square footage separately. Once you have the square footage for each smaller area, simply add them all together to get your room’s total. This divide-and-conquer method turns a complex space into a few easy calculations, ensuring no part of the room is missed.

    Don’t Forget Closets, Doorways, And Alcoves

    It’s easy to overlook the small spaces, but they add up. When you measure, be sure to include any closets, alcoves, or pantries that will receive the new flooring. Measure these areas just like you would a small room (length times width) and add their square footage to your main room’s total. For doorways, it’s a good practice to add a couple of inches to your measurement to ensure a seamless transition between rooms. Forgetting these spots is one of the most common reasons for running short on material, so a little extra attention here goes a long way.

    How To Calculate Your Square Footage

    Getting an accurate measurement is the first step to a successful flooring project, and it’s easier than you might think. Before you can even begin to compare material costs or schedule an installation, you need to know the size of your space. This crucial number, your total square footage, dictates how much flooring you’ll need to order. Nailing this calculation helps you avoid the headache of running out of material halfway through the job or the frustration of spending money on boxes of flooring you don’t need. Whether you’re working with a simple square bedroom or a more complex, open-concept living area, we’ll walk through how to measure your space accurately so you can plan your project with confidence.

    The Simple Formula For Square Footage

    For any standard rectangular or square room, the formula is straightforward: Length × Width = Square Footage. Grab a tape measure and, for the most accurate reading, measure from one wall to the opposite wall. Do this for both the length and the width of the room. Multiplying those two numbers gives you the room’s total area. For example, if your room measures 12 feet long and 10 feet wide, your calculation is 12 × 10 = 120 square feet. This basic formula is the foundation for all your flooring measurements, so it’s always a good idea to measure twice to confirm your numbers before you write them down.

    Calculating For Multiple Rooms

    If you’re planning to install new flooring in several rooms, the process is just an extension of the simple formula. You’ll need to calculate the square footage for each room individually. Keep your notes organized by listing each space and its dimensions (e.g., Master Bedroom: 14 ft x 15 ft = 210 sq ft). Once you have the total for every room, simply add them all together to get your project’s grand total. To streamline this and double-check your math, you can use an online flooring calculator. These tools are incredibly helpful because they let you enter the dimensions for each room separately and do the final addition for you.

    Breaking Down Complex Rooms Into Simple Shapes

    Of course, not all rooms are perfect squares. If you have an L-shaped living room, a kitchen with a center island, or a hallway with a nook, don’t try to measure the entire space at once. The best approach is to break the complex shape down into smaller, individual rectangles. Sketch a quick map of your room on a piece of paper and draw lines to divide it into simple sections. Measure the length and width of each section, calculate its square footage, and then add all the totals together. This method ensures every inch is accounted for. Finally, it’s standard practice to add 10% to 15% to your final number to cover cuts, mistakes, and pattern matching.

    Why You Must Factor In Waste

    You’ve measured your room perfectly, so you just order that exact amount of flooring, right? Not so fast. Forgetting to account for material waste is a common mistake that can cause major headaches. Every project generates some unusable material, and this “waste factor” is your insurance policy against delays and mismatched products. Here’s what you need to know to get it right.

    Where Does Material Waste Come From?

    Waste isn’t just about mistakes; it’s a natural part of the installation process. The main source is cutting. Every time a plank meets a wall or doorway, it has to be cut, and the leftover piece is often too small to reuse. Rooms with complex shapes, like L-shaped layouts or multiple closets, require more cuts and create more waste. You also have to account for the rare plank with a minor factory defect. Having extra material on hand turns these potential problems into non-issues, keeping your project on track.

    How Much Extra Flooring To Order By Type

    As a general rule, plan on ordering 5% to 15% more flooring than your room’s measured square footage. The exact amount depends on your material. For uniform products like luxury vinyl plank (LVP) or laminate in a simple layout, an extra 5% to 10% is a safe bet. For natural materials like hardwood, lean closer to 10% to account for removing planks with color variations you don’t like. A good flooring calculator can help with these estimates, but a professional evaluation is always best. It’s also smart to keep a few extra planks for future repairs.

    How Installation Patterns Affect Your Total

    The way your flooring is laid out has a big impact on how much material you’ll need. A standard, straight-lay pattern is the most efficient, but decorative designs require more cuts and create more waste. If you’re planning a diagonal or herringbone pattern, you’ll need to increase your waste factor to at least 15%. With these layouts, nearly every plank that meets a wall is cut at an angle, creating small, unusable offcuts. While the final look is stunning, it’s important to plan for the extra material needed to achieve it.

    Common Measurement Mistakes To Avoid

    Measuring for new flooring feels straightforward, but a few common slip-ups can turn an exciting project into a frustrating ordeal. Ordering too little material can bring your installation to a halt, while ordering too much leaves you with a dent in your budget and stacks of unused flooring. The goal is to get it just right, and that means being aware of the little details that are easy to overlook.

    From simple math errors to forgetting about the hall closet, these mistakes are more common than you’d think. The good news is that they’re also completely avoidable. By taking your time, double-checking your work, and planning for the unexpected, you can ensure your measurements are accurate and your project runs smoothly from start to finish. Let’s walk through the four most frequent measurement mistakes so you can sidestep them like a pro.

    Inaccurate Measurements And Math Errors

    The oldest rule in the book—measure twice, cut once—absolutely applies to flooring. The most frequent issue we see stems from simple inaccurate measurements or a misplaced decimal point in the final calculation. Rushing through this step can leave you a few crucial boxes short. Always use a reliable tape measure and write down the length and width of each room as you go. Before you place your order, take a moment to double-check your multiplication. It’s a simple step that can save you from a major headache and a delayed installation.

    Forgetting To Include Smaller Spaces

    It’s easy to focus on the main living area or bedroom and completely forget about the nooks and crannies. But closets, pantries, entryways, and alcoves add up. Forgetting to measure these smaller spaces is a classic mistake that can leave you scrambling for an extra box of flooring at the last minute. Treat every space as part of the whole project. Measure each closet and alcove individually and add their square footage to your room’s total. This ensures you have a complete and accurate number before you start shopping.

    Underestimating Your Waste Factor

    No flooring installation is perfect. Planks need to be cut to fit around corners, vents, and doorways, and occasionally a piece might get damaged. This is where the waste factor comes in. It’s the extra material you order to account for cuts, mistakes, and unusable pieces. A common mistake is not ordering enough extra. A good rule of thumb is to add 10% to your total square footage for waste. For complex layouts or diagonal patterns, you might even need 15%. Factoring in a healthy waste factor provides a necessary buffer and prevents a mid-project panic.

    Not Planning For Doorway Transitions

    Flooring is sold in full cartons, so you can’t just buy a few extra planks if you run short. This is especially important when planning for areas like doorways, where you’ll be transitioning from one room to another. A common oversight is not accounting for this and ending up just shy of what you need to finish the job cleanly. Always round your order up to the next full carton. This ensures you have enough material to complete every part of the room, including creating seamless doorway transitions, without having to place a second order.

    What To Look For In A Good Flooring Calculator

    A quick search for “flooring calculator” will give you dozens of options, but they aren’t all built the same. A great calculator does more than just multiply length by width; it acts as a mini-project planner, helping you budget, account for waste, and get a realistic idea of what you’ll need. While an online tool can never replace a professional in-home estimate—where an expert can spot subfloor issues or tricky transitions—using the right one makes your initial planning much smoother. It helps you compare material costs and walk into conversations with flooring experts feeling confident and prepared.

    Think of it as your first step toward making an informed decision for your home. A reliable calculator gives you a solid baseline, so you can explore different types of flooring, from luxury vinyl to engineered hardwood, with a clearer understanding of the potential investment. It removes a lot of the initial guesswork and empowers you to ask the right questions. Here’s what separates a basic calculator from a truly helpful one that will actually simplify your project.

    Cost Estimation Features

    Beyond just giving you a total square footage, a top-notch calculator helps you see the financial side of your project. Look for a tool that lets you enter the price per square foot for your chosen material. This feature instantly translates your room’s dimensions into a ballpark material cost, which is incredibly useful for budgeting. It allows you to quickly compare the costs of different flooring options—like laminate versus engineered hardwood—without having to do all the math yourself. This is about getting a clear financial picture from the start.

    Options For Multiple Rooms

    Most flooring projects don’t stop at a single room. You might be redoing the entire first floor or updating all the bedrooms at once. A good calculator should let you add and calculate multiple spaces simultaneously. Instead of measuring and calculating each room separately and then adding them up by hand, you can input the dimensions for your living room, hallway, and dining room all in one place. This feature provides a comprehensive total square footage for the entire project, saving you time and reducing the chance of manual math errors. It’s a simple function that makes planning for larger projects much more manageable.

    Material-Specific Waste Percentages

    Every flooring installation requires more material than the exact square footage of the room—this is known as the “waste factor.” This extra amount covers cuts, mistakes, and gives you a few spare planks for future repairs. A smart calculator will prompt you to include this. The general rule is to add 10–15% for waste, but the ideal amount can depend on the material and the complexity of the room’s layout. Look for a calculator that either suggests a standard waste percentage or allows you to input your own. This ensures your material estimate is realistic and helps you avoid a last-minute trip to buy more flooring.

    A Simple, User-Friendly Interface

    The best tools are the ones that are easy to use. You shouldn’t need a manual to figure out a flooring calculator. A great one will have a clean, intuitive interface with clearly labeled fields for length and width. It should be obvious where to enter your numbers and how to add another room or input a cost. The results should be displayed clearly, breaking down the total square footage, waste, and estimated cost. The goal is to get the information you need quickly and without any confusion, so you can move on with planning the more exciting parts of your project, like choosing the perfect finish.

    How To Ensure Your Flooring Estimate Is Accurate

    Getting your flooring estimate right from the start is the key to a smooth, stress-free project. An accurate calculation prevents you from overspending on materials you don’t need or, even worse, running out of flooring mid-installation. While online calculators are a great starting point, a few extra steps can help you confirm your numbers and ensure your budget stays on track. Think of it as the “measure twice, cut once” rule for your entire project. Taking the time to verify your math and plan for the realities of installation will save you from frustrating delays and unexpected costs down the road, giving you confidence as you move forward.

    Always Double-Check Your Math

    The foundation of any good flooring estimate is accurate room measurements. Before you do anything else, grab your tape measure and walk through the space again. To calculate the square footage for a simple room, measure the length and width, then multiply those two numbers together. For example, a room that is 10 feet wide and 12 feet long is 120 square feet. It sounds simple, but it’s easy to transpose numbers or make a small math error. Jot down your measurements for each room and double-check your multiplication. This quick review can catch a simple mistake before it turns into a costly ordering error.

    When To Call A Flooring Professional

    If your room has bay windows, L-shaped hallways, or other unique architectural features, measuring can get complicated. The best approach for these spaces is to break it down into smaller, simpler shapes, like rectangles and squares. Measure each section individually and then add their square footage together for a total. However, if you’re feeling unsure or simply don’t have the time, this is the perfect moment to call a professional. An experienced installer can account for tricky angles and complex layouts, ensuring your material order is precise. At Next Day Flooring, our free in-home estimates are designed to handle exactly this, giving you an accurate number you can trust without the guesswork.

    Plan For How Materials Are Packaged

    Flooring isn’t sold by the individual square foot; it comes in boxes or cartons. This is a critical detail that many homeowners overlook. Once you have your total square footage (including the waste factor), you’ll need to figure out how many boxes to buy. Check the product details to see how many square feet are in each carton, then divide your total square footage by that number. For example, if you need 500 square feet of flooring and each box covers 25 square feet, you’ll need 20 boxes. Always round up to the next full carton to ensure you have enough material to finish the job. This simple step helps you determine how many cartons to purchase and prevents a last-minute trip to the store.

    Frequently Asked Questions

    Why is a professional in-home estimate still necessary if I use an online calculator? An online calculator is an excellent tool for creating an initial budget and understanding the scope of your project. However, a professional can see things a calculator can’t, like the condition of your subfloor, tricky transitions between rooms, or complex angles that require more precise cuts. An in-person evaluation turns a good estimate into an exact one, ensuring there are no surprises on installation day.

    Is it better to have too much flooring or too little? It is always better to have a little extra flooring. Running out of material mid-project can cause significant delays, especially if the product needs to be reordered. Having a few extra planks left over is also incredibly valuable for any future repairs. It’s much easier to match a repair with a plank from the original batch than to find the exact same product years down the road.

    Does the type of flooring I choose affect how much I need to order? Yes, it can. While your room’s square footage doesn’t change, the amount of extra material you need—the waste factor—often does. A simple, straight installation of luxury vinyl plank might only require 10% extra. But if you choose a natural hardwood where you might discard pieces with certain grain patterns, or if you want a complex herringbone design, you should plan for at least 15% extra to account for the additional cuts.

    What’s the most common mistake homeowners make when measuring themselves? The most frequent slip-up is forgetting the small spaces. It’s easy to measure the main area of a room and completely overlook the closets, pantries, or entry nooks. These areas add up, and not including them is a primary reason people end up short on material. Always measure every single space that will get new flooring and add it to your total for an accurate count.

    How do I handle measuring a room that isn’t a simple square? The best way to approach an oddly shaped room is to break it down into smaller, manageable rectangles. Sketch the room’s layout on a piece of paper and draw lines to divide the space into simple sections. Then, measure the length and width of each individual section, calculate its square footage, and add all the totals together. This method turns a complicated space into a few simple math problems.

  • Cost Of Laminate Flooring: A Complete Breakdown

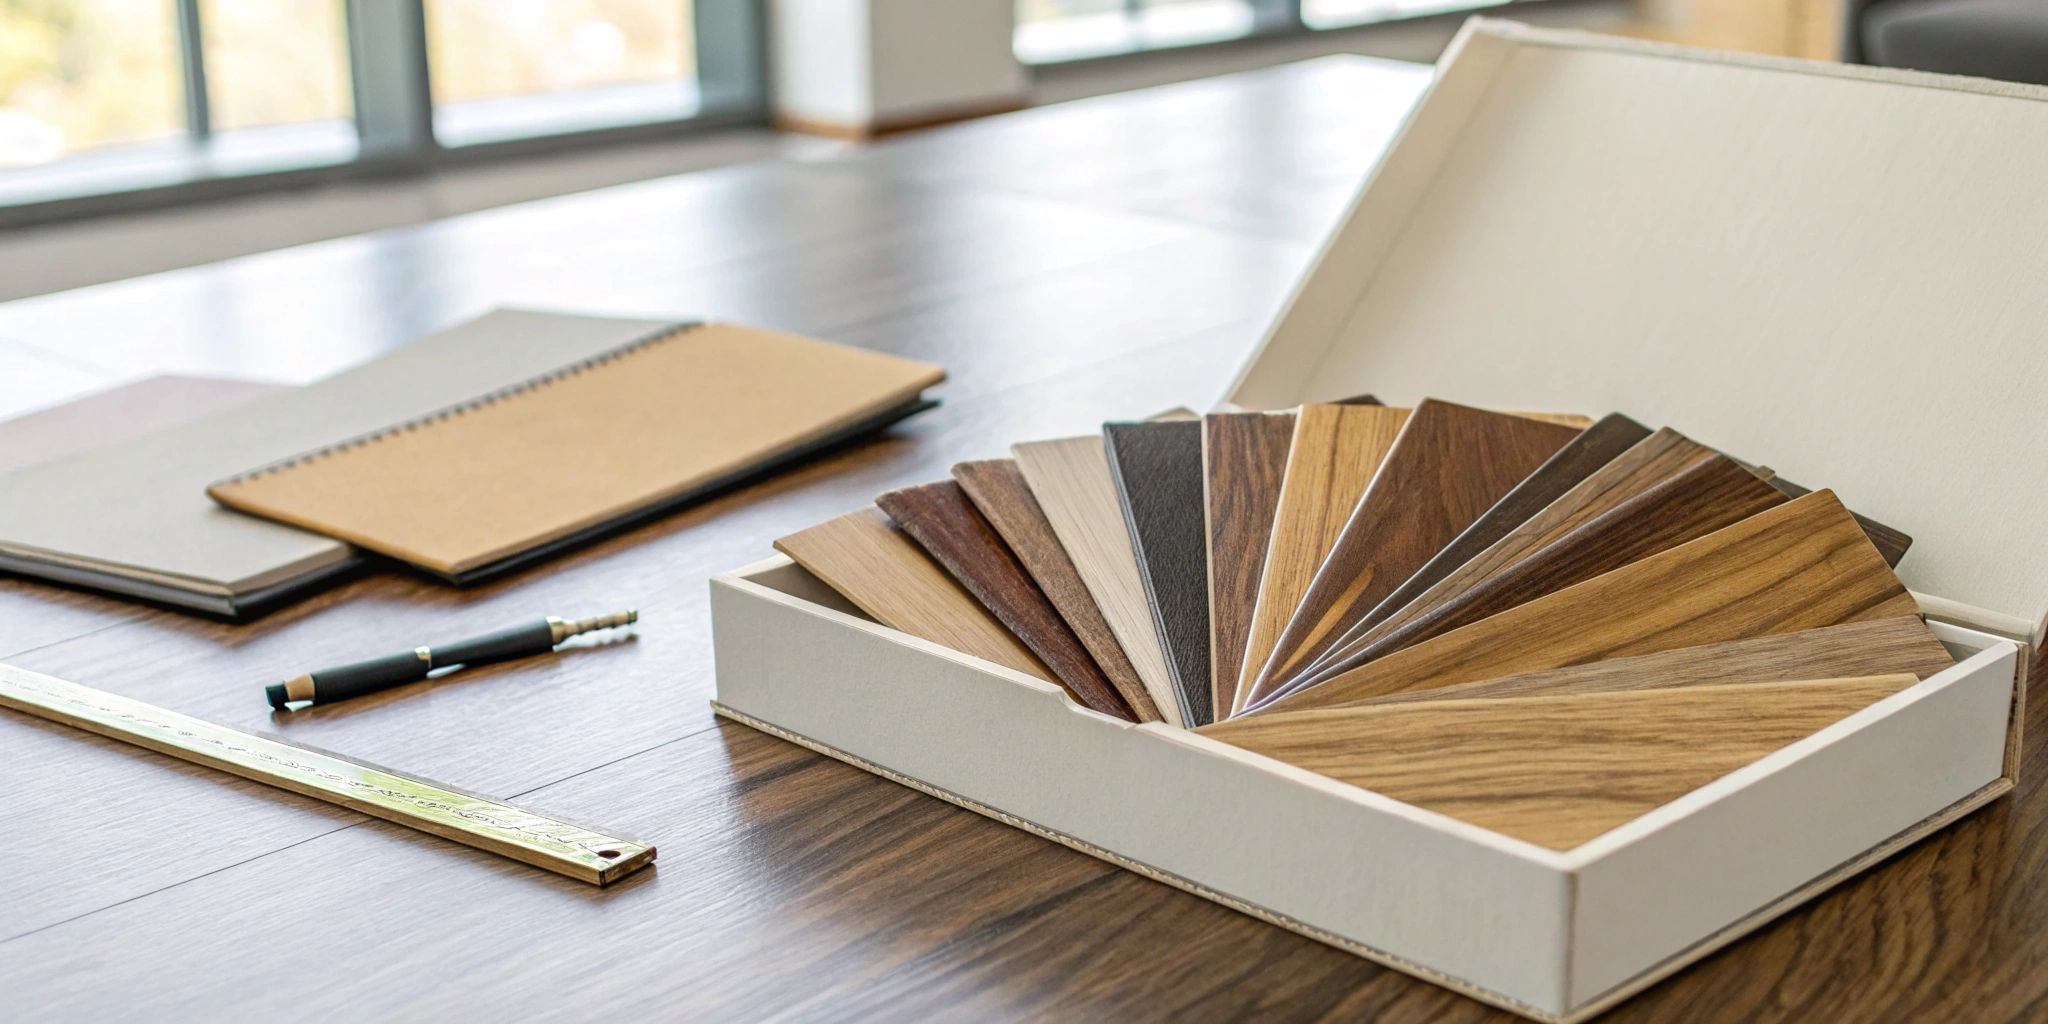
    Cost Of Laminate Flooring: A Complete Breakdown

    Walking into a flooring store can feel overwhelming. You’ll see dozens of laminate options with prices ranging from surprisingly cheap to more than you expected. What’s the real difference between a $3-per-square-foot plank and a $5 one? Is it just about the brand name, or are you paying for features that actually matter? Understanding these details is the key to choosing the right floor for your home and lifestyle. We’ll demystify the cost of laminate flooring by explaining exactly what drives the price, from durability ratings to advanced waterproofing, so you can feel confident you’re making an informed and practical decision.

    Key Takeaways

    • Create a Complete Budget: The price per square foot is just the start. A realistic budget also includes professional labor, subfloor prep, tear-out of old floors, and essential finishing materials like underlayment and trim.
    • Match the Quality to the Room: The price of laminate reflects its durability. Invest in thicker, water-resistant planks with a higher wear rating for high-traffic areas to get the best long-term value, and save on budget-friendly options for quieter spaces.
    • Invest in a Professional Installation: While DIY seems like a way to save money, mistakes can cost you more in the long run. A professional installer handles everything from subfloor prep to the final trim, guaranteeing a durable, beautiful result and giving you valuable peace of mind.

    How Much Does Laminate Flooring Cost Per Square Foot?

    When you start shopping for laminate flooring, one of the first things you’ll notice is its affordability. It’s a fantastic way to get the look of hardwood without the high price tag. For the material alone, you can generally expect the cost of laminate flooring to start around $3 per square foot. Higher-end, more durable, or designer options can climb to $5 or more per square foot.

    To put that into perspective, let’s say you’re re-flooring a 1,000-square-foot area in your home. Just for the planks themselves, your budget would likely fall somewhere between $1,000 and $4,000. This is a pretty wide range, and that’s because not all laminate is created equal. The final price depends heavily on the quality, thickness, brand, and style you choose. Think of this as the starting point. From here, we can dig into the details that influence where your project will land on that spectrum.

    Breaking Down Material Costs By Quality

    The thickness of a laminate plank is one of the biggest factors in its price and performance. Thinner laminate, around 6mm, is the most budget-friendly option, often costing between $0.70 to $1.00 per square foot. It’s best suited for low-traffic spaces, like a guest bedroom or closet, as it can feel less substantial underfoot. On the other hand, thicker 12mm laminate provides a more solid, quiet feel that’s perfect for busy living rooms and hallways. This premium quality comes at a higher price, typically $2.30 to $6.00 per square foot, but its durability makes it a worthwhile investment for the main areas of your home.

    How Brand Names Impact The Price

    Just like with any other product, the brand name on the box can influence the price of your laminate flooring. Different manufacturers specialize in certain styles and technologies, which affects the cost. For example, a basic, smooth-finish laminate will be less expensive than a plank with an ‘Embossed in Register’ texture that perfectly mimics the grain of real wood. These more advanced designs and realistic visuals require a more intricate manufacturing process, and that detail is reflected in the price. When you choose a premium brand, you’re often paying for better design, durability, and a more authentic look and feel.

    What To Expect In Dallas-Fort Worth

    Here in the Dallas-Fort Worth area, you’ll find that laminate flooring prices are right in line with the national averages. The DFW market has a wide variety of options available to fit different budgets and styles, so you won’t have trouble finding something you love. While material costs can vary, the average cost to install laminate floors nationally falls between $1 to $4 per square foot. This gives you a good baseline for what to expect for professional labor in our area. Homeowners here tend to look for durable, attractive flooring that can handle family life, and the local selection definitely reflects that need for quality.

    What Factors Drive Up Laminate Flooring Prices?

    When you start shopping for laminate, you’ll quickly notice that prices can vary quite a bit. It’s not just about the brand name on the box; several key factors determine the cost and, more importantly, the quality and longevity of your new floors. Understanding these differences helps you choose a floor that not only fits your budget but also stands up to the demands of your household. From its core thickness to its ability to handle spills, every detail plays a role in the final price tag. We’ll break down the four main elements that influence cost so you can make a confident and informed decision for your home.

    Thickness And Durability Ratings

    One of the most significant factors in laminate pricing is the thickness of the planks, measured in millimeters (mm). Thinner options, around 6mm to 8mm, are more budget-friendly but are best suited for low-traffic areas like guest bedrooms. Thicker planks, typically 10mm to 12mm, cost more but provide a more solid feel underfoot, better sound insulation, and increased durability for busy spaces like hallways and living rooms.

    Beyond thickness, you’ll want to look at the floor’s AC (Abrasion Class) rating. This rating, from AC1 to AC5, indicates how well the floor resists wear and tear. An AC1 or AC2 floor is fine for light residential use, while an AC3 or AC4 rating is ideal for homes with kids, pets, and heavy foot traffic. A higher AC rating means a tougher floor, which naturally comes at a higher price.

    Water-Resistant Vs. Waterproof Features

    The terms “water-resistant” and “waterproof” are often used interchangeably, but they mean very different things for laminate flooring. Most standard laminate is water-resistant, which means its surface can handle minor spills as long as they’re wiped up quickly. This is usually sufficient for living rooms and bedrooms.

    However, for areas prone to moisture like kitchens, entryways, or bathrooms, you’ll want to invest in a fully waterproof product. Waterproof laminate is engineered with a specialized core and tight-locking joints that prevent water from seeping through to the subfloor. This advanced technology adds to the cost but provides essential protection against moisture damage, making it a worthwhile investment for certain rooms.

    The Role Of Style And Design

    Laminate flooring has come a long way from the flat, artificial-looking designs of the past. Today’s advanced printing and texturing technologies can create incredibly realistic wood and stone visuals, but these premium aesthetics come at a price. Basic, smooth-surface laminates are the most affordable.

    Costs start to climb as you add more sophisticated design features. For example, embossed-in-register (EIR) texturing aligns the surface texture with the printed wood grain image, creating an authentic look and feel. Other features like beveled edges, which define each plank, or wider and longer plank formats also contribute to a higher price point. While these details are purely cosmetic, they make a huge difference in achieving a high-end look.

    How Brand And Warranty Affect Your Budget

    As with most products, brand reputation plays a role in the cost of laminate flooring. Well-known manufacturers often invest heavily in research and development to create more durable, realistic, and innovative products. While you might pay more for a recognized brand, you’re also paying for quality control and consistency.

    The warranty is another key indicator of quality. A budget-friendly floor might come with a 10- or 15-year warranty, while premium products often offer 25-year, 30-year, or even limited lifetime residential warranties. A longer and more comprehensive warranty reflects the manufacturer’s confidence in the floor’s ability to perform over time. Investing in a product with a solid warranty provides peace of mind and protects your investment for years to come.

    How Does Laminate Pricing Compare To Other Floors?

    Choosing a new floor often comes down to balancing your budget with the look you want. Laminate is a popular middle-ground, but it’s helpful to see exactly how its price stacks up against other common flooring types like hardwood and luxury vinyl. The upfront cost is just one piece of the puzzle; the long-term value, durability, and maintenance needs also play a big role in determining the best fit for your home and lifestyle. Understanding these differences will help you make a confident decision that you’ll be happy with for years to come.

    Laminate Vs. Hardwood: A Cost Comparison

    The most significant difference between laminate and hardwood is the price tag. Solid hardwood is a premium material, and its cost reflects that. Including professional installation, you can expect hardwood floors to run anywhere from $10 to over $20 per square foot. In contrast, laminate offers a similar look for a fraction of the cost, making it an excellent alternative if you love the appearance of wood but have a tighter budget. Generally, if you want to keep your total project cost under $10 per square foot, laminate is one of the best wood-look flooring options available.

    Laminate Vs. Vinyl: Which Costs More?

    This comparison is a bit closer. Both laminate and luxury vinyl plank (LVP) are known for their durability and realistic wood visuals. Material costs for entry-level laminate can be slightly lower than LVP, but high-quality, water-resistant laminate is often priced similarly to mid-range vinyl. When you factor in professional installation, both flooring types typically fall within a similar range of $5 to $15 per square foot. The final price really depends on the product’s thickness, wear layer, and special features like waterproofing. The best way to compare is to get an estimate with the specific products you’re considering for your home.

    Factoring In Long-Term Value And Upkeep

    Beyond the initial purchase, think about how your floor will fit into your life. Laminate is famously easy to clean and maintain, making it a practical choice for busy households. With proper care, a quality laminate floor can easily last 15 to 20 years. Hardwood, on the other hand, requires more specialized care but offers incredible longevity. Its biggest advantage is the ability to be sanded and refinished multiple times, which means it can last for generations. This refinishing process allows you to erase scratches or even change the stain color down the road, a feature laminate doesn’t offer.

    What Goes Into Total Installation Costs?

    When you’re budgeting for new laminate floors, it’s easy to focus on the price per square foot for the planks themselves. But that’s only part of the story. The total cost of your project includes several other key services and materials that ensure your new floor looks great and lasts for years. Understanding these components helps you create a realistic budget and avoid any last-minute surprises.

    From the skilled labor required for a flawless finish to the essential prep work happening beneath the surface, each step plays a vital role. You’ll also need to account for removing your old flooring and adding a protective underlayment. A professional quote should break down these elements clearly, so you know exactly what you’re paying for. At Next Day Flooring, our free in-home estimates are designed to give you this complete picture, ensuring total transparency from the start.

    The Cost Of Professional Labor

    Hiring a professional installer is an investment in getting the job done right the first time. While it might be tempting to save on labor, a poor installation can lead to gapping, buckling, and premature wear, costing you more in the long run. Professional labor for laminate flooring installation typically runs between $2 to $3 per square foot. For a 1,000-square-foot space, that means you can expect to budget around $2,000 to $3,000 for the installation itself. This fee covers the expertise of a skilled team that can handle tricky cuts, ensure tight seams, and deliver a beautiful, durable result.

    Budgeting For Subfloor Prep And Repairs

    What’s underneath your new laminate floor is just as important as the floor itself. A clean, flat, and stable subfloor is non-negotiable for a successful installation. If your subfloor has dips, cracks, or moisture issues, they must be addressed first. The cost for subfloor preparation can range from $1.50 to $7.00 per square foot, depending on the extent of the work needed. Minor leveling might be on the lower end, while significant repairs or replacing damaged sections will cost more. During an in-home estimate, an expert can assess your subfloor’s condition and pinpoint exactly what needs to be done.

    The Price Of Tearing Out Old Floors

    Before the new laminate can go in, the old flooring has to come out. The cost for this service is usually billed hourly, often between $50 and $70 per hour. The total price will depend on what type of flooring is being removed and how it was installed. For example, pulling up old carpet and padding is generally quicker and less expensive than scraping up old, glued-down vinyl or breaking out ceramic tile. Factoring in removal and disposal ensures your project starts with a clean slate and stays on schedule.

    Underlayment And Moisture Barrier Essentials

    Don’t skip the underlayment. This thin layer of foam or felt is rolled out over the subfloor before the laminate planks are laid. It serves a few key purposes: it provides a bit of cushioning, helps absorb sound, and smooths over minor subfloor imperfections. Many underlayments also include a built-in moisture barrier, which is essential for protecting your laminate from moisture damage, especially over concrete subfloors. A roll of quality underlayment typically costs between $30 and $50, making it an affordable and critical component for the health and longevity of your new floors.

    What Hidden Costs Should You Plan For?

    When you’re budgeting for new laminate floors, it’s easy to focus on the price per square foot. But that number is just the starting point. Several other costs can pop up during the project, and if you aren’t prepared for them, they can throw your entire budget off track. These aren’t about hidden fees; they’re simply the necessary components of a high-quality, long-lasting installation.

    From the finishing pieces that create a seamless look to the labor involved in preparing your space, a lot goes into a flooring project beyond laying down the planks. Understanding these potential expenses ahead of time helps you create a realistic budget and ensures there are no surprises on the final invoice. This is where a detailed, in-home estimate becomes invaluable, as it accounts for the unique details of your home that a simple calculator can’t predict.

    Finishing Touches: Transitions And Molding

    The small details are what give your new floors a polished, professional look. Molding and transition strips are essential finishing pieces that often get overlooked in initial budgets. Transition strips create a smooth and safe connection between your new laminate and other flooring types, like the tile in your bathroom or the carpet in your bedrooms. You’ll also need quarter-round or shoe molding to cover the expansion gap between the flooring and your baseboards. While these items are not expensive on their own, the costs can add up, especially in a home with many doorways and complex layouts. A professional installer will measure for these pieces accurately to ensure a perfect fit and a clean finish.

    The Real Cost Of A DIY Project

    Tackling a flooring project yourself can seem like a great way to save on labor costs, but it’s important to consider the full picture. If you’re not an experienced installer, a DIY project can cost you something even more valuable: your time. A project that takes a professional team a day or two could take you several weekends. You’ll also need to rent or buy specialized tools like a tapping block, pull bar, and miter saw. More importantly, mistakes can be costly. An improperly prepared subfloor or an incorrectly cut plank can lead to bigger problems down the road. For busy homeowners, the peace of mind that comes with a professional installation is often worth far more than the potential savings of a DIY project.

    Delivery Fees And Material Acclimation

    Once you’ve selected your perfect laminate, you have to get it to your home. Depending on the supplier, you may need to factor in delivery fees, especially for large orders. But the most critical step is acclimation. Laminate flooring needs to sit in your home for at least 48–72 hours before installation. This allows the planks to adjust to your home’s specific temperature and humidity levels, preventing buckling or gapping after they’re installed. While this isn’t a direct monetary cost, it’s a crucial part of the timeline that needs to be planned for. A professional flooring partner manages these logistics for you, ensuring the material is delivered on time and properly acclimated before the installation work begins.

    Replacing Or Reinstalling Baseboards

    To properly install new laminate flooring, your existing baseboards usually need to be removed. In a perfect world, they come off cleanly and can be reinstalled once the new floor is in place. However, baseboards can sometimes be brittle, old, or damaged during removal, which means you’ll need to budget for new ones. Even if the baseboards are in good shape, they will likely need some touch-up paint after being reinstalled. This process adds to the overall labor and material costs. Similarly, the cost of tearing out your old flooring is a separate line item, typically ranging from $1 to $5 per square foot, depending on the material being removed.

    How Much Will Laminate Cost For Your Space?

    Now that we’ve covered the different factors that influence price, let’s put it all together. Seeing real numbers can help you create a realistic budget for your home, whether you’re updating a single bedroom or the entire first floor. Here’s a breakdown of what you can expect for different project sizes.

    Estimating Costs For A Single Room

    Let’s start with a single room. Imagine you’re redoing a home office or a guest bedroom. A standard 12×12 foot room, which is 144 square feet, is a great example. For a space this size, you can generally expect the laminate planks themselves to cost between $350 and $400. This figure gives you a solid baseline for budgeting smaller projects and helps you see how quickly a new floor can transform a room. Of course, the first step is always getting an accurate measurement to ensure you buy the right amount of flooring and account for any cuts or waste.

    Calculating The Price For Your Entire Home

    When you’re thinking bigger, like flooring your main living areas or the entire house, the numbers scale up. A full laminate flooring project can range anywhere from $2,000 to over $28,000. That’s a huge range, and for good reason. The final price tag depends entirely on your home’s total square footage and the specific laminate you choose—a basic, durable option will cost far less than a premium, waterproof one. This is why a personalized quote is so important for larger projects; it’s the only way to get a number that truly reflects your home and your home renovation budget.

    A Simple Square Foot Breakdown

    To get even more specific, it helps to think in terms of square feet. On the materials side, you can find basic laminate starting around $3 per square foot, while higher-end, feature-rich styles can climb past $5 per square foot. For a 1,000-square-foot area—think of a small one-story home’s living space—your material costs alone could land between $1,000 and $4,000. Professional installation costs also vary based on the complexity of the job, from the layout of your rooms to the condition of your subfloor. This is why getting a comprehensive in-home estimate is the best way to understand the full investment required to get the job done right.

    Are These Common Misconceptions Affecting Your Budget?

    When you’re planning your flooring budget, it’s easy to get tripped up by outdated advice. Believing these myths can lead you to miscalculate costs, choose the wrong product, or create more headaches down the road. Let’s clear up a few common misunderstandings about laminate flooring so you can invest your money wisely and confidently.

    Misconception: “DIY Is Always Cheaper”

    It’s true that installing a floor yourself means you don’t pay for labor, which can look like a big saving. But the DIY route has hidden costs. First, there’s the time commitment—a project that takes a professional a day could take you an entire weekend. You’ll also need specialized tools. More importantly, mistakes can be expensive. An uneven subfloor or a poorly cut plank can lead to gapping and buckling, and fixing these common installation errors often costs more than hiring a pro from the start. Your time and peace of mind have value, too.

    Misconception: “All Laminate Is The Same”

    Years ago, laminate had a reputation for looking artificial, but today’s products are in a completely different league. Modern laminate features high-definition imaging and embossed textures that convincingly mimic real wood. Beyond looks, there are significant differences in performance. You’ll find options with varying thickness, durability ratings, and water-resistance levels. While a cheaper laminate might seem like a deal, it won’t hold up in a busy entryway or kitchen. Investing in a quality product is a much better long-term value, ensuring your floors can handle daily life and look great for years.

    Misconception: “It’s Just A Short-Term Fix”

    Some people still think of laminate as a temporary solution, but this couldn’t be further from the truth. High-quality laminate is an incredibly durable and practical choice for a long-term home. It’s a smart option for busy households because it’s tough, easy to clean, comes in many styles, and costs less than some other flooring types. With proper installation and care, a good laminate floor can last for 15 to 25 years or more. It’s a lasting investment that provides both style and function, making it a fantastic choice for any homeowner looking for a beautiful, resilient floor.

    Where Can You Find The Best Value On Laminate Flooring?

    Finding the best value in laminate flooring isn’t just about chasing the lowest price per square foot. True value comes from getting a durable, beautiful floor that fits your lifestyle without hidden costs or future headaches. It’s a balance of quality materials, smart timing, and expert installation. When you know where to look and what to prioritize, you can make a confident investment that pays off for years.

    For many Dallas-Fort Worth homeowners, the process can feel overwhelming with so many options available. Should you wait for a holiday sale? Is it better to buy from a big-box store or a local specialist? And how much does the installer really matter? The right answers depend on your priorities, but a little strategy goes a long way. By focusing on a few key areas—when you buy, where you buy, and who you hire—you can ensure you’re getting the most for your money. Let’s break down how to find that sweet spot between cost and quality.

    Timing Your Purchase With Sales And Promotions

    Everyone loves a good deal, and flooring is no exception. Big-box retailers and flooring stores often run promotions around major holidays like Memorial Day, Labor Day, and Black Friday. Planning your project around these sales events can certainly cut down on material costs.

    A great way to maximize savings is to look for bundled offers. Many companies provide a discount when you purchase the flooring and schedule the installation together. This not only saves you money but also simplifies the entire process by keeping everything under one roof. Instead of coordinating with separate suppliers and installers, you get a single point of contact and a more streamlined timeline—a huge plus for any busy homeowner.

    Shopping Online Vs. Buying Locally

    Deciding where to buy your laminate flooring often comes down to a choice between endless online catalogs and the hands-on experience of a local store. Online retailers like Lumber Liquidators offer a massive selection, making it easy to browse different styles and brands from your couch. You can find high-quality, durable options and often at competitive prices.

    However, nothing beats seeing the product in person. Local showrooms allow you to get physical samples, which you can take home to see how they look in your home’s unique lighting. This step is critical for avoiding surprises and ensuring the color and texture are exactly what you envisioned. An in-home consultation combines the best of both worlds, bringing expert advice and curated samples directly to your space.

    How Working With A Pro Can Save You Money

    The temptation to install flooring yourself to save on labor costs is understandable. But while a DIY project can work for those with the right tools and experience, it often comes with hidden costs in time, stress, and potential mistakes. An improper installation can lead to gaps, buckling, and a voided product warranty, forcing you to pay for repairs or a full replacement down the road.

    Hiring a professional installer is an investment in getting the job done right the first time. A pro handles everything from subfloor preparation to the final trim, ensuring a flawless and durable result. When vetting contractors, always confirm they are insured, check their reviews, and ask for a clear breakdown of what’s included in their quote. A quality installation protects your flooring investment and gives you peace of mind.

    Frequently Asked Questions

    What is a realistic “all-in” price for laminate flooring, including installation? While the planks themselves might be advertised for a few dollars per square foot, a more realistic budget for the entire project—including materials, underlayment, and professional installation—is typically between $5 and $15 per square foot. This range accounts for everything from a durable, mid-range laminate to a premium waterproof option with all the finishing touches. The final number depends on the quality of the materials you choose and the specific needs of your space.

    Is it really worth paying more for thicker, waterproof laminate? Absolutely, especially in the right rooms. For high-traffic areas like your living room or entryway, a thicker plank (10mm or 12mm) provides better stability and durability against daily wear and tear. In spaces prone to spills, like kitchens or mudrooms, investing in a waterproof product isn’t just an upgrade—it’s peace of mind. It protects your subfloor from potential damage and ensures your investment lasts for years.

    How long does a typical laminate flooring installation take? The process is quicker than many people think. After your in-home estimate, the flooring material needs to acclimate in your home for about 48 to 72 hours to prevent future buckling. Once that’s done, a professional installation team can often complete the job in just one to two days, depending on the size and complexity of the area. This includes removing the old flooring, preparing the subfloor, and installing the new laminate.

    What’s the most common budgeting mistake homeowners make with new floors? The biggest oversight is forgetting about the costs beyond the flooring itself. Homeowners often focus on the price of the planks and don’t account for essential elements like subfloor preparation, underlayment, new baseboards, or the transition pieces needed for doorways. These aren’t optional add-ons; they are critical components of a professional, long-lasting installation that a comprehensive quote should always include.

    Why is a professional in-home estimate so important if I can measure myself? An in-home estimate is about much more than just measuring square footage. A professional can assess the condition of your subfloor, identify potential installation challenges, and help you choose a product that truly fits your home’s lighting and your family’s lifestyle. This expert evaluation ensures your final quote is accurate and complete, preventing the kind of surprise costs that can derail a project.